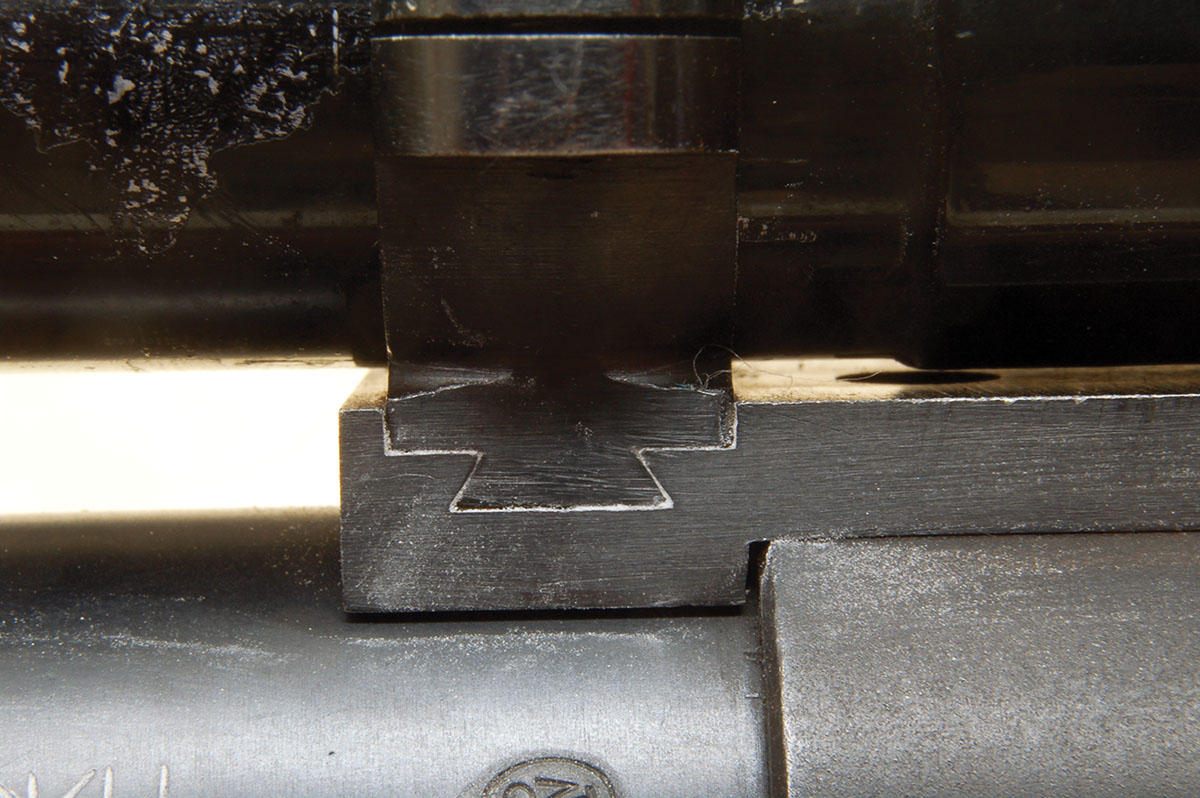
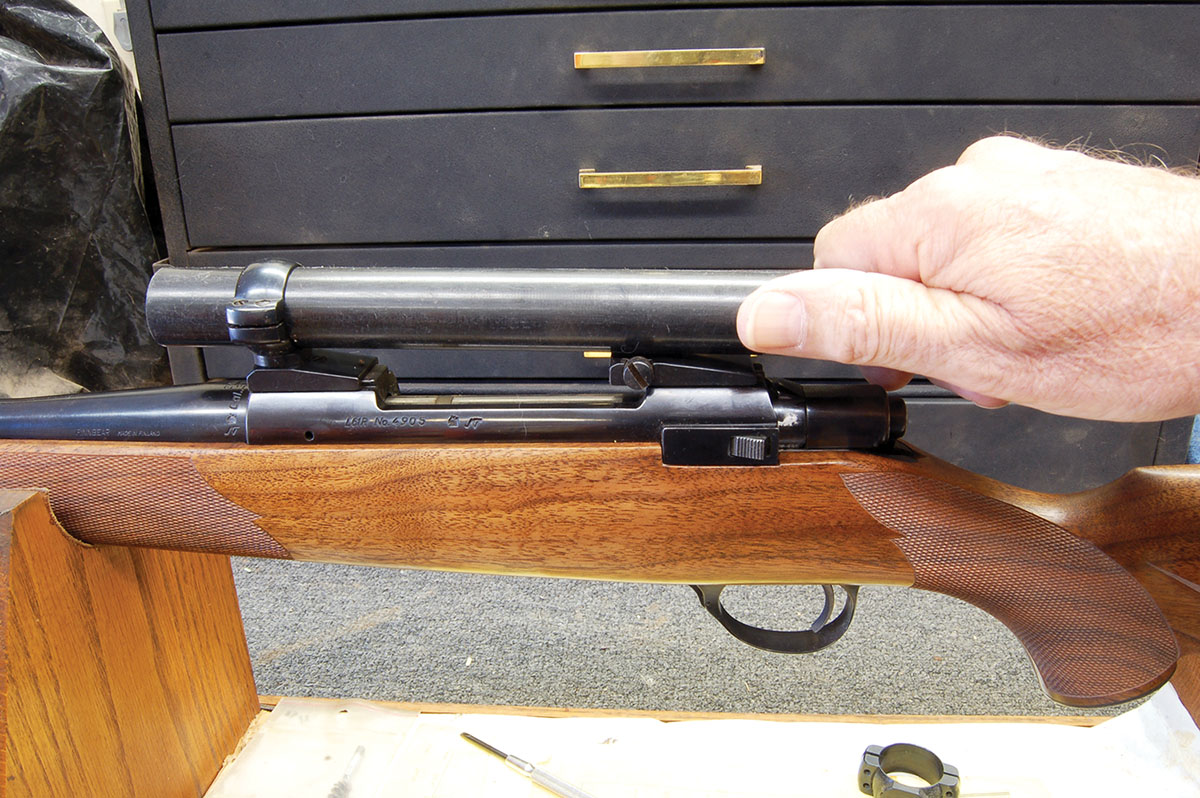
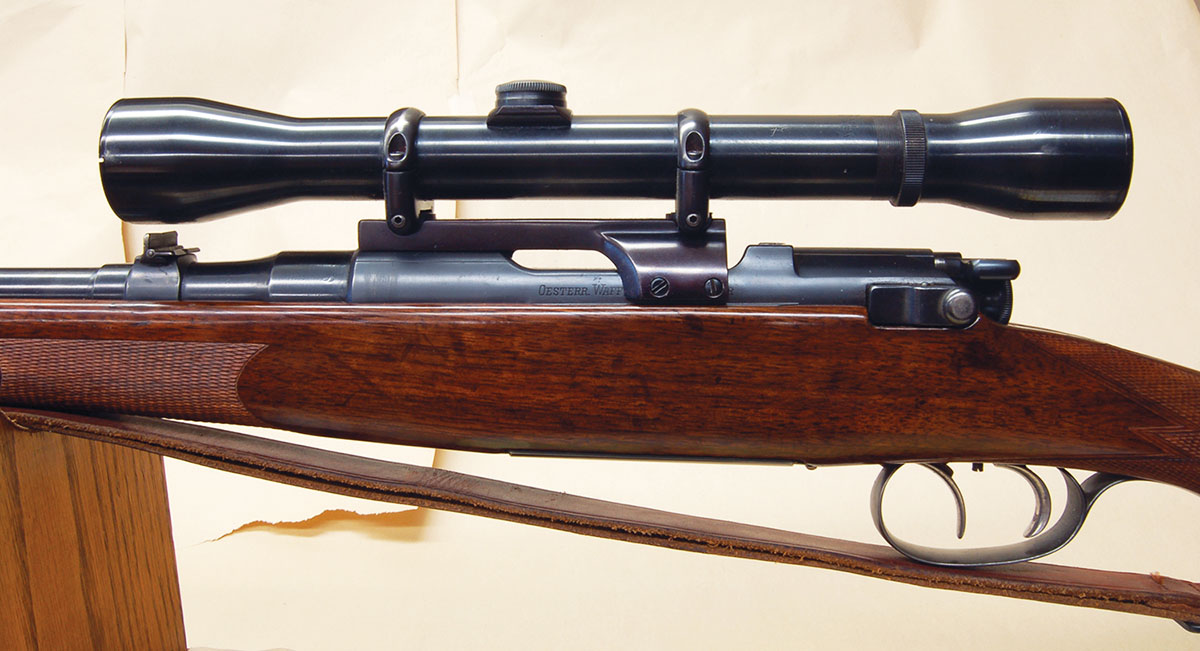
A custom-made mount on a pre-war Model 70. The rings are attached to the base by a dovetail. The scope is a Kollmorgen 26mm.
Last time, I made a couple of precision rods that allowed for determining if the two rings holding a scope sight were in alignment with each other. Such measurement is seldom made today and certainly not with the accuracy made possible using the alignment rods. Failure to detect and correct the problem will result in a dented scope tube at best, failure of the internal workings of the scope immediately, or sometime down the road at worst.
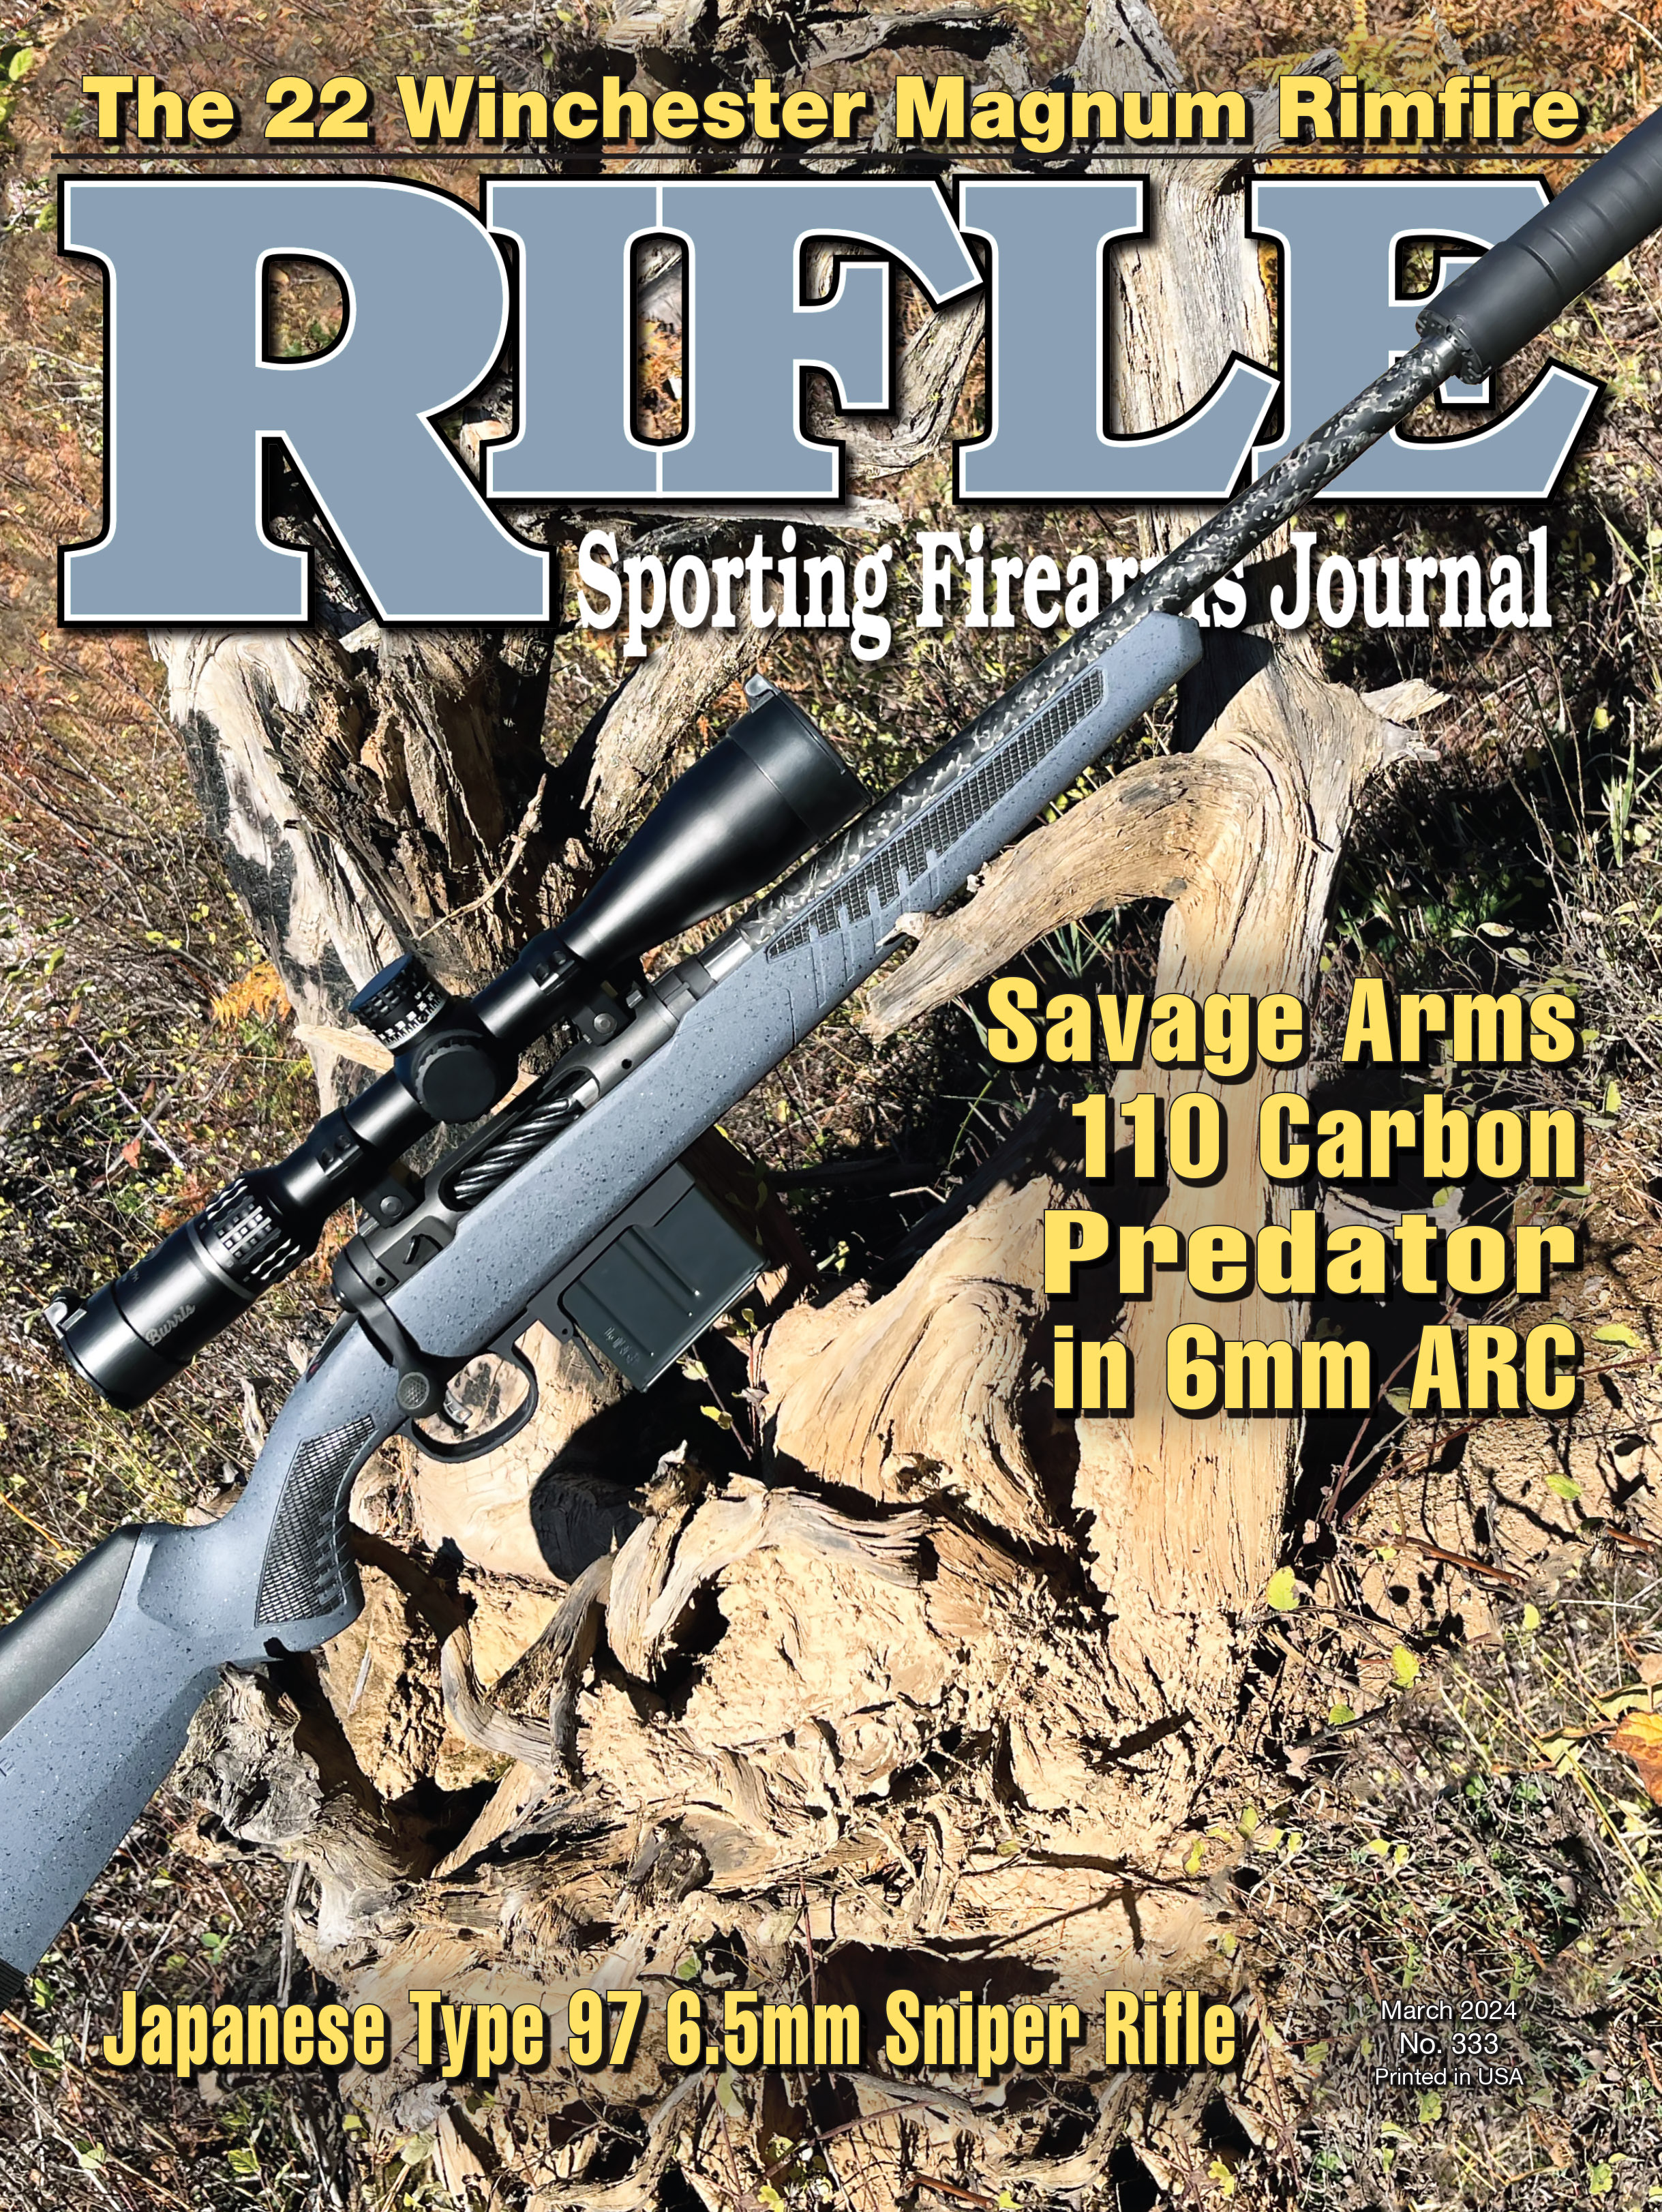
This custom mount also has a screw through the ring and base. Its purpose?
Unfortunately, I ran out of space before covering the attaching of scopes using Redfield/Leupold rotary-dovetail front rings and opposing screw-clamped rear rings. Here, the lug on the front ring often fits the base so tightly that it is a good idea to clamp the base between hardwood blocks in a bench vise, apply some wheel bearing grease to the lug and twist it in the base a few times to loosen the fit a little. Use a length of 1-inch diameter rod in the ring for this, not the scope!
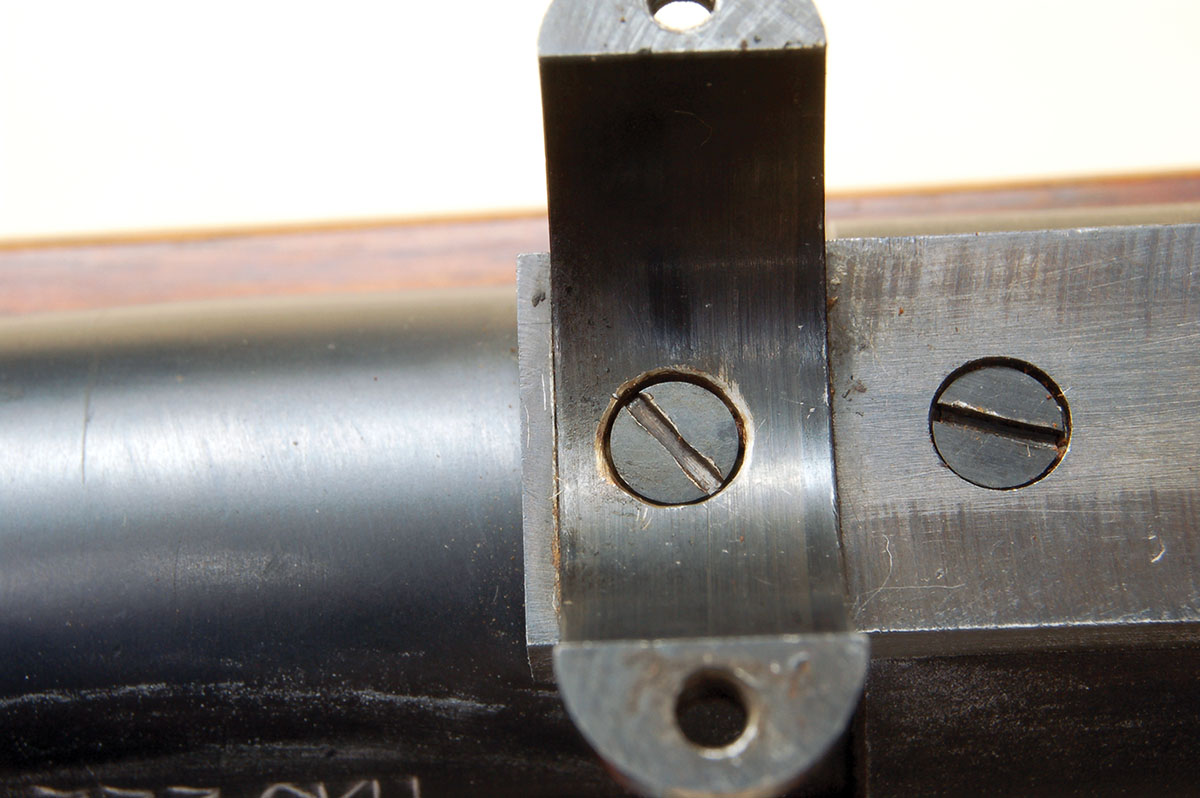
The rear of the custom front-mount base has full-contact overhang of the receiver ring to prevent forward movement from recoil.
The question now becomes how to position that front ring. Where is it pointing in relation to the bore? It must be turned until the scope points exactly down the bore line. To do this, first adjust the scope windage to the center of its total movement range, then clamp the scope in the front ring only. Check alignment by bore sighting or use of a collimator.
It is tempting to make any correction by turning the ring using the scope as a lever. Resist the urge. The tube will flex, possibly damaging internal components. It is much better to change out the scope for a length of 1-inch rod a few times than ruin an expensive scope.
To install the front rotary dovetail ring of a Redfield or a Leupold mount, clamp a 1-inch rod in the ring and twist it.
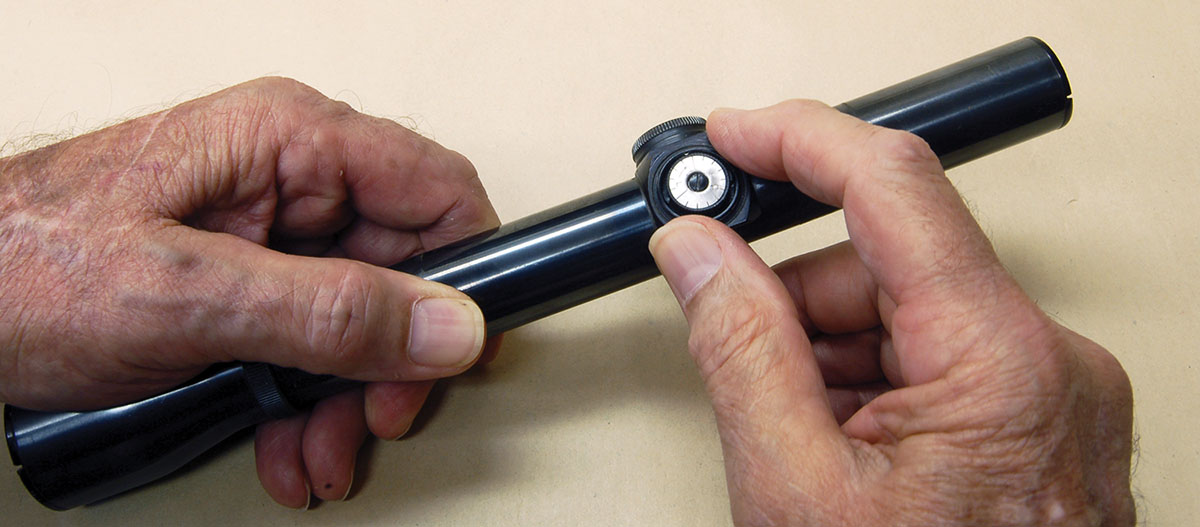
The windage adjustment of the scope to be mounted must be set to the center of its adjustment range.

Next, the scope is clamped in the front ring only and by either bore-sighting or by the use of a collimator, the vertical crosswire is aligned with the bore. Do not use the scope as a lever.
When the scope tube has been aligned with the bore, alignment rods are placed in both rings and windage screws are turned to bring them together.
With the front ring properly positioned, replace the scope with one of the alignment rods made in the last column. Place the rear ring on the base and clamp the second alignment rod in this ring. Check the matchup of the two rods. Turn the opposing base screws until the windage (side-to-side) surfaces are perfectly aligned. The top and bottom surfaces of the rod should also be very close unless the problems concerning receiver polishing or hole location that were mentioned in the last issue of Rifle are present. Some shimming, lapping or replacement of parts may be necessary.
After the windage adjustment, note that the front rod is lower than the rear. New rings will be required for this old Sako action.
One final observation. Once the rings are adjusted as above, set up the “windage” screws holding the rear ring. They will never be moved again. I know, I know, instructions with the mount suggest making the initial windage adjustments using these screws. Does anyone really think moving these a few thousandths of an inch will turn the front ring in its recess? In virtually every instance, all that will happen is bending the scope tube. The bullet impact will move, but at what cost to the scope’s internal parts? The alignment rods made the installation perfect. Why alter it? The scope’s own windage adjustment will do just fine.

A scope without internal adjustments is never a 1-inch tube.
Now, to a more irritating problem, that of metric scope tube diameters. These were quite common in the U.S. up to about 1950. But how can this be? Hasn’t 1 inch always been the standard tube diameter? In a word, “No!”
In the U.S., the earliest users of telescopic sights were long-range target shooters and buffalo hunters. These instruments were long, sometimes spanning the entire length of the barrel. In Europe, target and game ranges were much shorter. Iron sights were entirely adequate. This did not change until the bolt action was invented. Short, low-powered scopes that attached to the receiver of the bolt gun came into being in Germany. Hunters liked them. A few were exported with their rifles at the time, but the U.S. had no bolt guns of its own. The new scopes would not fit on our lever actions, so there was little interest.
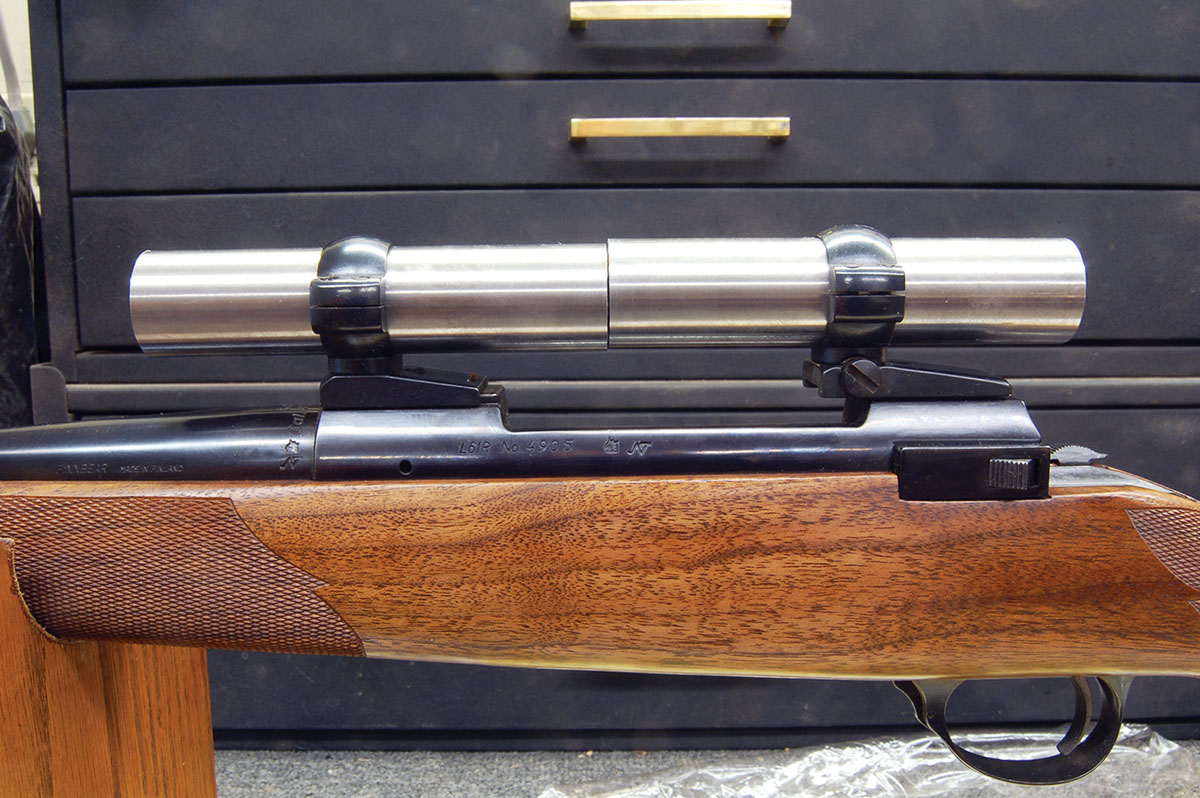
Leupold sold its Adjusto-Mount in 26mm for Mannlicher-Schoenauer in the 1950s. A shim inside the rings holds a 1-inch Weaver K4 replacement scope.
Most Americans were introduced to the bolt gun, and in some part, the telescopic sight, by involvement in World War I. A demand for bolt-action rifles firing rounds like the 30-06, 250-3000 Savage and 270 Winchester gradually developed. These were quickly followed by several European and American rounds, most all were suited only for bolt-action rifles designed by Mauser, Mannlicher, Winchester, and of course, rebarreled M98s and 1903 Springfields.
Some of these cartridges were no doubt used for the extra power they provided at iron-sight ranges. However, the common American response was “Wow, now I can shoot stuff farther away than ever!” This didn’t work out so well when using only open iron sights.
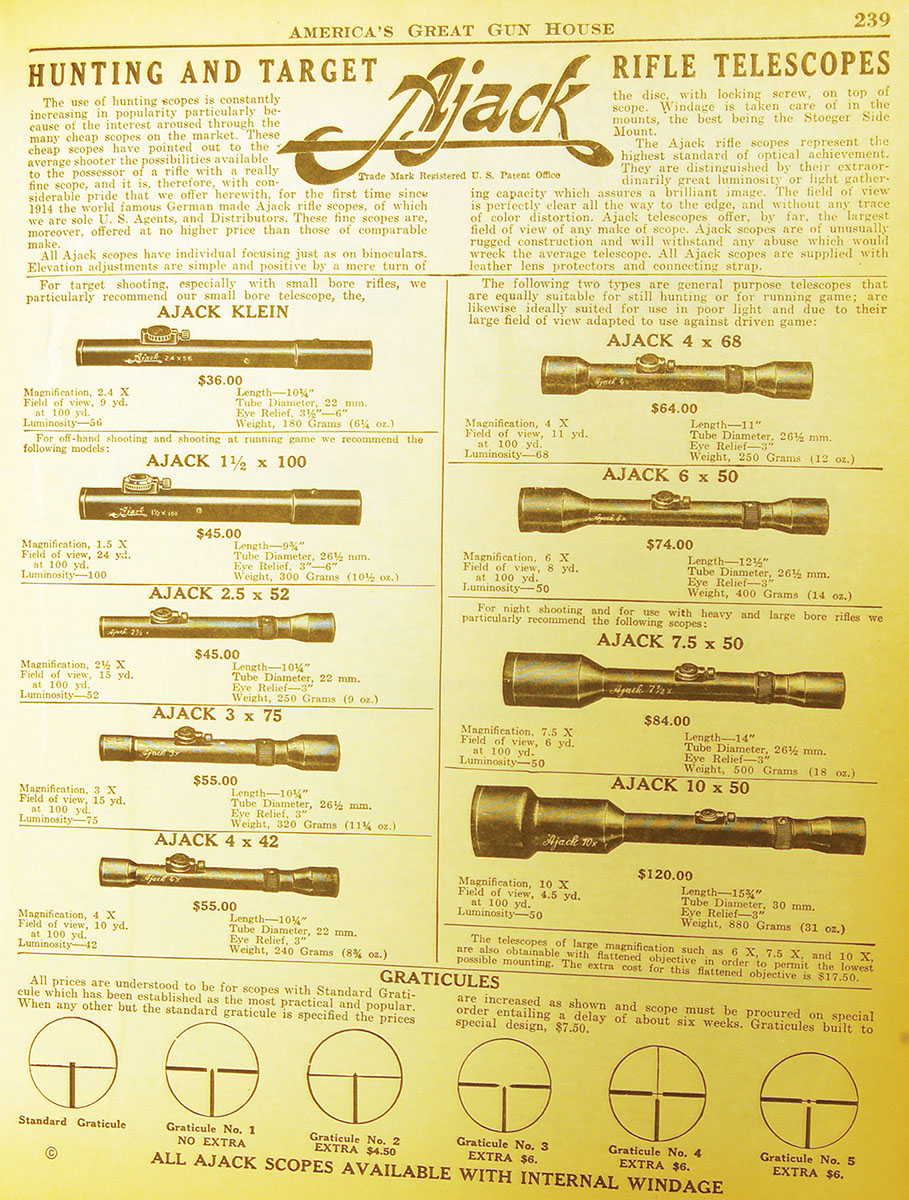
This is an Ajack scope ad from 1939. Note the tube diameters from 22-30mm.
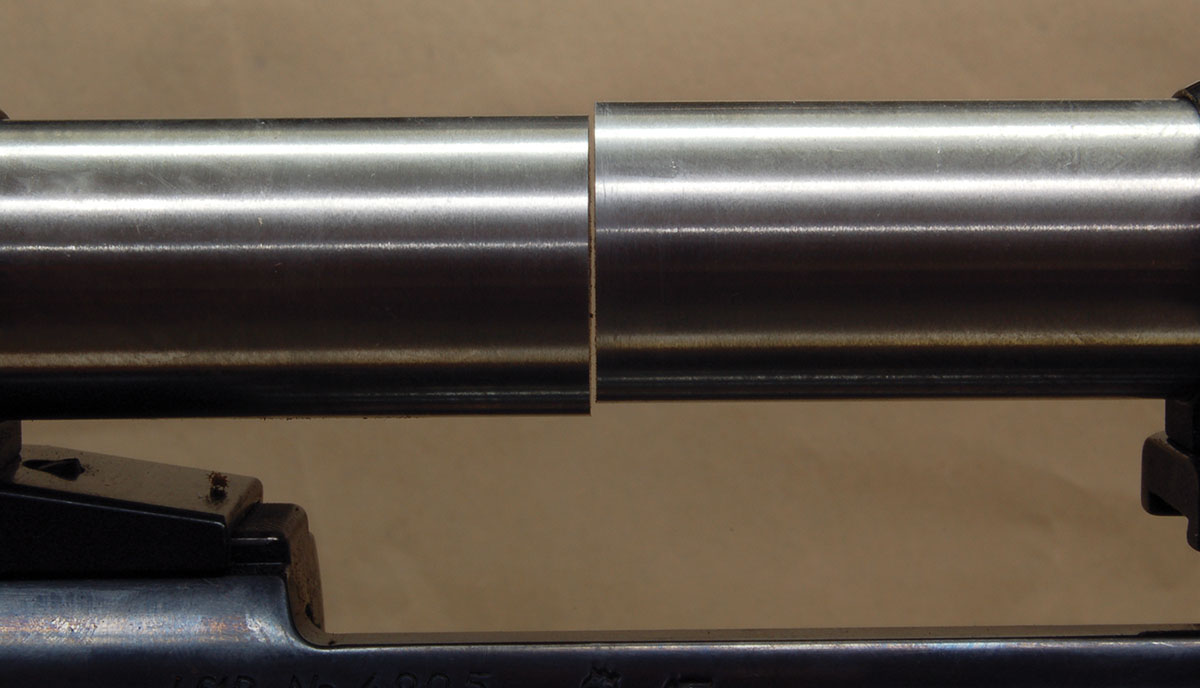
Our problem today is that all short hunting scopes available in the U.S. before World War II were either imported and had tubes of metric diameters, or the few made here used .750- and .875-inch tubes. Not a 1-inch tube in sight. Rifles carrying this glass have never been worth much on the used gun market, especially if they were military conversions or rebarrel/restock jobs. However, in the last three years, inflation and politics have pushed prices up to the point that many such rifles have come up for sale. The most common tube diameters seem to be 26mm (1.024 inches), 26.5mm (1.043 inches) and 27mm (1.063 inches). Many folks buy these rifles thinking the tubes are 1 inch and old scopes can be replaced by modern or at least newer ones. Then, they discover that when the rings are screwed down, they don’t touch the new tube.
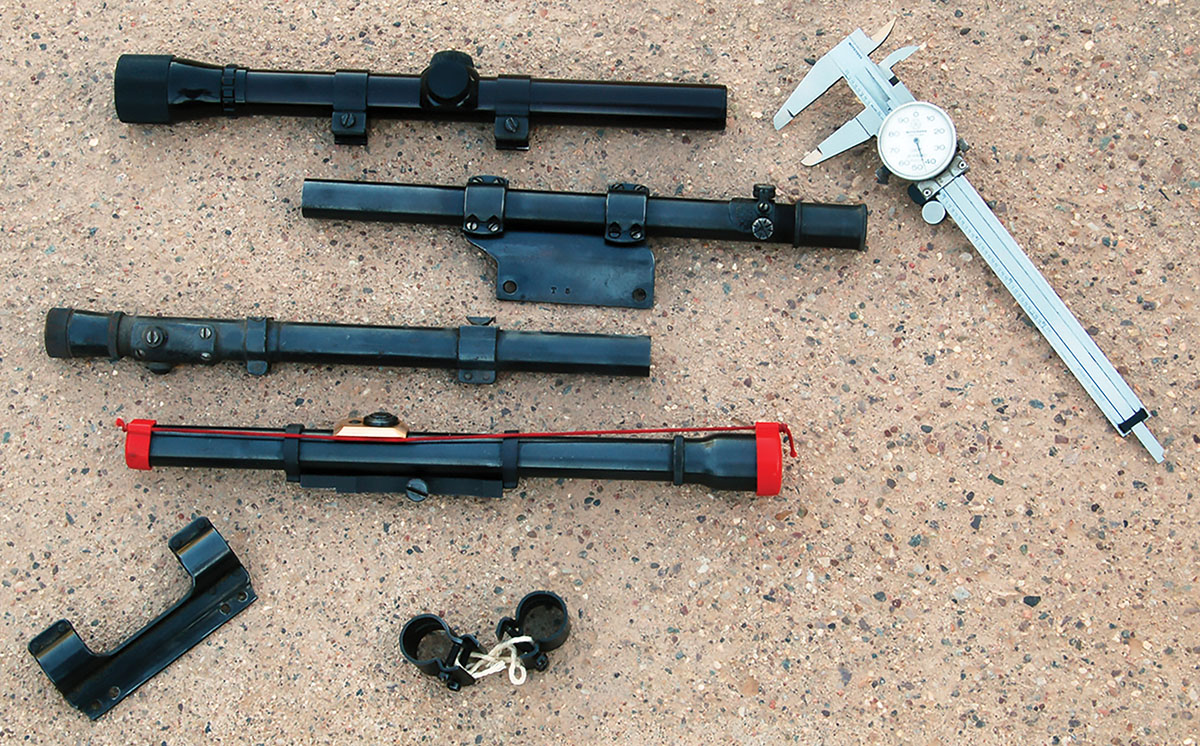
American scopes also had other than 1-inch tubes. These are .750 and .875 inch.
One solution is to have the old scope rebuilt by one of the outfits that advertise such work. The scopes I have seen come back quite clear and bright, though how well the old designs with their thick, heavy lenses stand up to recoil is unknown. It is quite possible to simply put a strip of shim stock of proper thickness around the body of a new 1-inch scope tube and use the old rings. This has been done more than once.
Old catalogs list metric scope tube diameters from 22mm (.866 inch) to 30mm (1.181 inches), thus mounts came with the scope. They were fit to the rifle receiver either at the factory or by a gunsmith. It was never an easy task because machine work was required.
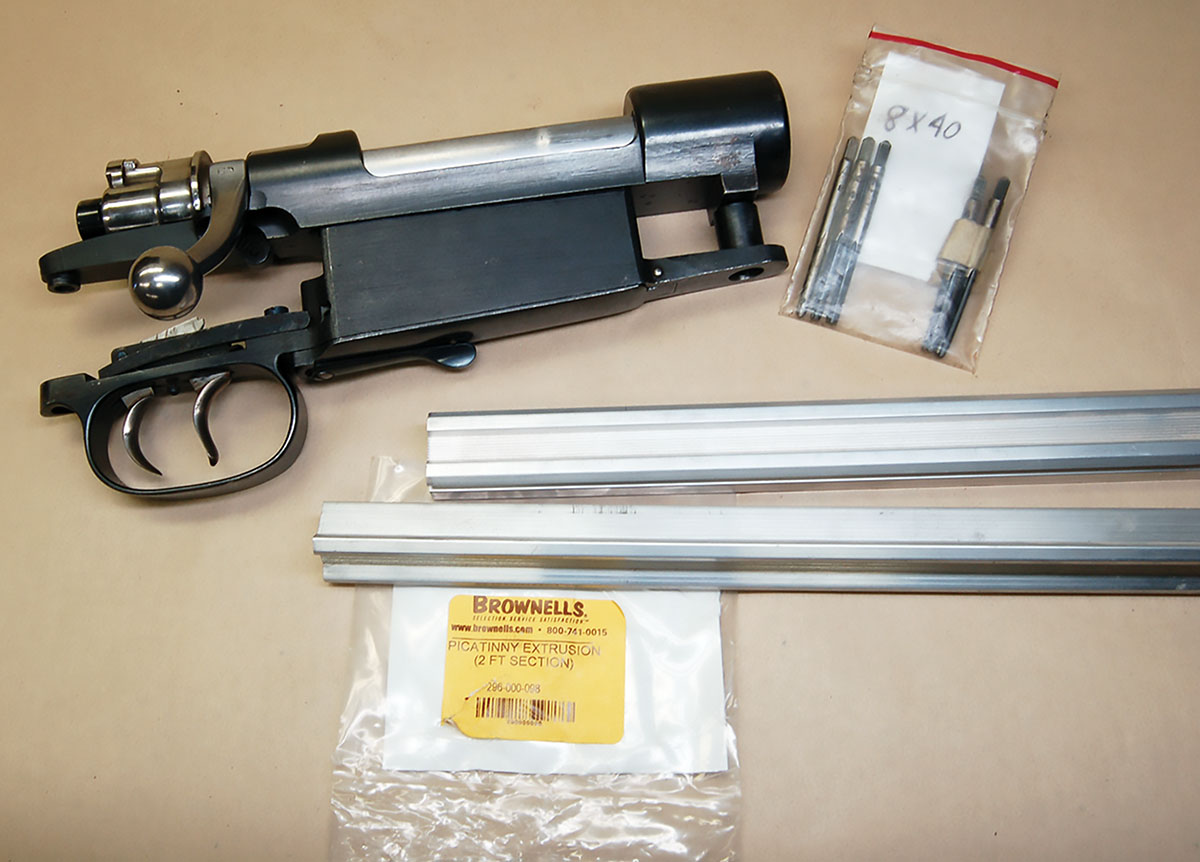
If an action like this comes along and hole spacing doesn’t fit any existing base, a blank Picatinny base stock is the answer. If metric, holes may be drilled out to 8x40 threads per inch.
Often, a new owner decides to just scrap the old scope, rings and base. As just mentioned, this is a shame not only for the machine work but the design and hand fitting involved in making the old mount. The one shown in the photos held a Kollmorgen 26mm. The rings are dovetailed into the two-piece bases with a screw down through the center of the ring threading into the base. The fit of the bases to the receiver ring and bridge is watertight. Almost unnoticed is a small lip that hangs down from the rear of the front base where it overhangs the rear of the receiver ring. This lip is hand fit against the receiver ring and prevents forward movement of the base and thus prevents stress on the mounting screws during recoil. Brilliant. Wish I knew who made it.
There are other pitfalls when replacing one of these scope mounts. If the receiver is one that was not factory drilled (as most aren’t) for scope installation, its probable hole spacing does not match any modern base on the planet. We are left with drilling new holes (if possible), machining a new base from blank aluminum Picatinny stock (expensive) or machining a steel base (more expensive). If using the existing holes, be sure to save the old screws as they are probably metric. Sometimes, it’s possible to drill out and tap 8x40 threads per inch (tpi). About now, those shims mentioned earlier sound like a good idea.
Next time, we will cover items that seem insignificant – until they are needed.
(Sponsered by Yavapai College Gunsmithing School)