
Light Gunsmithing
Marlin M336 Maintenance
column By: Gil Sengel | March, 22
.jpg)
.jpg)
.jpg)
Having received requests regarding maintenance on various common hunting rifles, I will, from time to time, pick a rifle and disassemble it only enough to do the work necessary to keep it operating smoothly. This time, the rifle is the Marlin M336 and its variations.
Of course, it is true that with enough searching, much of this can be found on the internet. Nevertheless, a magazine format is the perfect way to present such information because it can be laid out flat on the bench. Clear photos can then be studied and text read and reread to gain complete understanding. This seems superior to small images flashing across a computer screen.
At any rate, the Marlin M336 is a somewhat simplified design of the earlier M36. The most obvious difference is the round breech bolt of the M336 versus the rectangular bolt of previous Marlin leverguns. The introduction date was 1948. Note that all Marlin centerfire leverguns are now made on the M336 action with the exception of the new model 1894, which is designed for short pistol-size cartridges.
Marlin also sold the M336 as the Glenfield M30 for several years. It was a lower priced gun sold by mass merchandisers. The stock was birch, the metal finish was of lower quality, but mechanically, it was identical to the M336. It was successful because, simply put, it is probably impossible to come up with a simpler or more trouble free levergun design.
To begin disassembly, please start with the gun unloaded and the hammer down! Lay the rifle on the bench right side up. If a couple of bags of shot are available, lay them under the receiver. Lightly pushing down on the rifle causes the bags to form around it a bit, preventing turning or sliding when removing screws. Turn out the lever pivot screw and pull the lever down out of the receiver. The lever contains a small spring and plunger, which hold it in the up position when the action is closed. It requires no attention (and no oiling) so long as it works freely.
.jpg)
Removal of the firing pin from the breech bolt should not be done unless it is broken because it is made in two parts; the rear does not line up with the front until the action is closed and locked. The rear is held in place by a retaining pin. No problem. The front part, however, is also retained by a pin, but that pin is under the one-piece extractor/extractor collar. This collar must be pried out of its groove in the breech bolt. Often it bends or breaks in the process. Have a new one available as well as a firing pin.
The stock screw in the top tang is now removed, allowing wood to slide off the receiver tangs, exposing the mainspring. Gently lower the hammer to full-forward position, then push the mainspring with its bracket sideways out of the receiver. The spring is under slight tension, but is easily controlled with the fingers. The hammer pivot screw is now removed and the hammer lifted out.
Next is the trigger plate, which closes up the bottom of the action. It is now held in place by one screw in the bottom of the receiver and one in the side as shown. Remove them and pull the trigger plate down and out. Note the rust on the side where it touched the receiver. This is common in rifles that have been used extensively for hunting. Also, pull the breech bolt lock down and out at this point.
Looking down into the trigger plate reveals the trigger and its return spring. If rust is present, drive out the cross pin, drop out parts and clean recess. If there is no rust and the trigger moves freely, there is no need to disassemble.
Two more screws remain in the receiver. Removing them frees the carrier and loading port cover, which drop out the bottom of the receiver. The receiver is now open from the bottom, allowing rust, congealed lube and other debris to be scrubbed out.
The magazine tube has not yet been touched, but it should not be ignored. If rain or condensation are going to cause rust, it will be on the magazine tube or barrel under the forearm.
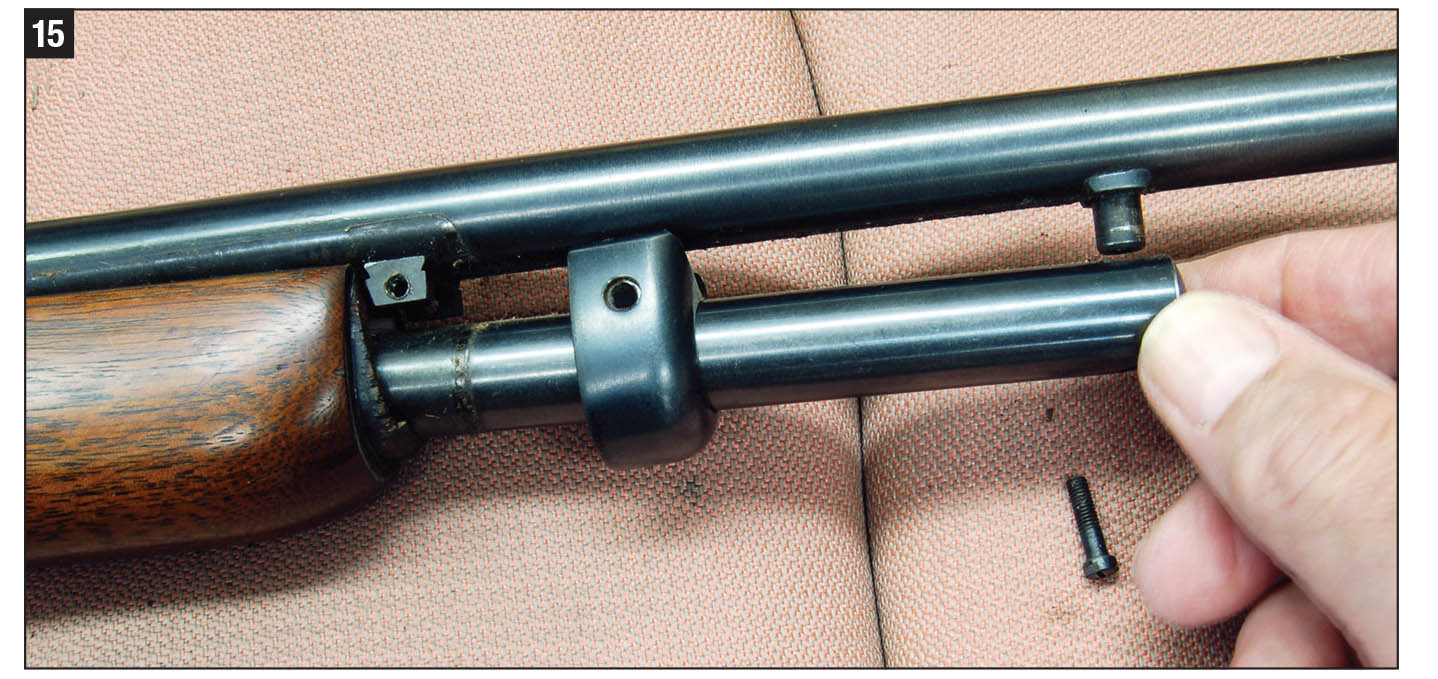
The rifle shown here is a Marlin M336-SC with a steel forearm cap and two-thirds length magazine. To remove the tube, it is first necessary to remove the two forearm cap screws and slide the cap forward off its hanger. (If your gun has barrel bands securing the forearm and magazine tube, remove their screws and slide the bands completely off the muzzle end.) Next, remove the magazine plug screw. Keep a finger over the magazine plug because the spring is pushing against it. Pull the tube straight down. The tube and forearm will drop free.
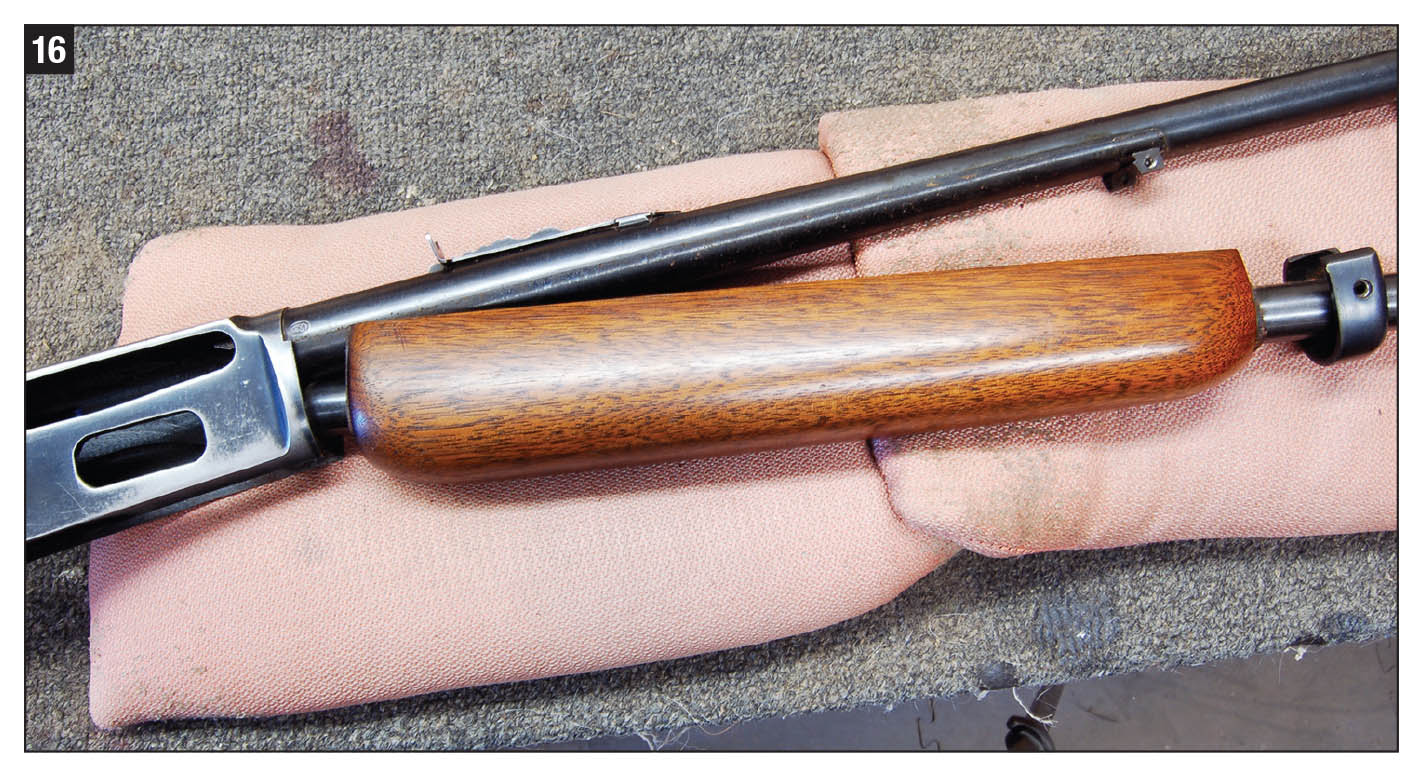
Sure enough, there was rust present on this rifle, but much less than on the trigger plate. It was easily removed using 0000 steel wool and oil. There was also a bit of rust inside the magazine tube at the rear. It looked as if someone had loaded a wet cartridge.
If ever the expression “reassemble in reverse order” applied, it is for the Marlin 336. No special tools are needed. The magazine tube is reassembled by holding the follower and spring in the tube using only finger pressure. The same applies to the mainspring with its bracket. Start the lower leg of the bracket into its slot in the lower tang, then push the rear of the bracket with the thumb until it slides under the top tang. Tap fully into place using a block of wood. Remember that the breech bolt is not yet installed and the hammer must be as far forward as possible.
An important final concern is lubrication. Lever-action rifles used only for hunting don’t have to be smothered in grease and oil. Complete disassembly and cleaning, however, leaves the metal dry and unprotected. The inside of the receiver, barrel, magazine tube and all parts as they are put back in should be wiped with a rag just oily enough so a film of oil can be detected. I also add a dab of molybdenum disulfide wheel bearing grease to the end of the lever where it bears against the breech bolt. Any Marlin M336 or derivative will now be happy and smooth running for many seasons to come.