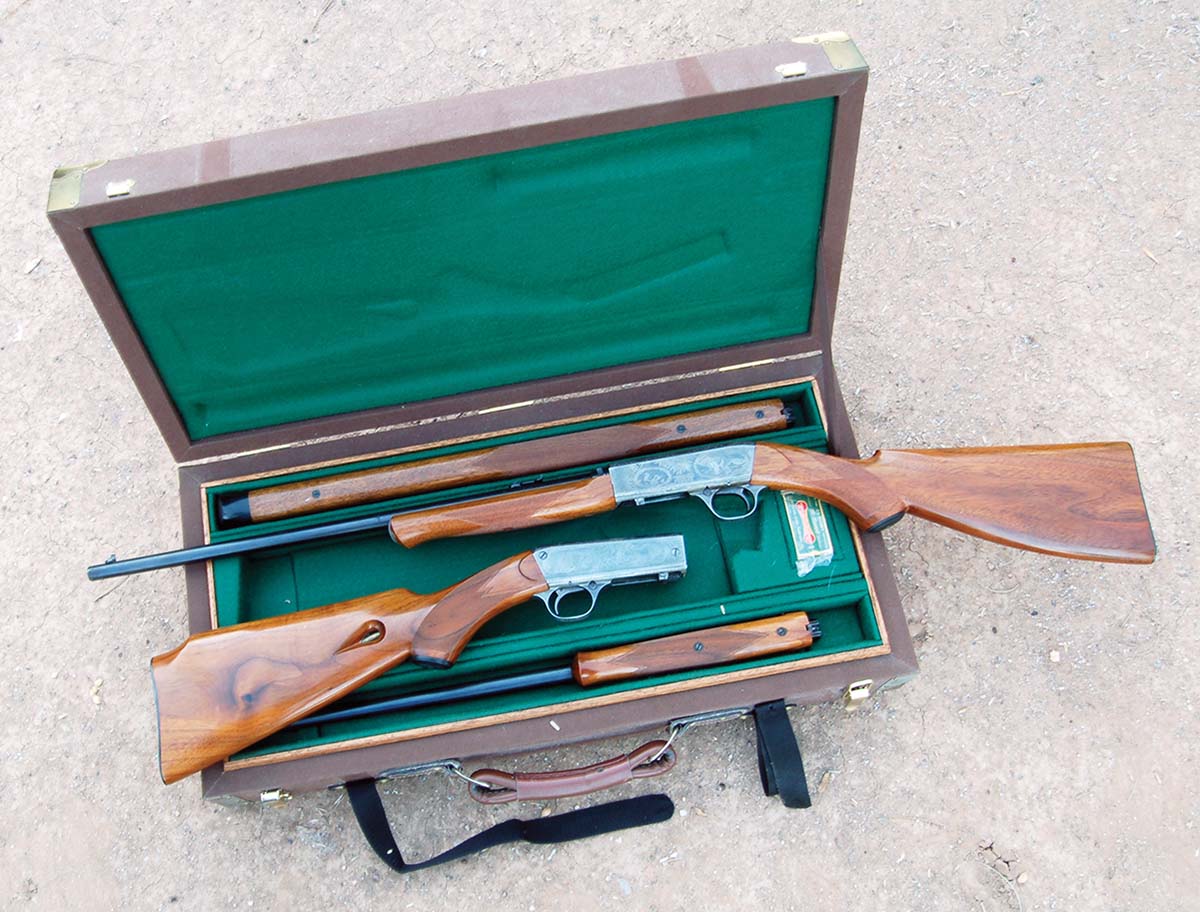
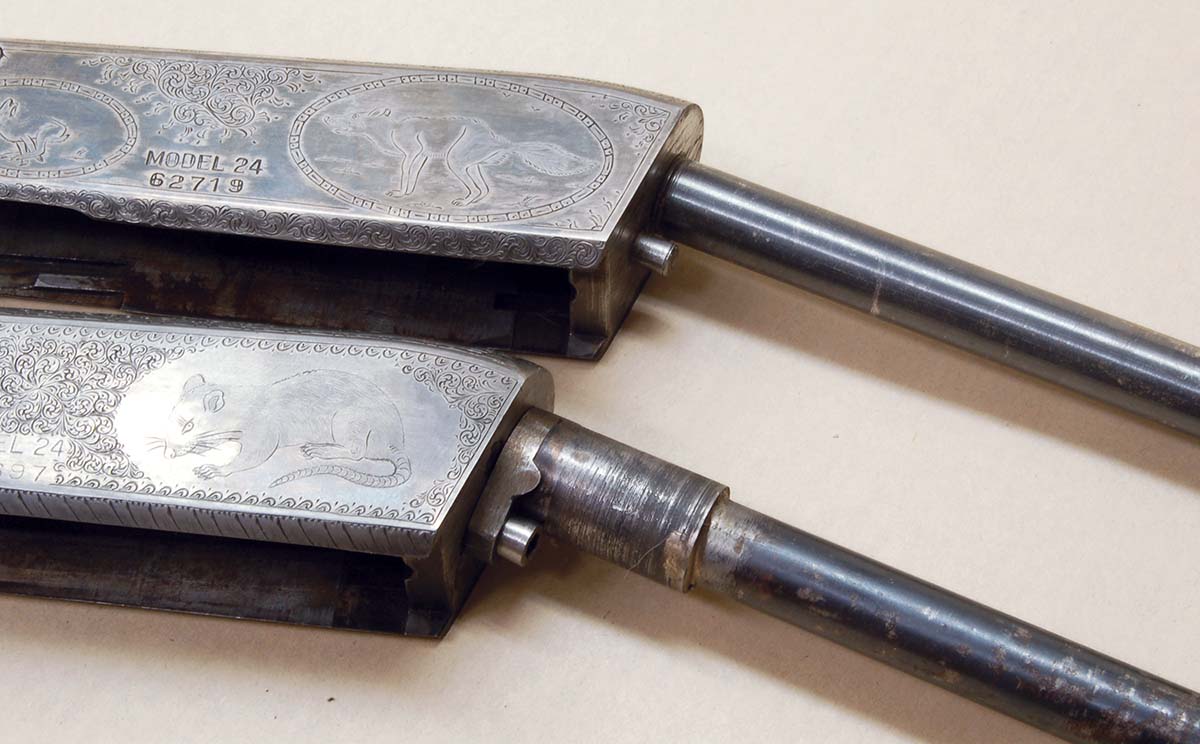
Remington Model 24s tend to affect owners to the point they can’t help prettying them up a bit!
All the gun-crazy farm kids I grew up with (myself included) wanted an “automatic” .22 rimfire when we outgrew our single shots. When that happened, however, we were still mostly kids without the finances to buy new rifles. All we could afford were well-used Savages or hardware store brands, none of which “automaticed” very well. Jams and failures to feed were common. These were cleared by prying the offending cartridge out of the receiver with a large pocket knife. This probably didn’t help the situation any.
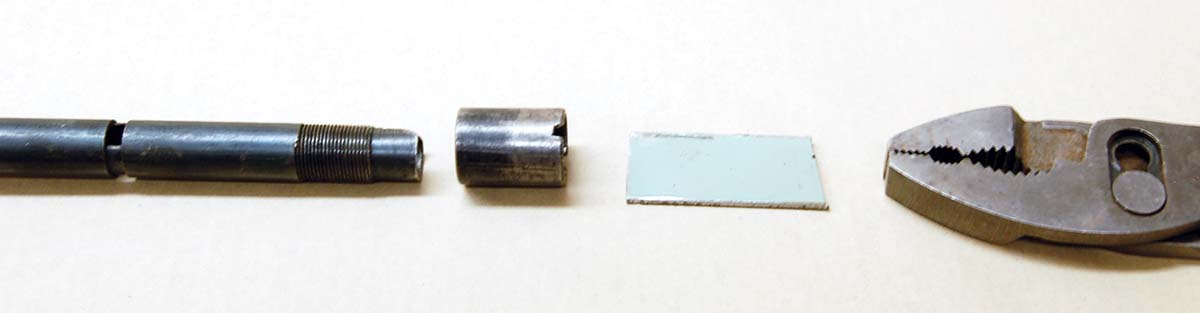
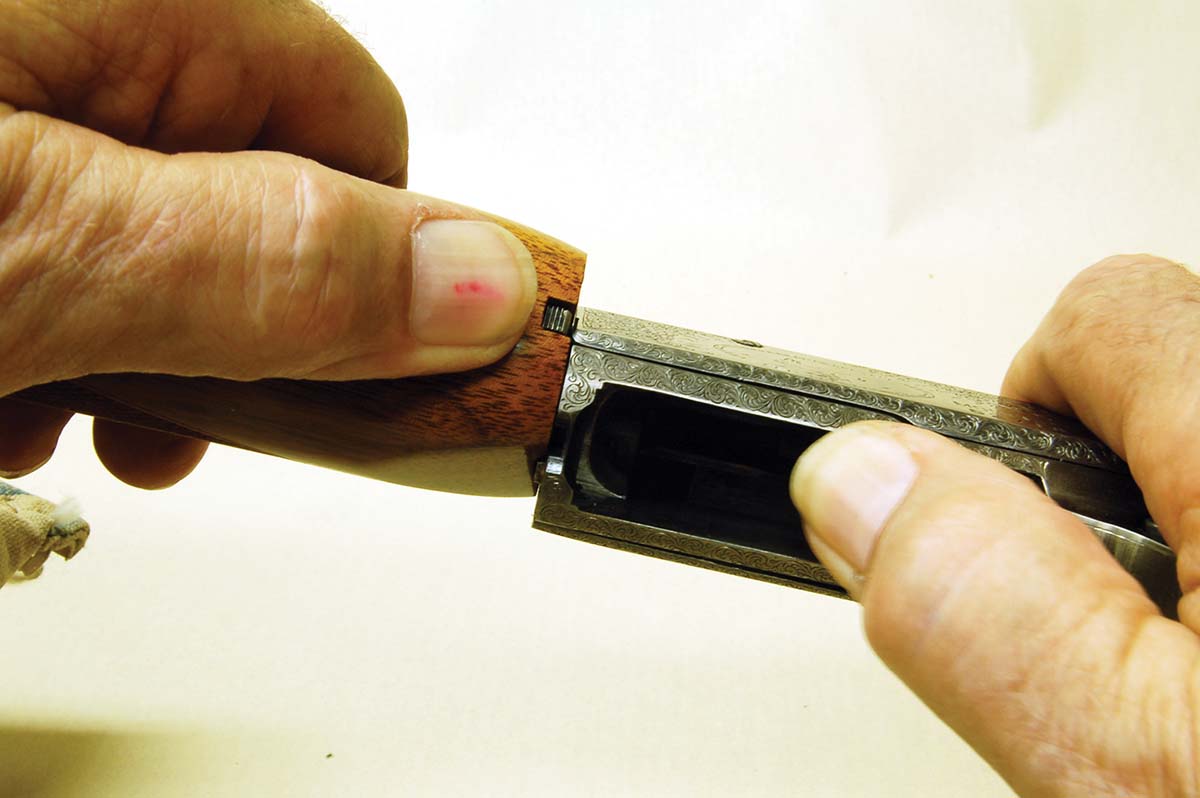
The outer tube of the buttstock magazine (left) acts as an anchor for the M24 stock. A piece of sheet metal fits in the magazine tube nut-screw slot (center) and pliers turn the nut out.
Our ammunition usually came from the Montgomery Ward store in town, which sold its own brand. The local liquor store sold Winchester and Remington for a nickel a box more. We thought they worked better; therefore, most Saturdays, a couple of us would hitch a ride into town, traipse into the liquor store, and pile our pennies, nickels and dimes on the counter. “What’ll it be, boys?” the pretty lady by the cash register would purr, “Winchesters or Remingtons?”
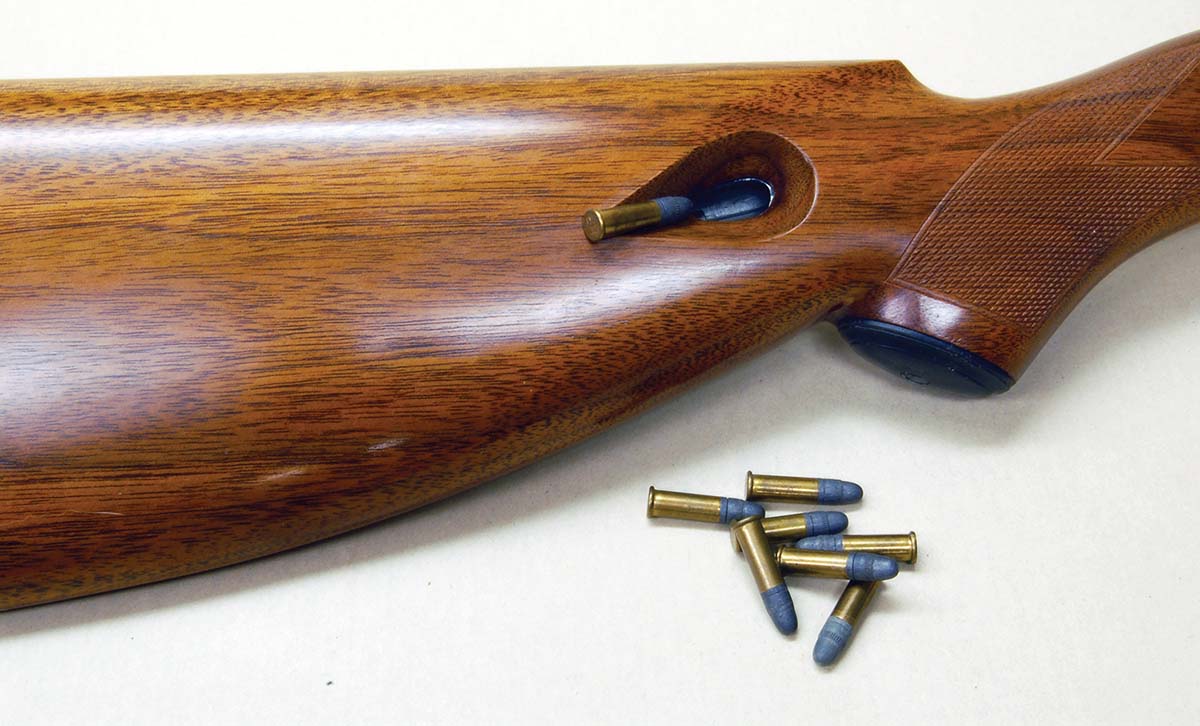
A Model 24 magazine tube loads through the buttstock, preventing the tube from most damage.
Then one day, a member of the group showed up with a .22 automatic like no one had ever seen. It was a gift from his uncle, who had bought it to keep foxes, skunks and other vermin from disturbing his chickens. Now retired and moved to town, he had no more chickens and didn’t need the rifle. It loaded through a hole in the stock. Browning Arms Co. was stamped on the barrel. It never jammed or misfed. Everybody wanted one!
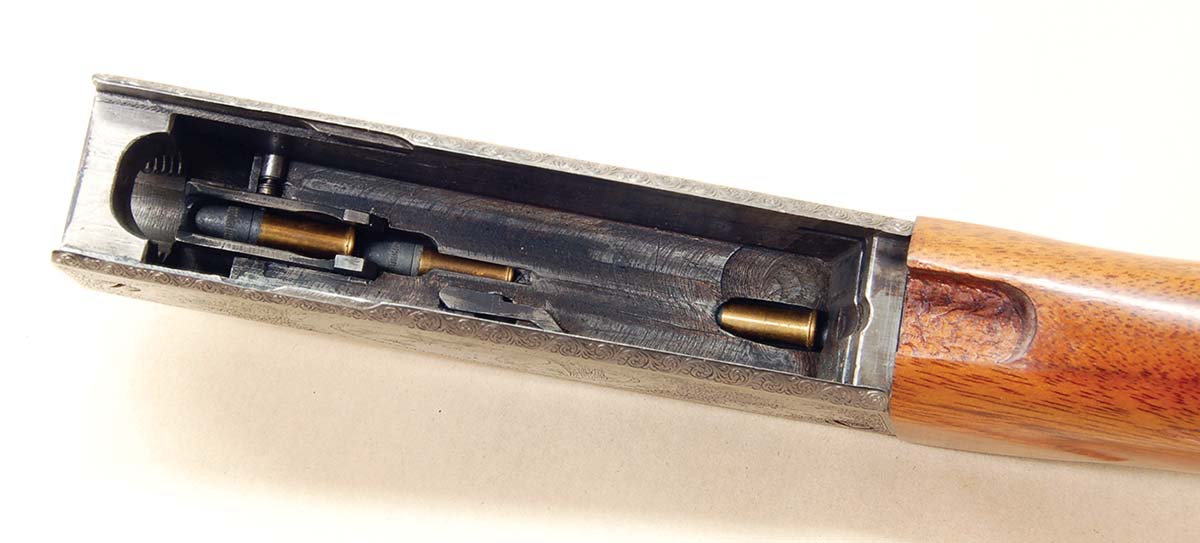
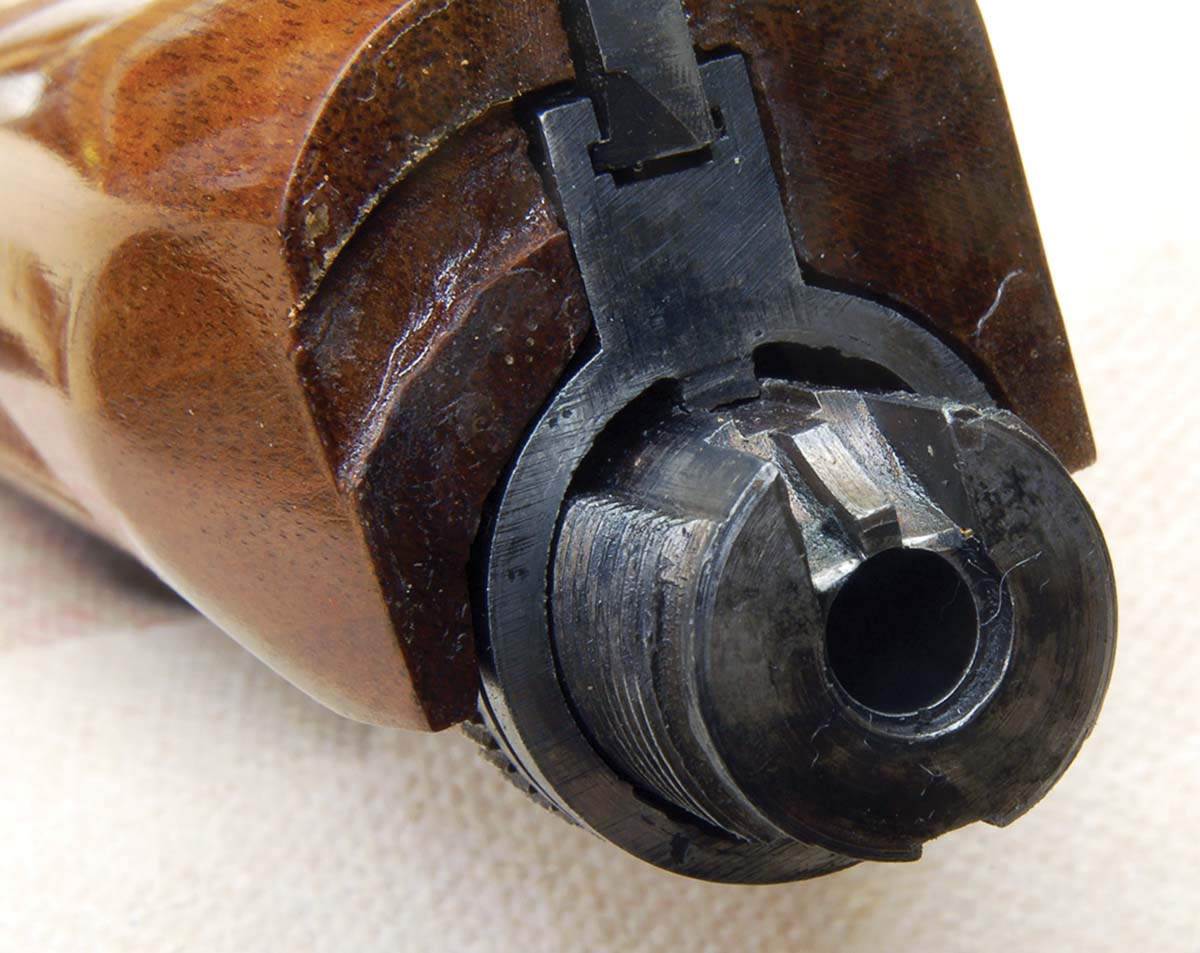
Cartridges feed through the precision-machined guide way in the receiver top. It must be kept clean, or cartridges will jam.
Unfortunately, no one could find a used rifle, and a new one cost $68 (1960). To us kids, that may as well have been $1,000. I have never owned one, but I’ve come close. Many years later, in a small rural gun shop, there was a rifle that looked like a Browning but wasn’t. This was my introduction to the Remington Model 24 (M24).
A factory attachment of a magazine tube (top). The receiver (bottom) had a tube broken off at the rear of the receiver; parts were not available, so the repair was made.
The M24 more than just looked like a Browning; it was Browning. Details of how this came to be are not important here. Suffice to say, post-World War I Remington needed an autoloader to fire smokeless-powder 22 Long Rifle rounds and purchased the rights to produce the Browning. Remington-made M24s appeared in 1922. Some 130,000 were made, plus 108,000 of an essentially scaled-up version called the Model 241.
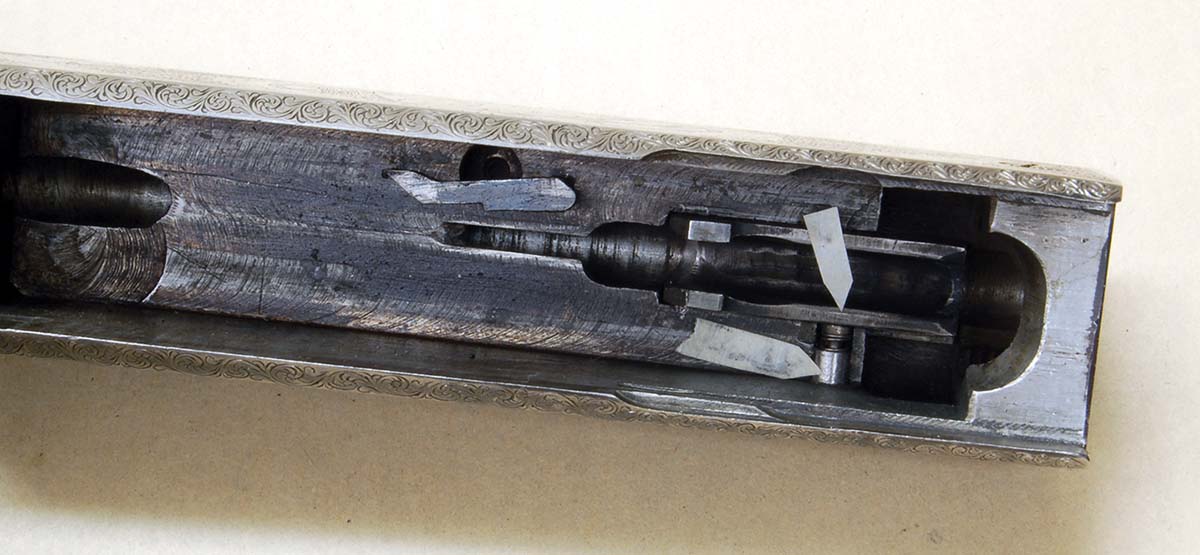
The last cartridge stop uses a spring and a plunger (long arrow). Its tip protrudes through the cartridge guide (short arrow).
Unfortunately, many are seen today in a· nonworking state caused by a build-up of fouling from years of cleaning the barrel but not the receiver. There can also be rust from long-ago corrosive priming. With any fouled M24, it is best to take off the barrel, remove the wood, pull out the trigger-guard assembly, and remove the ejector if it will come out (this is covered later). Now drop all metal in the solvent tank for a day or two. Be certain the enclosed feeding track at the top of the receiver is clean. Also, clean the inside of the inner (brass) magazine tube.
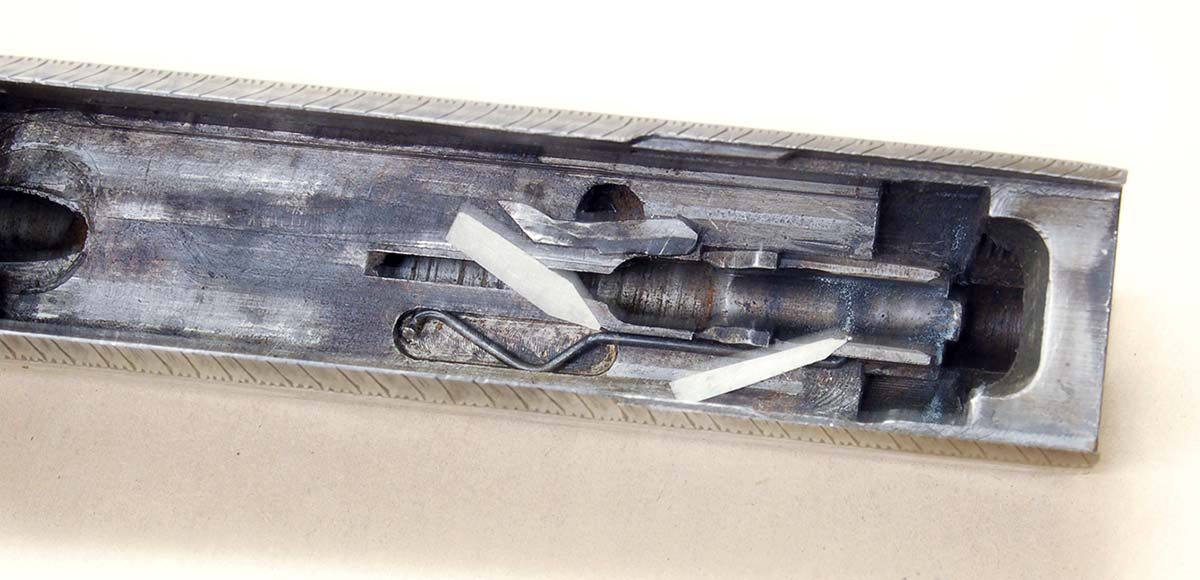
The first cartridge stop was a bent wire spring (thick arrow) with its tip protruding through the cartridge guide (thin arrow).
Feeding failures can also occur if the cartridge stop (the two types are shown in photos) is not free to move. Its tip protrudes through the cartridge guide about .030 inch, which stops the next round in line until the breechblock slams forward, driving the cartridge into the chamber. Push on the tip with a screwdriver blade. If it moves freely, all is well; if not, a drop of solvent should free it up.

The ejector is the part colored red. Be careful removing the breechblock as the ejector can fall out.
If the rifle feeds fine but won’t eject an unfired round, then the extractor is missing. Someone tried to remove the barrel and didn’t pull the breechblock back to allow the extractor to clear its recess in the rear of the barrel. Forcing the barrel to turn broke the extractor, which then fell out, propelled by its spring and plunger. Remington parts are hard to find, and it’s my experience that Belgian-made Browning parts don’t fit. An extractor is difficult to make. Shape is not intuitive. If the parts can’t be found, it will be necessary to find a working M24 to get parts to copy.
Another part that is often missing is the ejector (shown in a top view of the breechblock in the photo above). Just a thin piece of sheet metal, it’s easy to make, which is good because it is not retained in any meaningful way. It can fall out when the breechblock is removed.
Note how the extractor (arrow) extends out from the breechblock. It will be broken if the breechblock is not pulled back before trying to remove the barrel.
To make an absent ejector, file a piece of sheet metal to just fit the ejector slot in the breechblock, and flush with the top of the block. Length is .060 inch longer than the slot, but this doesn’t seem to be critical. Now, clamp the ejector vertically in the bench vise at about its midpoint and tap the exposed ejector enough to bend it about .005 inch. Not much. The ejector should show a bit of resistance to sliding in the slot. Next, fit a small pin through the center to limit back-and-forth movement to .060 inch. This is how the original was kept from falling out – until it did.
The recess in the barrel into which the extractor fits.
A strange thing about these ejectors is that I bought a M24 in 22 Short at a gun show and fired it a few times before cleaning. It ran fine. When disassembled, it was noticed that there was no ejector. The gun was reassembled, and it ran fine again, covering the ground at my feet with shiny little empties! Who knows? I have never made an ejector for the thing.
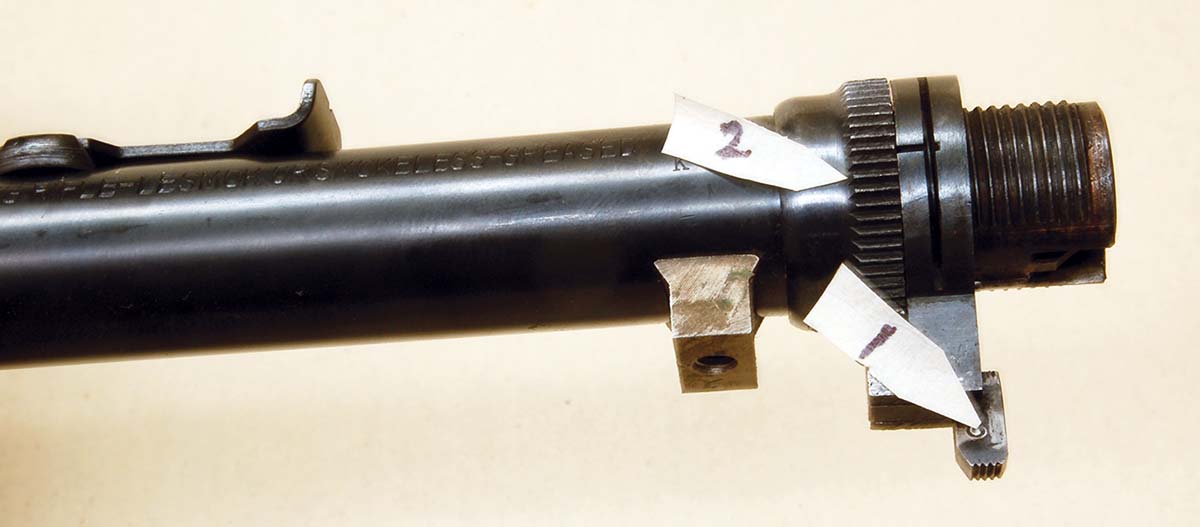
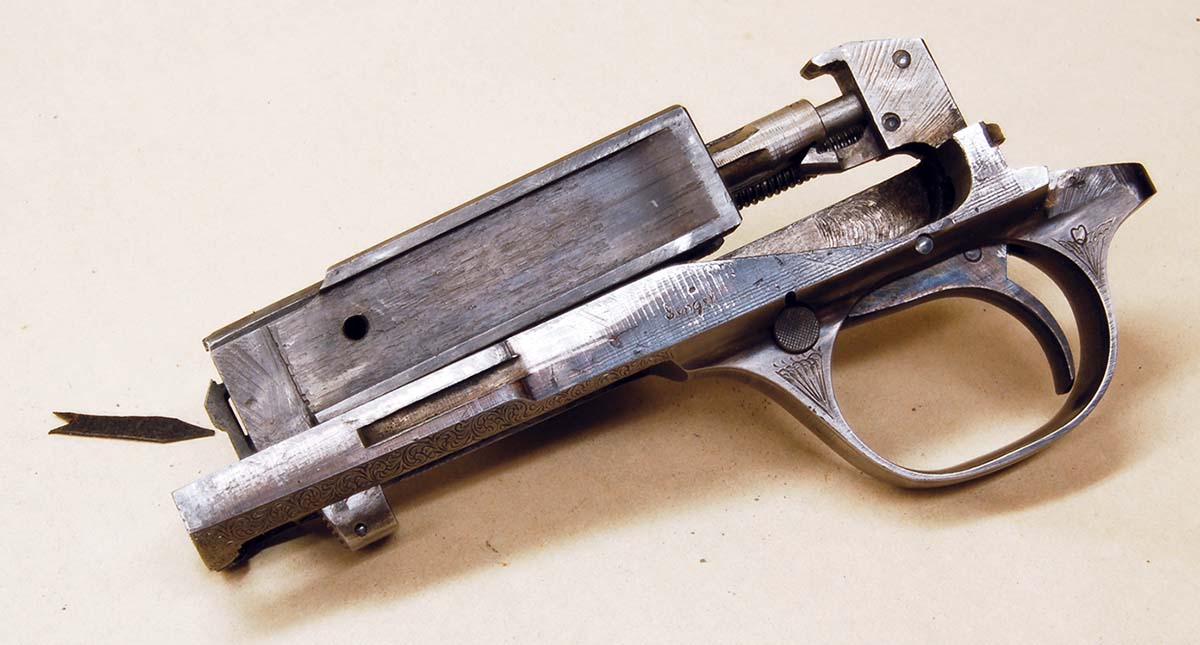
Takedown joint adjustment requires the forearm to be removed, then push the takedown button (1) to the left until the notched adjustment nut (2) can be turned. (See text for warning!)
Now, a few words about adjusting the takedown joint because Remington seems to have set a trap there for unsuspecting owners. Actual adjustment is easy. The forearm is removed, and the takedown tab is pushed toward the muzzle until it disengages with the barrel-adjustment nut, which has little grooves cut around its outer surface. That nut is now turned one groove clockwise, and the takedown tab is released.
In my experience, however, as the lock releases from the adjustment nut, the lock can pop forward out of its channel, propelled by its spring and plunger. This is one of those moments where you instantly know something is wrong. If the pieces are found somewhere on the bench top, the situation is not as bad as it could be. Reassembly is not easy, given the spring pressure. If one or two pieces can’t be found, well, Browning parts might be made to fit. Be careful if an adjustment is necessary.
The barrel is removed by pushing the takedown button in, pulling back the breechblock and turning the barrel counterclockwise.
Lone last thing, there is a problem that would seem too rare to mention, but one often walked into the shop after the opening of hunting seasons. This is an M24 with a bent buttstock at an angle to the receiver.
The breechblock is removed by first removing the barrel, then pushing forward and upward as shown.
A repair is shown in the photo on page 15. No dimensions are given as they would depend on the particular rifle and how much of the outer magazine tube can be saved. Basically, the repair is just a rod, .150 inch larger in diameter than the outside diameter of the steel magazine tube. A hole is drilled completely through the rod that is the same as the inside diameter of the steel magazine tube. Length of the repair piece is such that when one end is turned down to fit through the receiver, just like the original, the amount protruding out the rear, when added to the undamaged length of the magazine tube, will be one inch longer than the original steel magazine tube. The repair piece is now counterbored for one inch, and the remaining length of the original magazine tube is soldered in.
In the photo, notice also that the “pin” in the rear of the undamaged receiver (top) is really a headless machine screw. A tab was welded on the repair tube (bottom in the same photo), a hole drilled in it to match the threaded hole and a machine screw turned in. Repair is a bit of overkill, but it won’t have to be repeated. Yes, these parts were ordered from Browning at least twice and were told they weren’t available at the time. Fortunately, the inner magazine tubes (brass) were repairable using a mandrel like raising dents in a shotgun barrel.
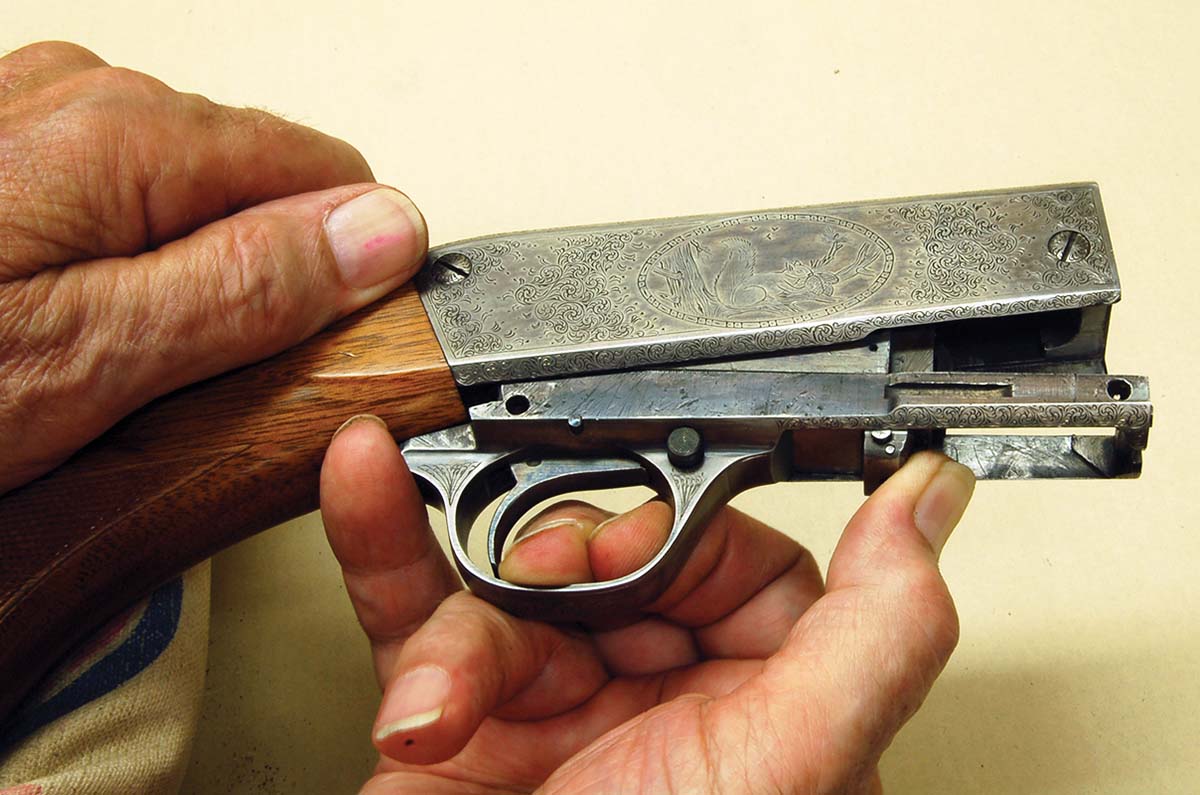
As shown in the two M24s photo, folks who like the little guns can get carried away with customizing. There is nothing wrong with this, as the guns are all steel, with the only malfunctions caused not by wear or breakage, but by people. They could theoretically last nearly forever.