Light Gunsmithing
Adding Comb Height to Stocks
column By: Gil Sengel | November, 17

To deal with the low comb, a lace-on leather comb riser that added a half-inch to comb height was used while working up loads. These things were common 40 years ago, when countless military rifles were being converted to hunting rifles, but owners didn’t want to add the cost of a new stock with a higher comb necessary for scope use. While such devices work okay on rifles that aren’t shot much, they tend to work loose and look just like what they are – an add-on gadget. There is a better solution for anyone with moderate woodworking skills.
Normally when thinking of adding to comb height (or length of pull, which will be the subject of a future column), visions of gluing on a piece of wood that is then rasped to shape come to mind. A lot of this has been done, but it doesn’t look very good. A simpler and much better fix is possible.
Before getting to the comb addition, however, covered is an example of a glue-and-rasp repair that is common for rifles having either steel or hard plastic buttplates. This is the “chipped toe,” caused by dropping the rifle butt down on a hard surface. If the toe contacts first, a hard buttplate transmits the full impact to the wood instantly, splitting off a piece the size of which depends on how the grain runs at that point. For some reason, these pieces are always missing when the rifles are sold or brought in for repair.
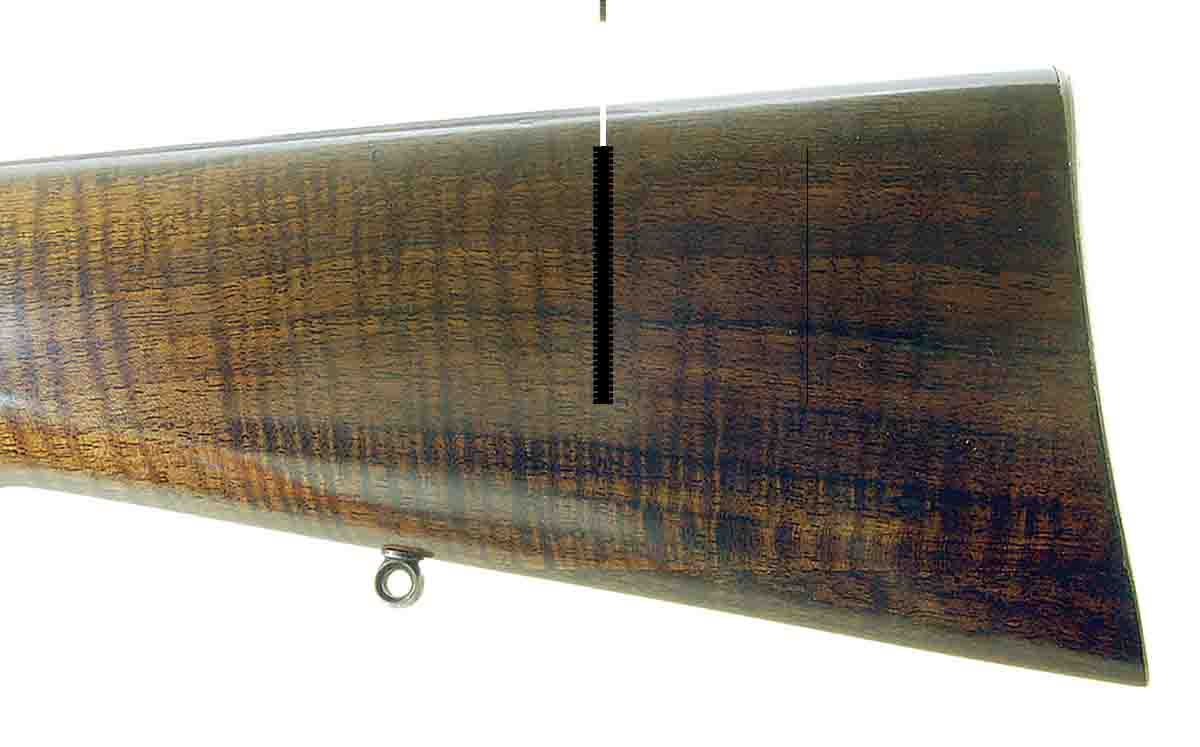
Such was the fate of the 6.5x53R Dutch Mannlicher stock shown in the photo. Originally a military rifle, it had been completely rebuilt as a sporting rifle, rust blued and restocked in England, probably in the 1890s, when small-bore smokeless cartridges were all the rage for big-game hunting. It is definitely a piece of sporting history worthy of restoring.
The thin steel buttplate was straightened and the angle of the break changed slightly so the grain of a piece of thin-shell walnut scrap from a previous stocking project would line up better. The secret here is not to be in a hurry. It took several months to find the piece to repair the break.
The joint surface of the stock is perfectly straight and flat. Two wood screws were run into the stock joint with their heads allowed to protrude about .125 inch. Recesses for these were cut into the repair piece so when all was epoxied together, it will never come apart. As the photos show, the figure of the wood helps hide the joint. Seldom do such jobs come out this well. Of course, the joint is not completely hidden.
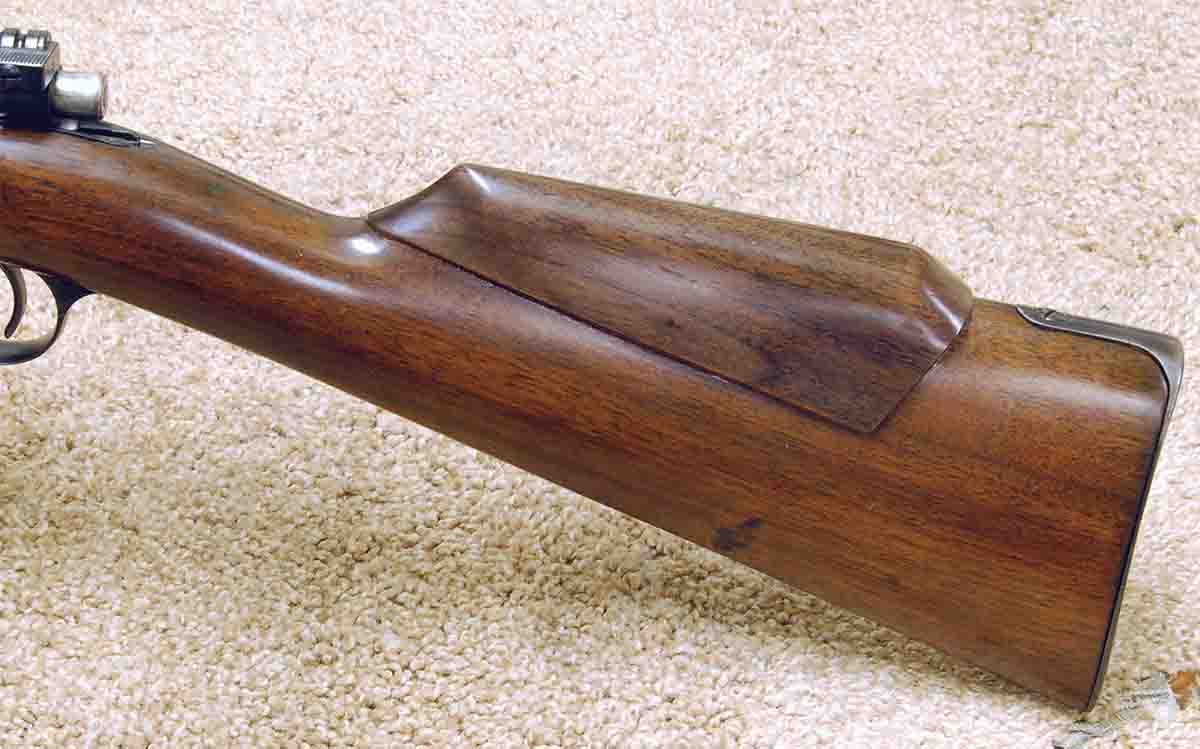
This brings us to the M91’s comb addition. Here it was determined that just over .5 inch was needed for a proper height. Making a straight, flat joint, as was done on the toe of the old Mannlicher, is not possible because the sides of the stock are already angled inward to form the existing comb height, which is far too low. If new wood is spliced on and a smooth joint then made with the stock sides, the result will be the same low comb.
What is needed is to restart the taper of the stock sides toward the comb. To do this, the sides of the new wood must be higher than the old surface, but that would look awful. Also, it could not be done without refitting or replacing the buttplate, an involved job in itself.

The proper response to this dilemma is as old as woodworking. If a repair, modification or mistake cannot be covered up, then make it obvious! Make it stand out like it was intended to be there all along. Gunstocks, with their many angles, straight and curved lines are made for this rule. This comb addition is going to look like a modern-style, raised cheekpiece that was part of the design from the beginning.
Begin by laying out the addition on the stock using a black grease pencil or china marker (not a felt-tip pen, which is permanent). When the design looks right, cut the entire inlay from black paper, like scrap roofing felt, to be sure of appearance. The angle at the rear of the “cheekpiece” is 110 degrees, but this can obviously vary some. Note that the bottom edge of the addition is nearly parallel with the stock’s toe line. This seems to look best. Also, the rear of the addition comes out of the stock and the Monte Carlo forms about a half-inch forward of the tang of the military buttplate. No modifying or replacing of the buttplate is needed.
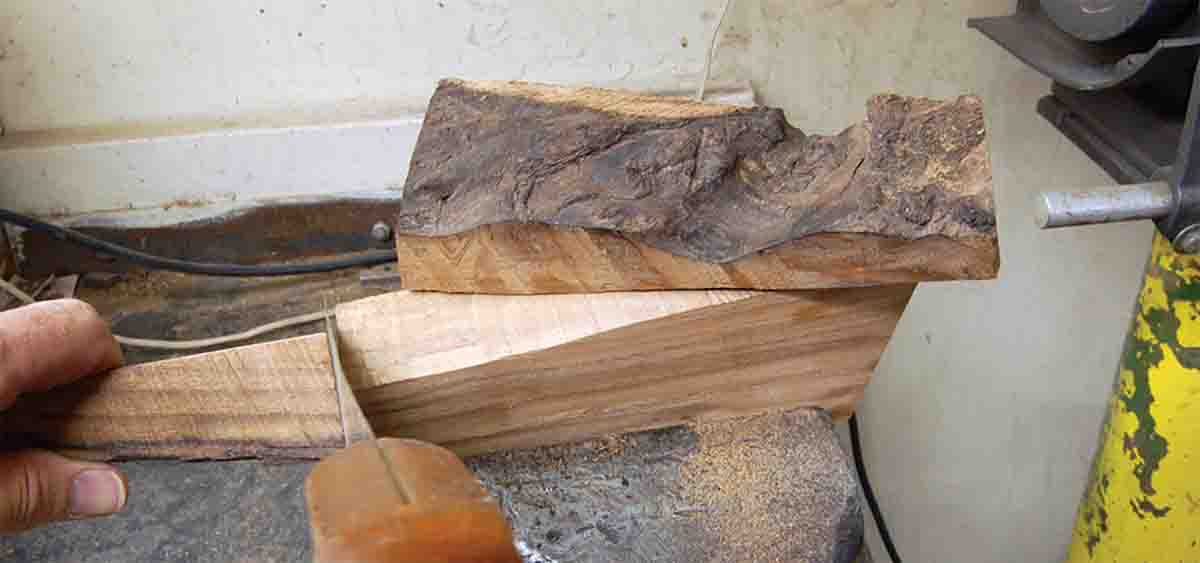
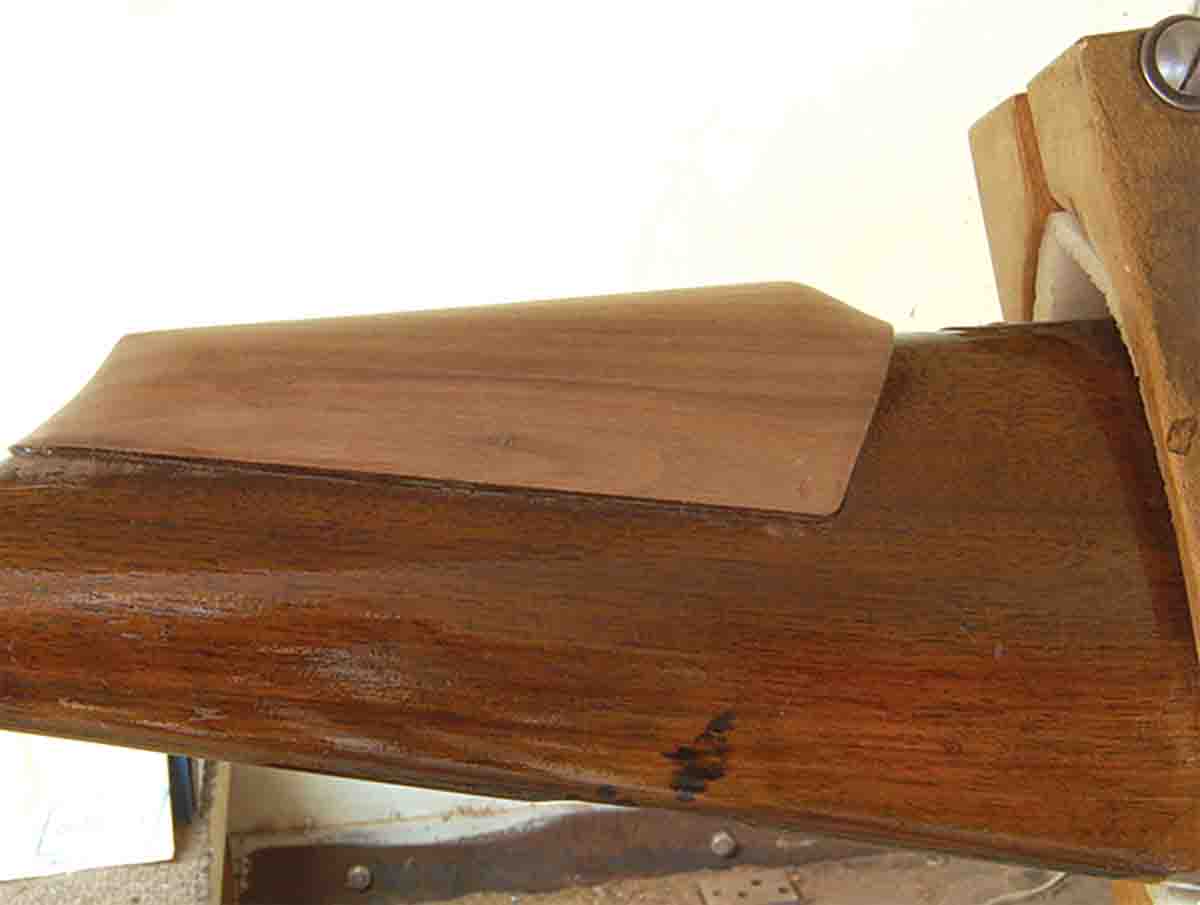
Cut the insert piece first. It can be scrap walnut if available, though purchasing a piece from a wood hobby shop may be easier, as they sell lots of walnut in many sizes for various projects. For our use it must be at least 1.75 inches thick with both sides surfaced (planed flat and parallel). This allows using a carpenter’s square to shape the edges of the insert – which will be the glue joints – perfectly flat and square with the sides. Once done, these surfaces will not be touched again.
Remove that portion of the buttstock where the insert will fit. Cut the angle smaller than it will be when complete; on this stock it will be 110 degrees, so I cut it at 100. After the bottom joint (the one parallel with the toe line) has been filed flat, the insert piece is slid down this surface toward the buttplate. Since the angle in the stock is a bit narrow, the insert will touch its recess at the heel (top) first, allowing this area to be worked back as the piece is pushed into place. This is far easier than if the angle was too wide, requiring wood to be removed from the bottom of the joint where the angle forms.
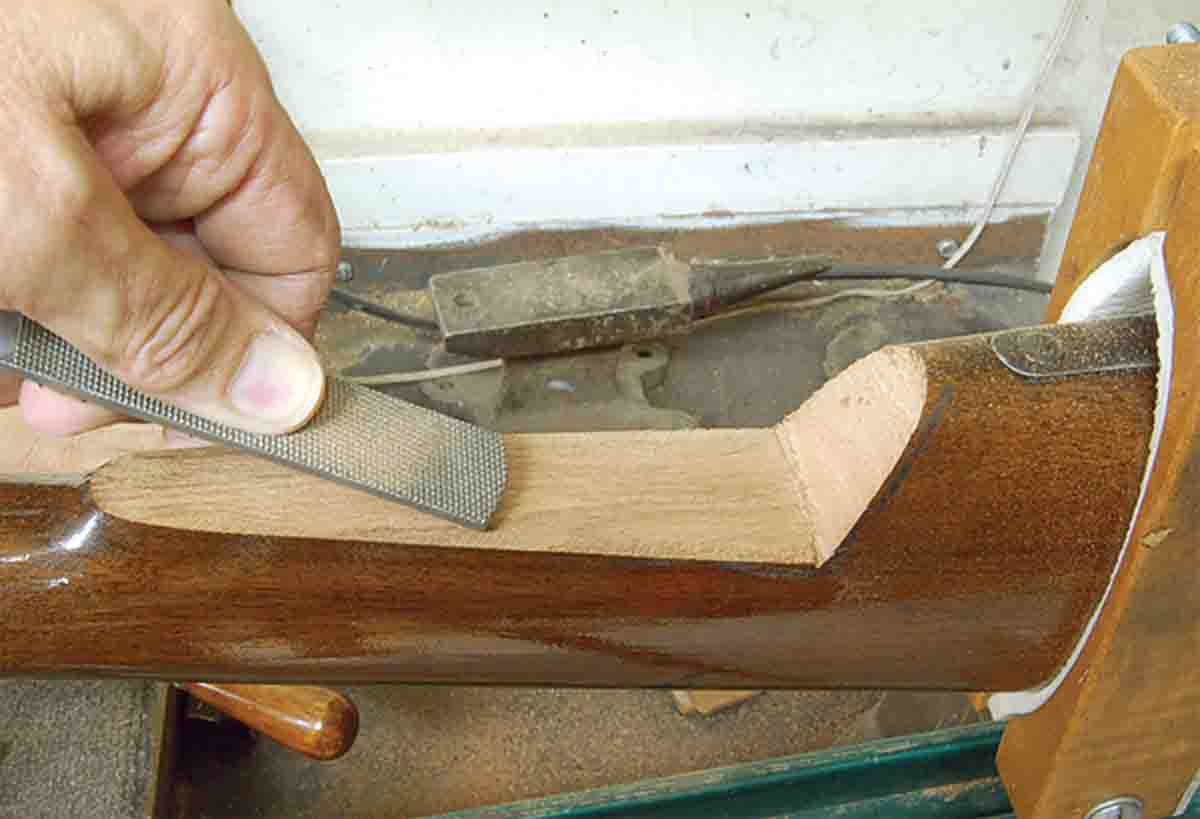
When fitting is complete, the insert is anchored in place using epoxy bedding compound. Brownells ACRAGLAS was employed, because it fills any small gaps in the joint. The new wood can now be formed to the proper height, in this case using a Monte Carlo shape. The sides of the insert stand above the sides of the stock about 1⁄16 inch to allow shaping the comb to its new profile.
Before finishing, remember to make the addition stand out. The new wood generally looks best if it is a bit darker than the old stock. A little wood stain accomplishes this. The new comb also looks very good if stained black to match a black forend tip, grip cap and recoil pad.
The little rifle’s stock now provides perfect eye alignment to its Bushnell red dot sight, thus making the dot quicker to find and faster to get on target. Don’t think this addition applies only to rifles. Several have been installed on shotguns that have had optics attached to improve accuracy when firing slugs. All are benefits definitely worth a few hours of shop time to acquire.