Light Gunsmithing
Removing Recalcitrant Pins and Screws
column By: Gil Sengel | March, 17
Firearms are nothing more than machines designed to store, feed and discharge ammunition. As with any machine, guns are made up of individual parts and subassemblies held together by pins, screws and spring clips.
This column will not deal with spring clips, except to say virtually everyone removes them by prying using a small screwdriver. When the clip comes free, a faint snap is heard, followed perhaps by other indistinct sounds as the clip bounces around. Of course, it could land in plain sight on the floor or bench top, but that never happens. Fortunately, replacements can usually be found in auto supply stores or as assortments available from gunsmith suppliers.
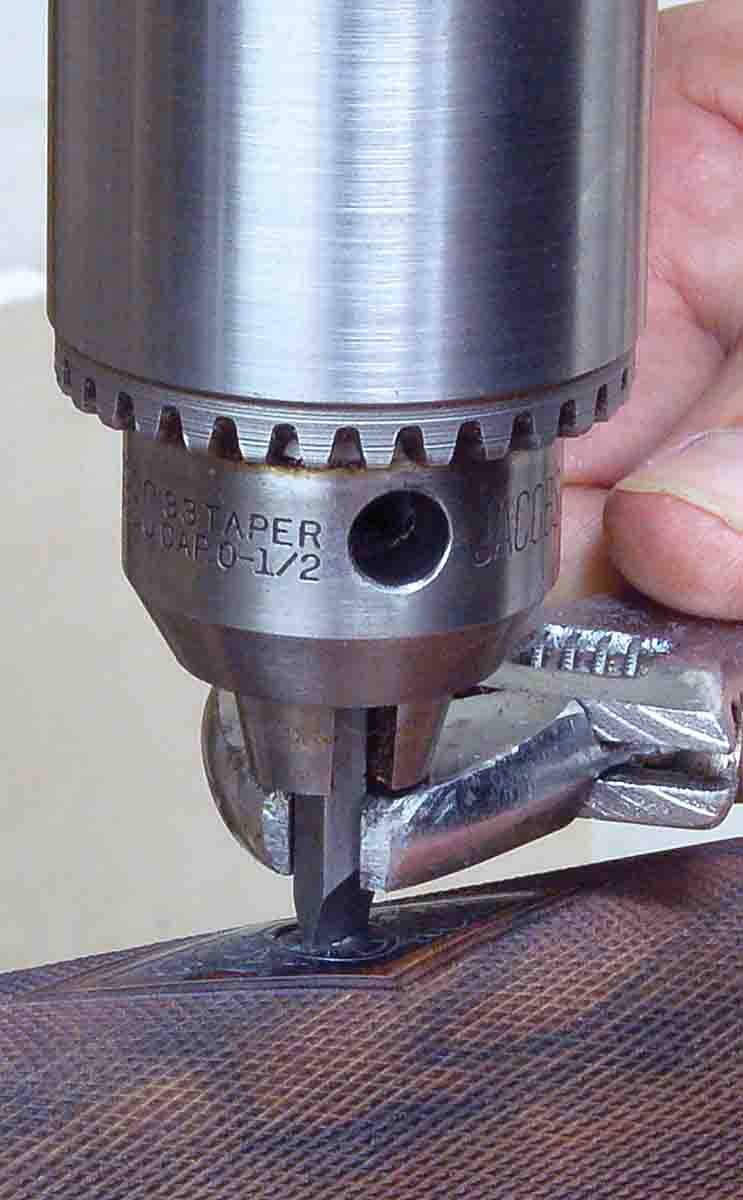
Pins are somewhat more civilized, so long as they are not tapered pins. As the name implies, this pin is a few thousandths of an inch larger on one end than the other and tapers from end to end. Normal pins are one diameter over their entire length.

There are three basic rules for removing pins from guns: First, if a part moves freely on a pin and the ends of the pin fit tightly into the gun mechanism, thus preventing the pin from turning, then don’t remove the pin unless it is really necessary. A good example is the trigger pin of countless guns that is visible on the outside of the action. Of course, if the gun is to be reblued or is so dirty and rusted inside as to cause malfunctions, then the parts must come out. Each time such a pin is removed and replaced, however, its fit is not as secure. Second, use a punch that is a bit smaller in diameter than the pin to prevent damage to the edges of the hole the pin fits into and, finally, with gun held as if to fire, drive out a pin from left to right. When it drops out, measure both ends to determine if the right end is larger in diameter than the left. If so, it obviously has to go back in the same way it came out. Taper is not uncommon, especially in foreign-made guns.
Most hidden pins tap out easily or can even be pushed out by only hand pressure on the punch. If not, it is then necessary to clamp the part solidly in a bench vise with hardwood jaw liners or lay it on a thick piece of wood having a hole drilled in it into which the pin can be driven. Be certain, however, that there is no setscrew holding the pin in place. Many boxlock double and single shots have hammers and sears pivoting on pins that are visible on the outside of the action. Often these pins are secured by a setscrew somewhere inside the receiver – and it’s not always obvious. Trying to drive out such a pin will result in serious, even irreparable damage.
With the part solidly supported, if the pin moves only .010 inch or so and stops, it could be a tapered pin that has been put in just opposite of normal. I have run into a few of these over the years. If tapping the pin in the opposite direction yields only slight movement and then stops, there is a setscrew someplace. Find it.
Turning to gun screws, one could say they are really rather simple to remove. Just use more force, until the head or shank breaks on small screws or the driver recess deforms to the point it’s useless. This ruins the whole day, but it is not at all necessary – except in one instance.
The one exception is Browning “salt wood.” In the early 1960s some genius decided that since salt attracts moisture, a quick way to dry green stock blanks was to cover
The best way to quickly identify salt wood is to remove the buttplate screws. If they don’t turn readily, then they are rusted in place and aren’t going to come out. If on a T-Bolt .22 Rimfire, the buttplate doesn’t have to come off. On an over/under, where the buttplate gives access to the stock bolt, grind out the screw heads with a Dremel tool and lift off the buttplate. Screw shanks will have to be drilled out, or just cut the whole mess off and install a recoil pad.
When fasteners thread into steel parts, the heating, soaking and cooling, as described for rusted pins, will allow removal. If threads are
If a scope ring or base screw won’t come out because it’s one of those despicable socket head 6x48s in which the tiny six-sided recess has stripped out, there is still hope. The standard size hex key (wrench) for these screws is 3⁄32 inch, but a 2.5mm hex key is a few thousandths inch larger, allowing it to be carefully driven into the stripped recess. This gives one more chance to get the thing out, but be sure to soak and heat well first. Replace it with a Torx head fastener.
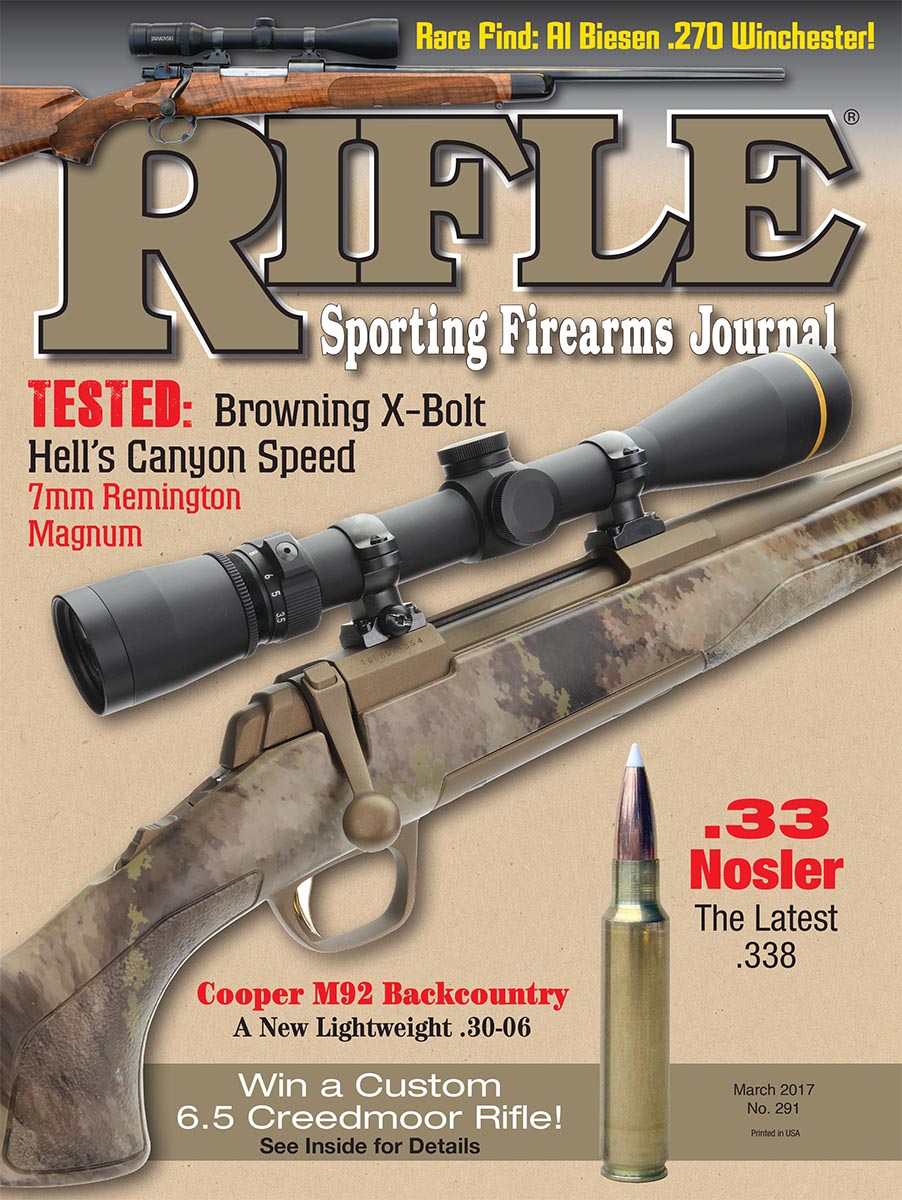
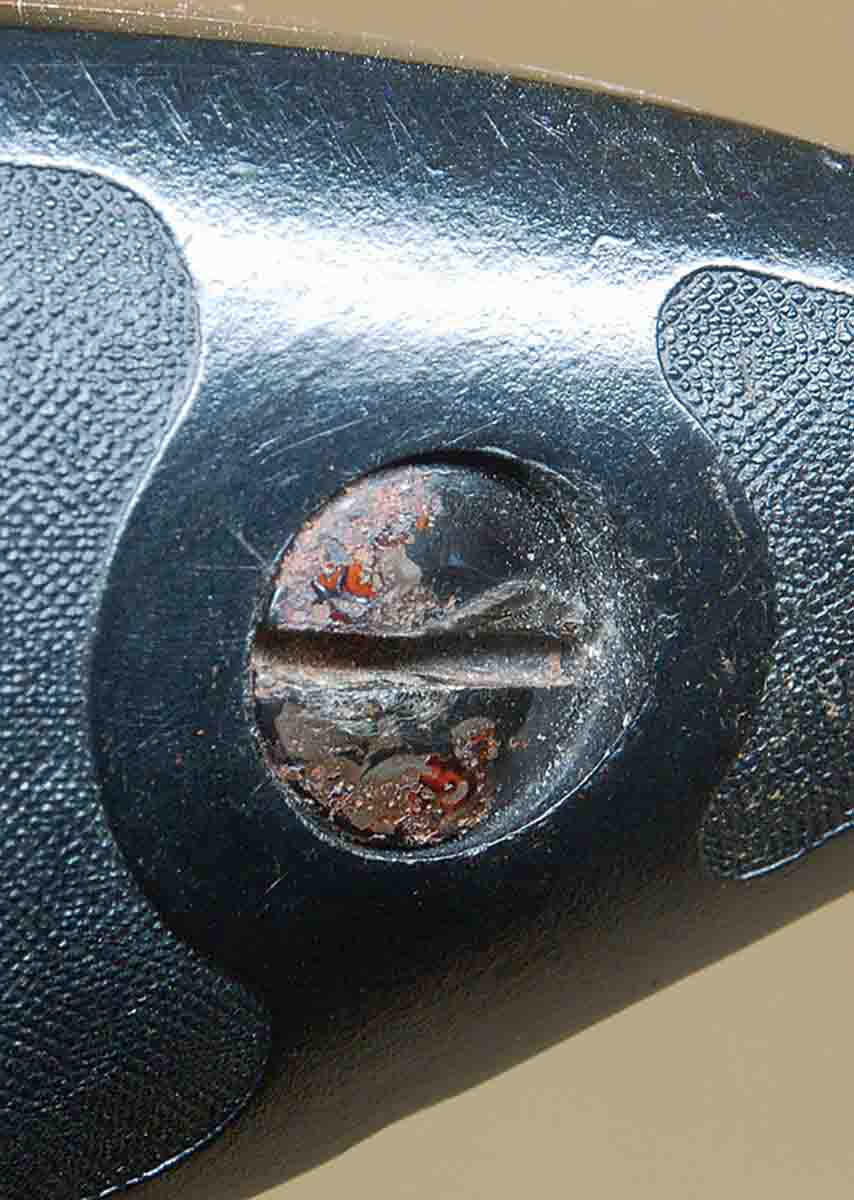
The final consideration is the common slotted screw. No one ever thinks to soak or heat these until the slot is hopelessly deformed. There are only a few possibilities here. One is to widen and deepen the slot using an engraving tool. Few hobbyists or even gunsmiths have the tools to do this, so the next best thing is to grind one of the removable tip screwdriver bits to perfectly fit what is left of the slot. Mount this in a drill press chuck, pad the press table to hold the rifle, then force the bit hard into the screw slot by lowering the chuck. Now turn the bit with a wrench. Yes, this is a two-person operation.
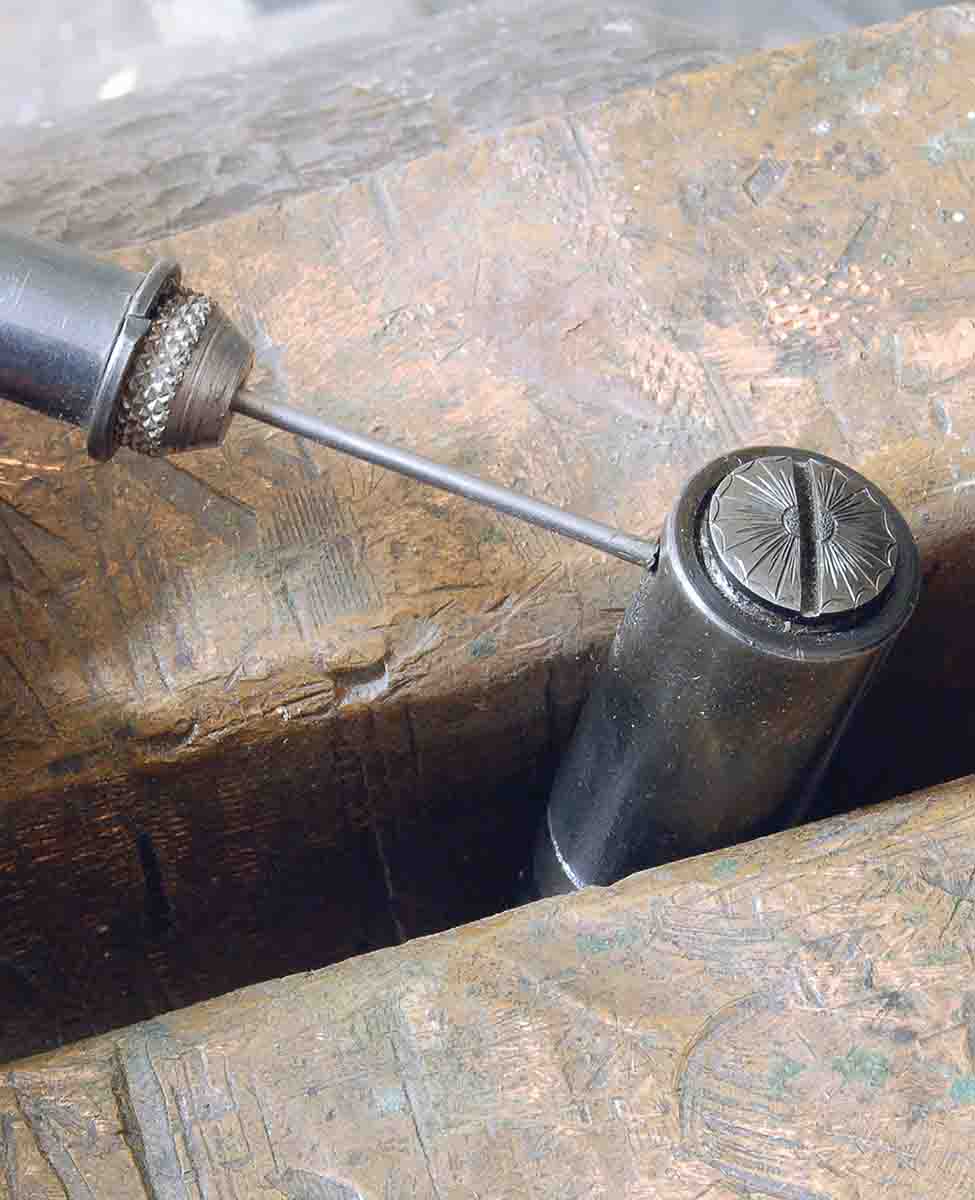
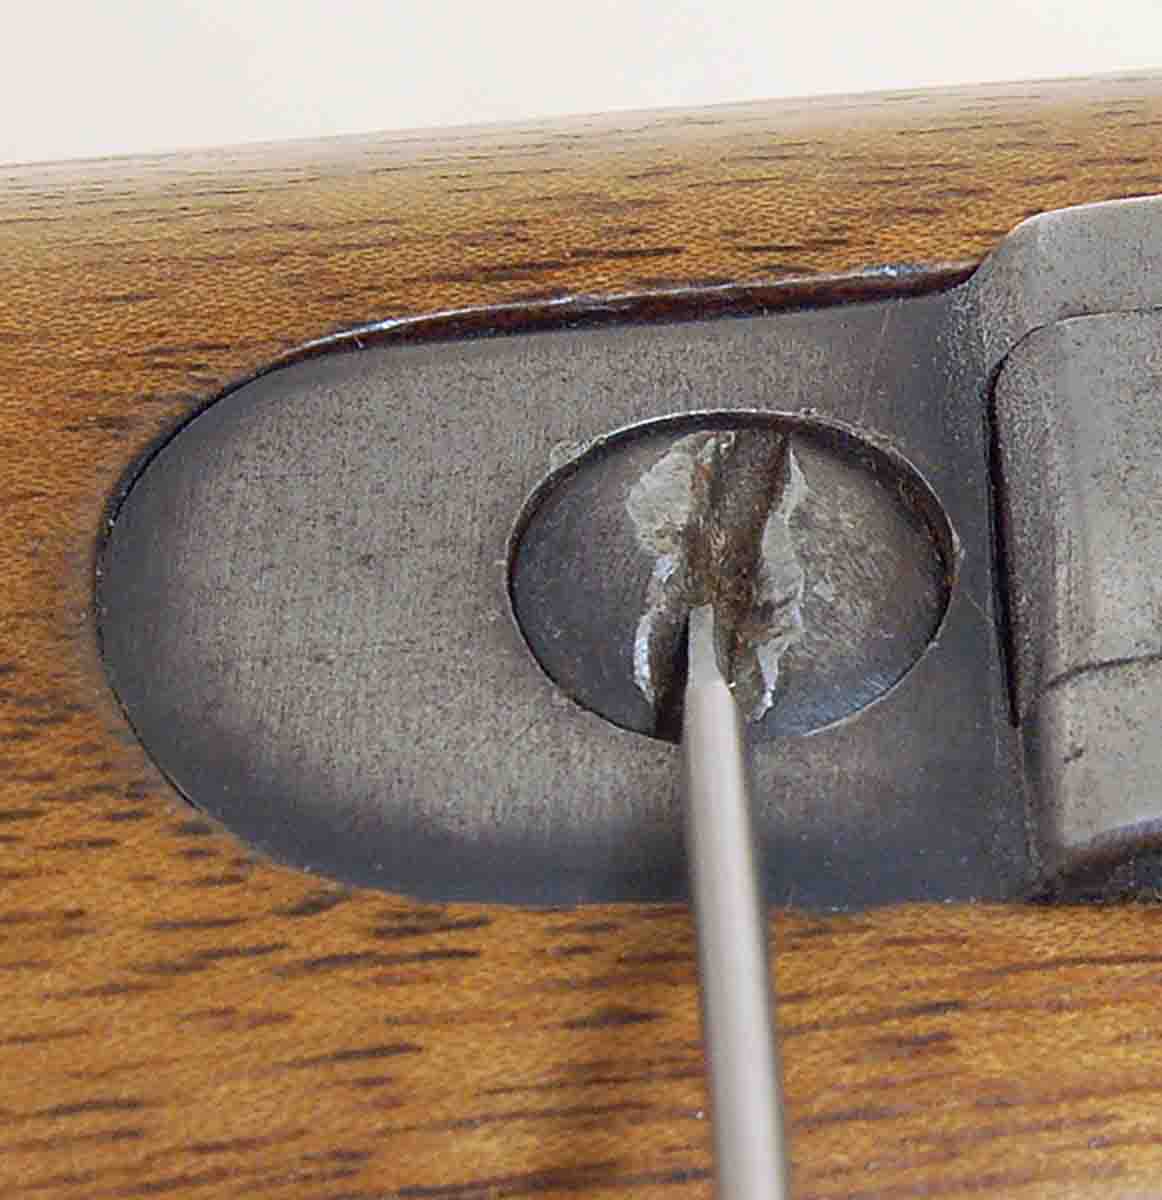
If the above does not yield the desired results, all that’s left is to grind the head of the screw out using a carbide burr in a Dremel tool. Grind almost to the edge of the recess, then pry out remaining metal with a dental pick. The photos show this being done to the forearm screw of a single shot in which the anchor block, screw and its threads were coated with glass-bedding compound – but no release agent! Neither heat nor oil could be used because of the wood. Removing that forearm should have taken 30 seconds. Instead, it required several hours plus making a new anchor screw.
Now difficult pins and screws are no worry. Given a bit of patience and the right tools, they are removable every time.