Login


Wolfe Publishing Group
    Menu

    Light Gunsmithing

    Repairing Iron Sights

    Savage 99 front sights (top to bottom) with blade missing, original sight blade in ramp and sight blade soldered in ramp – a real mess!
    Savage 99 front sights (top to bottom) with blade missing, original sight blade in ramp and sight blade soldered in ramp – a real mess!
    An original blade made from German silver sheet, which will be used to make a replacement blade as described.
    An original blade made from German silver sheet, which will be used to make a replacement blade as described.
    In the last column it was indicated I would continue correcting the questionable faddish features appearing on gunstocks over the years. Some examples couldn’t be found in time, so this will be done in an upcoming issue. Instead I’ll cover a plague of all shooters and collectors – damaged iron sights.

    Directly relating to this topic, I must mention a new reference titled American Rifle Sights by Tom Rowe. Time period is 1860 to 1930. There are 292 pages of open iron and target sights, 60 pages of scopes and 51 patent drawings. Nothing like this has ever been done or will be again (Rowebooks1@gmail.com).

    A sight blade has been fit and left high. It will be filed down as the rifle is sighted in.
    A sight blade has been fit and left high. It will be filed down as the rifle is sighted in.
    Note the rear sight arm is not touching the elevation slide (arrow), indicating the arm is bent and must be straightened.
    Note the rear sight arm is not touching the elevation slide (arrow), indicating the arm is bent and must be straightened.

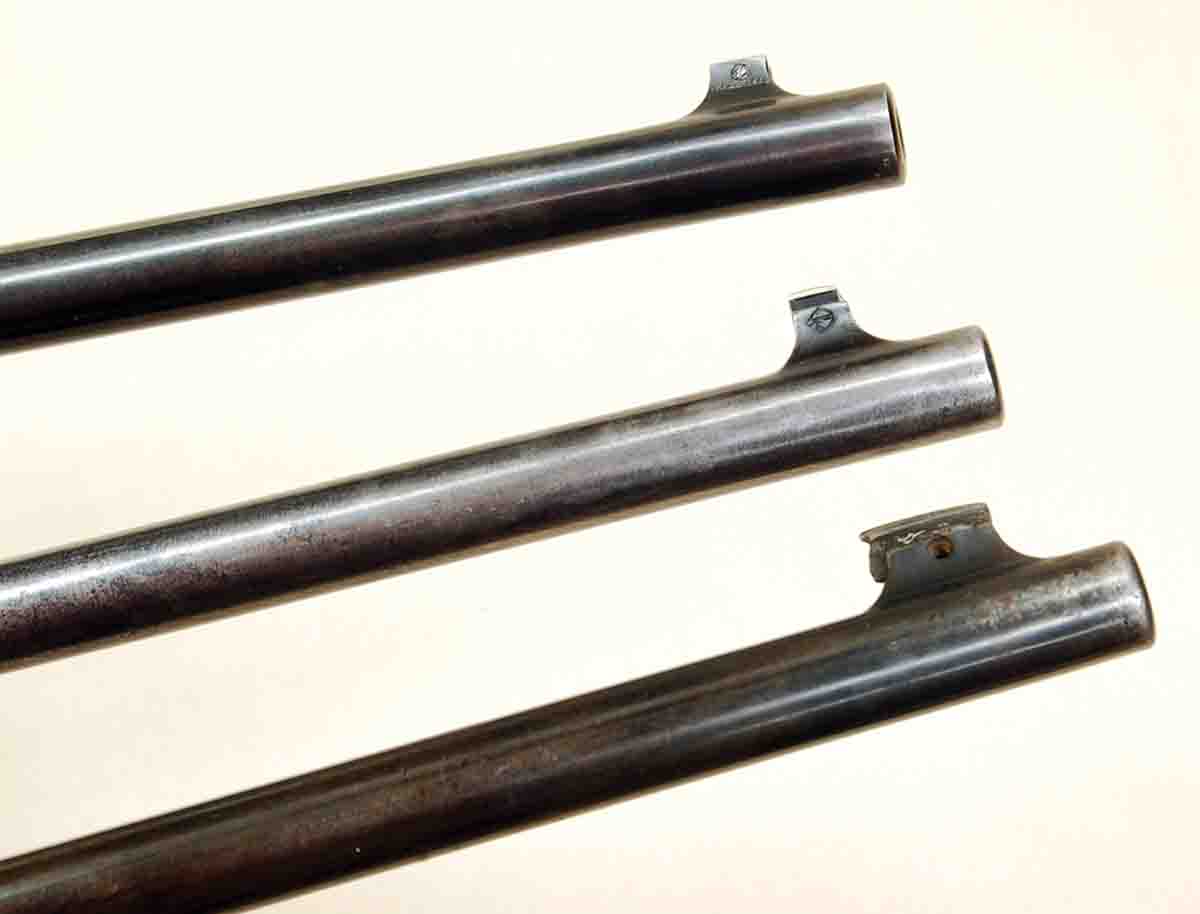
    Damage to iron sights is almost always caused by dropping the rifle or leaning it against something where it falls over onto a hard surface. This seldom breaks rear sights – they just bend and won’t adjust. Front sights are another matter. If the front has a fairly tall, unprotected blade, it will break off most every time. Such was probably the fate that befell the Savage 99 front sight shown in the photos.

    Another common problem is bent receiver sight arms on older .22 rimfires such as this Remington Model 510P.
    Another common problem is bent receiver sight arms on older .22 rimfires such as this Remington Model 510P.
    Savage 99 front blades are common repair jobs on early rifles and carbines having narrow integral front ramps. The blade is about .070 inch wide and fits in a groove milled in the ramp. It is held in place by a .078-inch diameter screw with a thread pitch just a tad coarser than a million threads per inch! Don’t lose it!
    Repairing the sight arm requires bending it using a wood block cut to fit the arm. Go slow.
    Repairing the sight arm requires bending it using a wood block cut to fit the arm. Go slow.

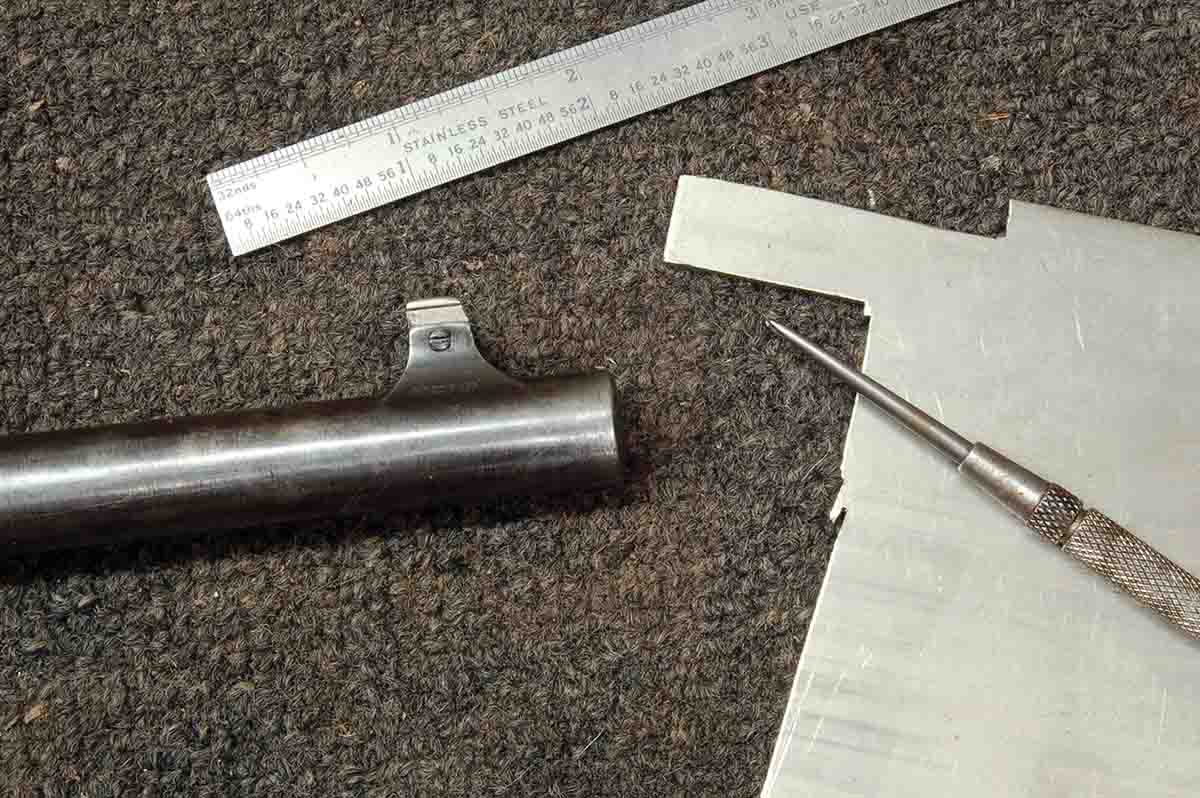
    Original sight blades are made from a white metal that appears to be German silver. An alloy of copper, zinc and nickel, this is available in small sheets from hobby shops or outfits that supply parts to builders of muzzleloading rifles. One thickness of sheet sold is exactly .070 inch, making it easy to cut out a sight blade. Just remember to leave the blade a bit longer than the ramp to allow a perfect fit and keep the blade attached to the larger sheet because it is easier to handle when drilling the screw hole. Concerning that small hole, drill it a bit high so the bottom of the blade can be filed off, gradually lowering it in its groove for a tight fit. The blade should also be left high so it can be filed down when the rifle is sighted in.

    After disassembling a sight completely, small tools like this 16-inch Crescent wrench are used to bend the sight  back to shape.
    After disassembling a sight completely, small tools like this 16-inch Crescent wrench are used to bend the sight back to shape.
    Next up is another commonly seen defect, this time affecting barrel-mounted rear sights. It is a bent sight arm caused by rough handling or catching on a gun case liner. When this happens, the elevation slide usually drops out and is lost. The sight shown is from a Savage 99 .22 Hi-Power and is constructed a bit differently so the elevator was still in place.

    Common sense would suggest the sight is tempered as a spring. Thus it wouldn’t stand much bending before breaking. Some are this way, especially early Winchesters. However, all steel is a bit “springy” even if it doesn’t have the carbon content or heat treatment to make it a spring. It can be bent a bit and not break.

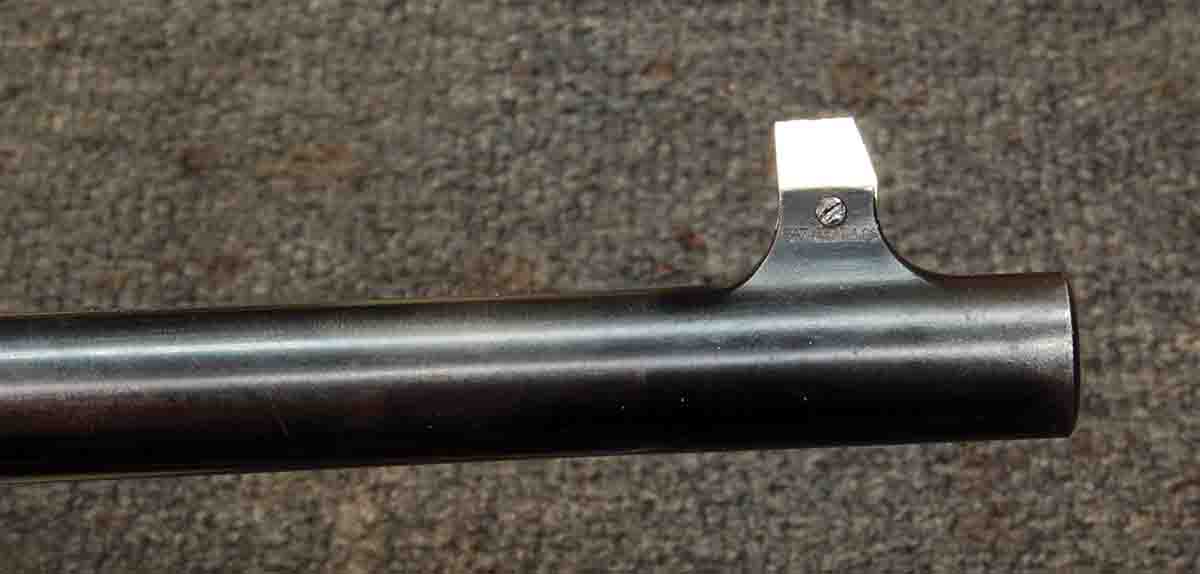
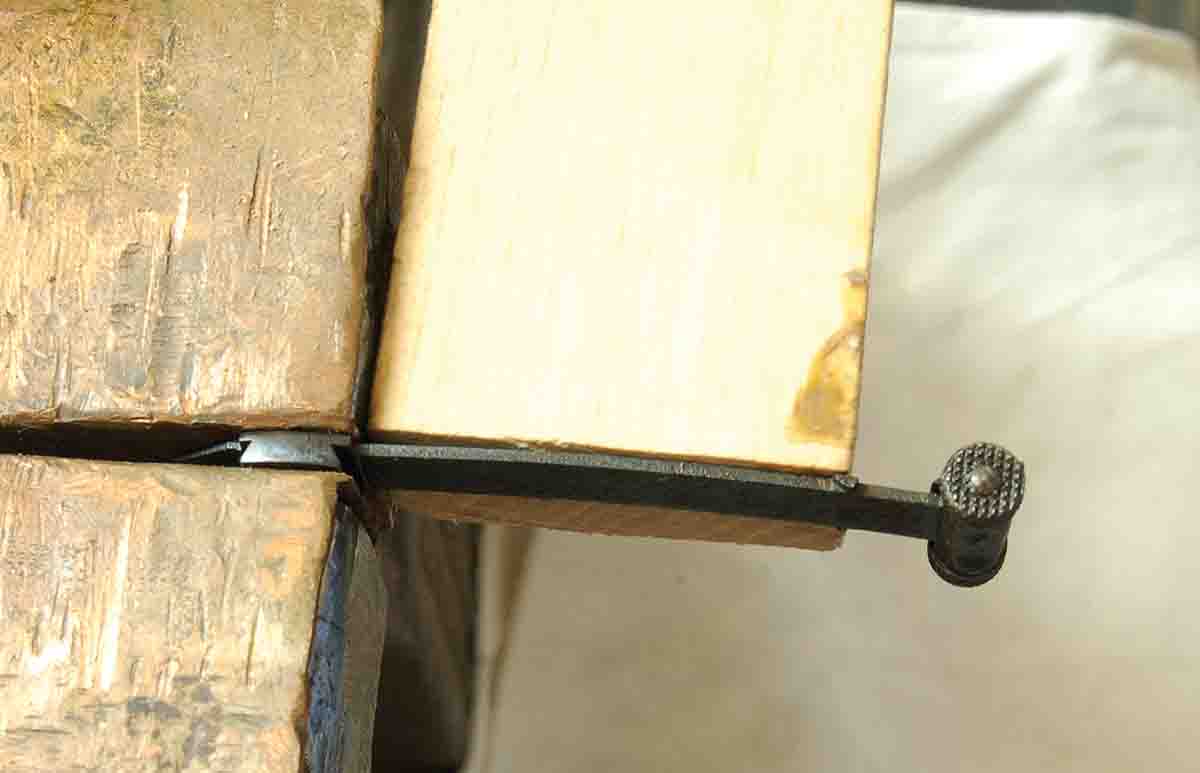
    The sight shown isn’t bent much, meaning it can be pushed back into shape and function perfectly. First the sight must be driven out of its dovetail (left to right), then only the dovetail portion is clamped in a vise. Use a piece of wood (no pliers) as long and wide as the sight arm to gently push the arm down straight with its base. Several attempts may be required because of spring-back. Go slow. Done in this manner, there should be no indication on either the sight arm or where it joins the dovetail base that bending ever occurred.

    An inexpensive steel machinist’s square indicates when a sight frame is straight.
    An inexpensive steel machinist’s square indicates when a sight frame is straight.

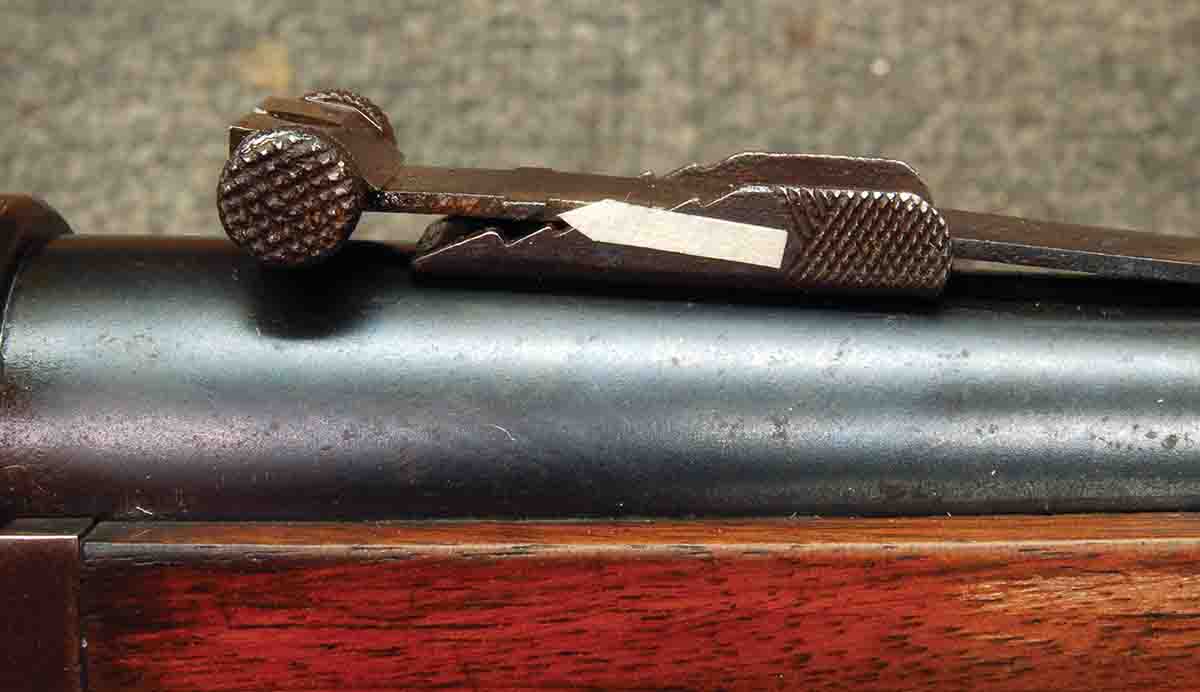
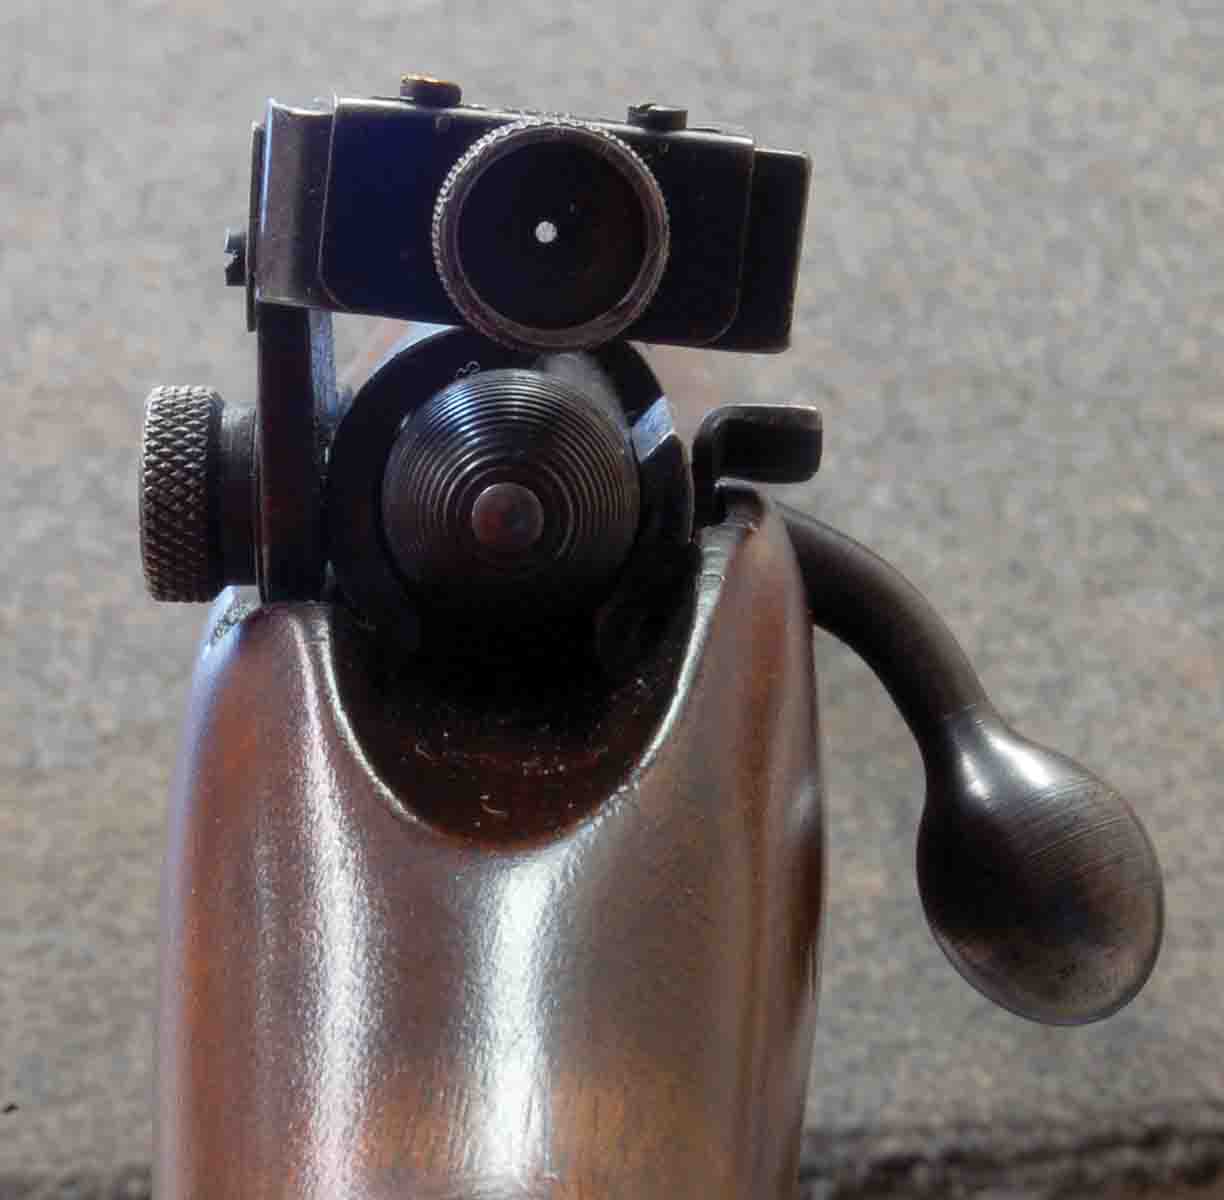
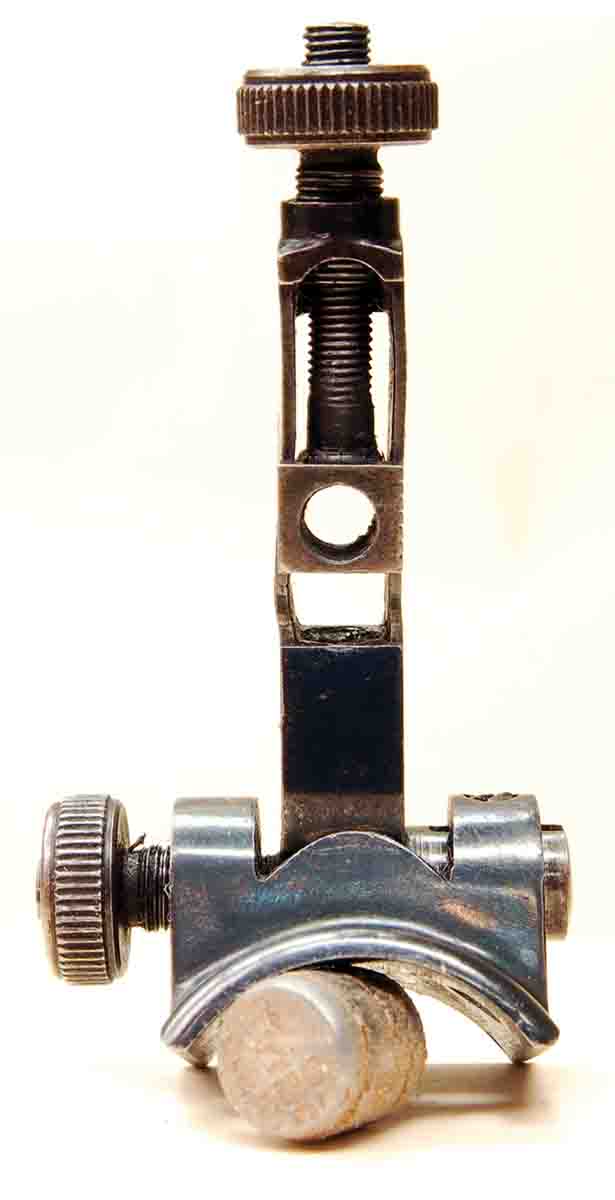
    A Remington M510P .22 rimfire with a bent factory receiver sight is next. These were inexpensive kid’s rifles. Winchester and Savage had similar products. The receiver sight is simply made from a .125-inch steel stamping. This design provides greater accuracy than a barrel-mounted rear sight before the days of dovetailed receivers and inexpensive scopes.

    It is difficult to understand how a short piece of steel of this thickness could be bent accidently, but boys will be boys, I guess. Repairing such damage is fairly easy. Proper small, delicate tools are required, however, like a 6-inch bench vise and 16-inch Crescent wrench.

    Removing the S-bend at the top and bottom of the elevation slot is done first using shims as explained.
    Removing the S-bend at the top and bottom of the elevation slot is done first using shims as explained.
    Fortunately, the side of the sight where it contacts the receiver is straight and flat. Any bending can be corrected by squeezing it in protected vise jaws and checked by a small steel machinist’s square. The windage arm of the sight is at exactly 90 degrees to the side. A tool that can support the entire arm (16-inch Crescent wrench) is used to bend the arm into place. Again, the steel square is used to check progress. The rifle is now ready for another child.

    Evidence of attempted repair – plier jaw marks.
    Evidence of attempted repair – plier jaw marks.
    The last example is more serious: a tang sight from a British Martini .22 rimfire target rifle. It attaches to the short, hollow tang (sometimes called the socket) at the rear of the action into which the buttstock fits. All these sights I have seen also have windage adjustments and are very well made.

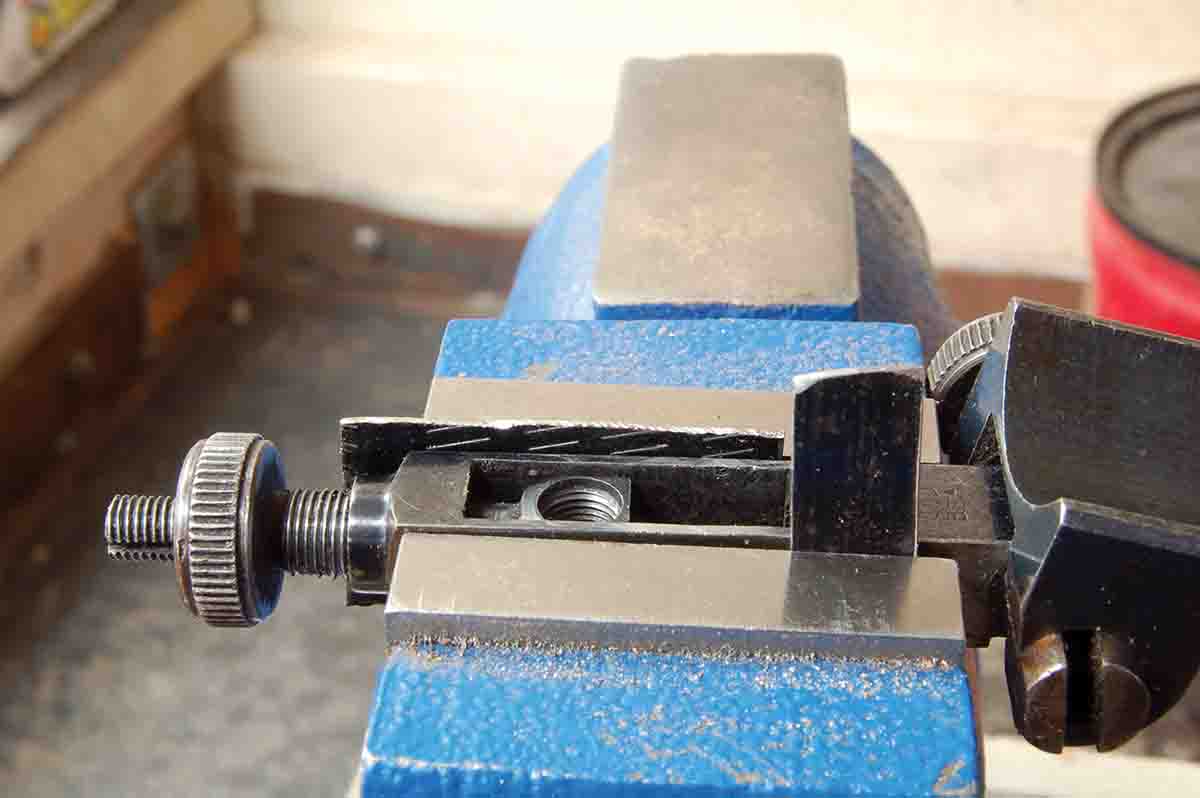
    The example here appears to have received a hard blow straight down on the elevation adjustment that protrudes from the top of the sight. Bending occurred where the thin sidewalls join the solid top and bottom of the window in which the elevation slide moves. The sidewalls bent in one direction at the top of the window and the other direction

    A steel punch is filed to a couple thousandths inch wider than the elevation slot and tapped in to iron out what is left of the S-bend. The elevator now moves freely.
    A steel punch is filed to a couple thousandths inch wider than the elevation slot and tapped in to iron out what is left of the S-bend. The elevator now moves freely.
    at the bottom, collapsing and forming a shallow S-shaped bend. Deformation was only about .030 inch, more than enough to lock-up a precision mechanism. Fortunately, the windage adjustment wasn’t harmed.
    This BSA tang sight for a Martini .22 target rifle has been damaged by dropping the gun, bending the thin sidewalls and preventing elevation adjustments.
    This BSA tang sight for a Martini .22 target rifle has been damaged by dropping the gun, bending the thin sidewalls and preventing elevation adjustments.

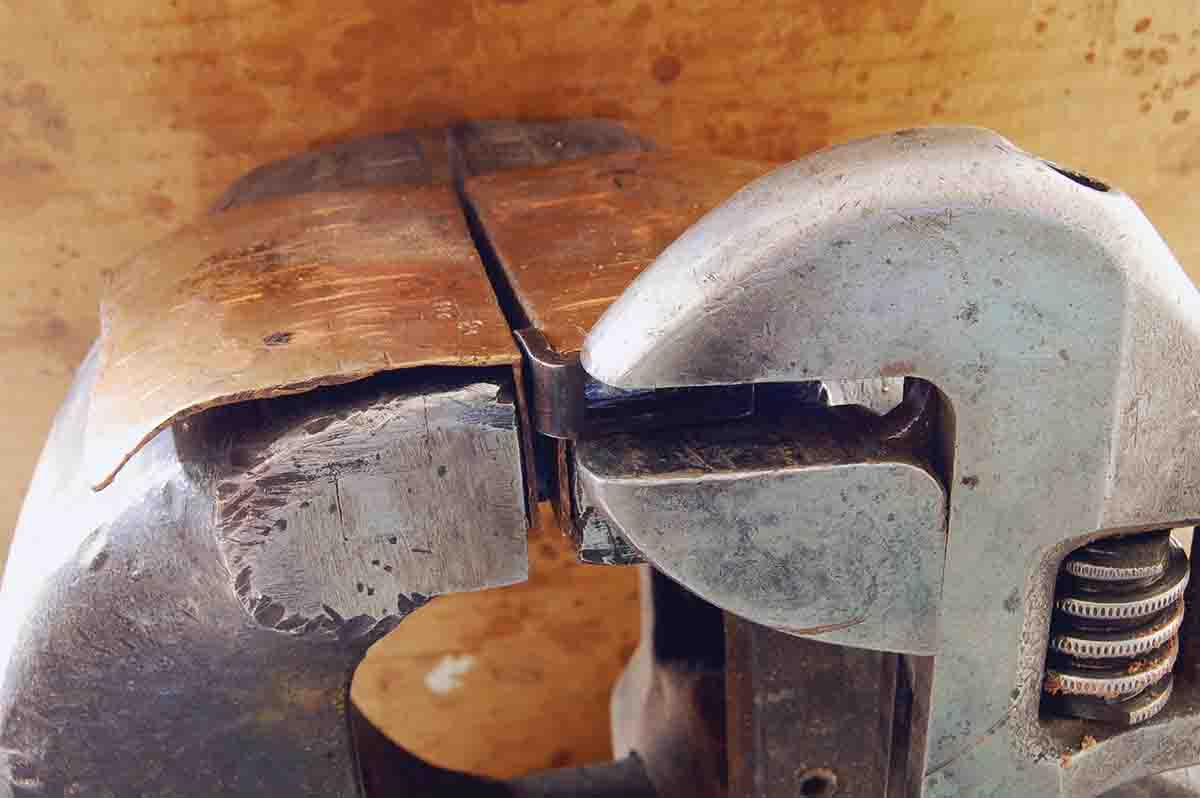
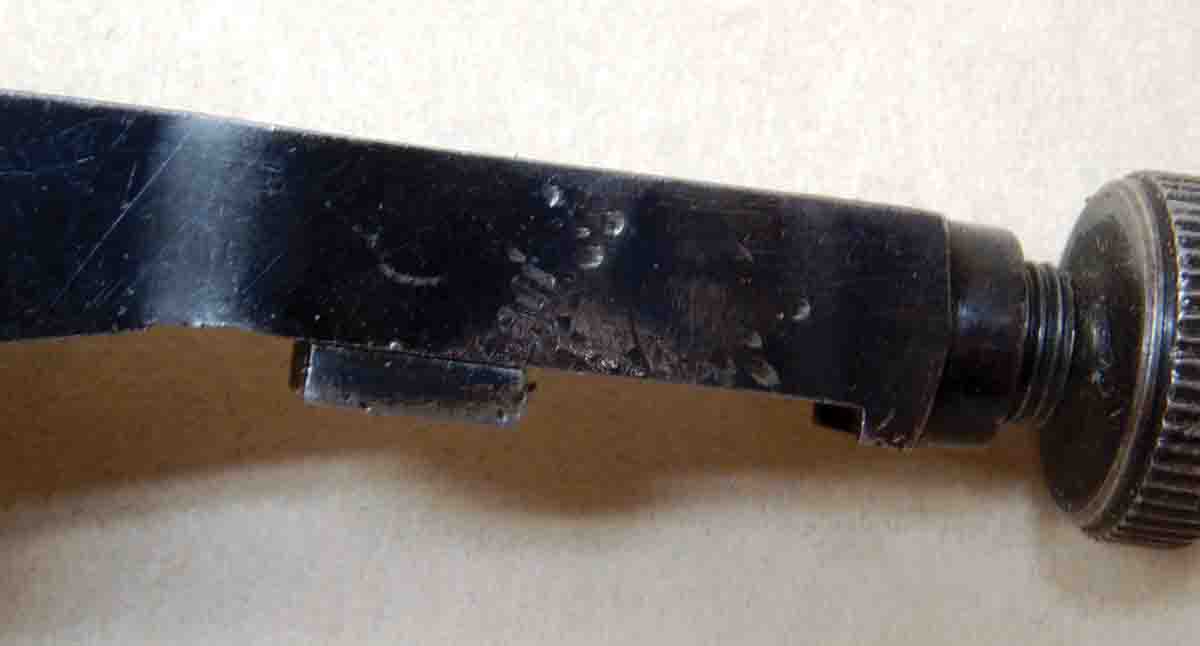
    Apparently, the previous owner tried to repair the damage with pliers, leaving jaw marks. These can’t be removed. Bending the sight back into shape is the only solution. For this a small, smooth-jawed vise is needed. The one shown was purchased from Harbor Freight several years ago for less than $20. A more detailed description is in this column in Rifle No. 271 (November 2013). It is the most useful tool in the shop for holding small parts.

    Bending is done using small shims made from commercial steel shim stock or steel banding material. Shims are placed against the sight on the bent areas. Closing the vise straightens the deformation. This takes a bit of practice, but it is really intuitive; you have complete control over the operation and it’s impossible to cause more damage, unlike using a hammer and pliers. Sights like this are made from soft steel and will stand a lot of gentle bending. Use the previously-mentioned machinists square to check progress.

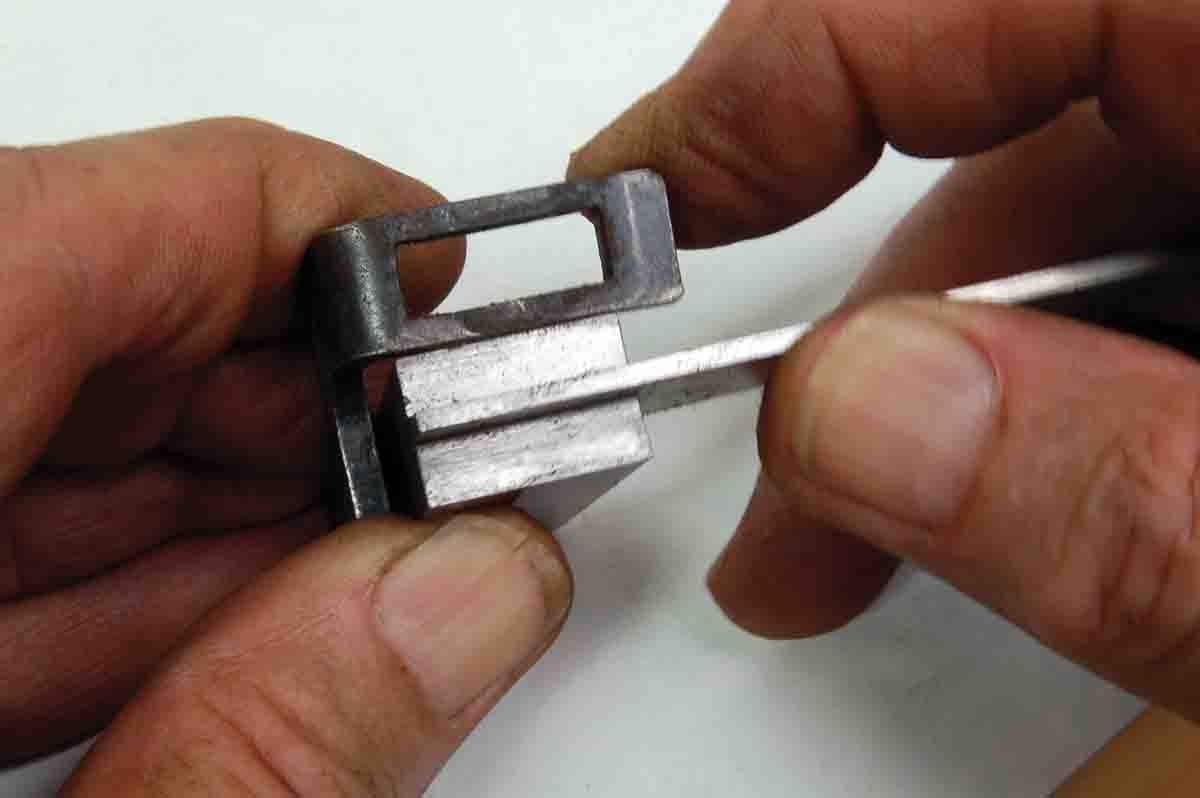
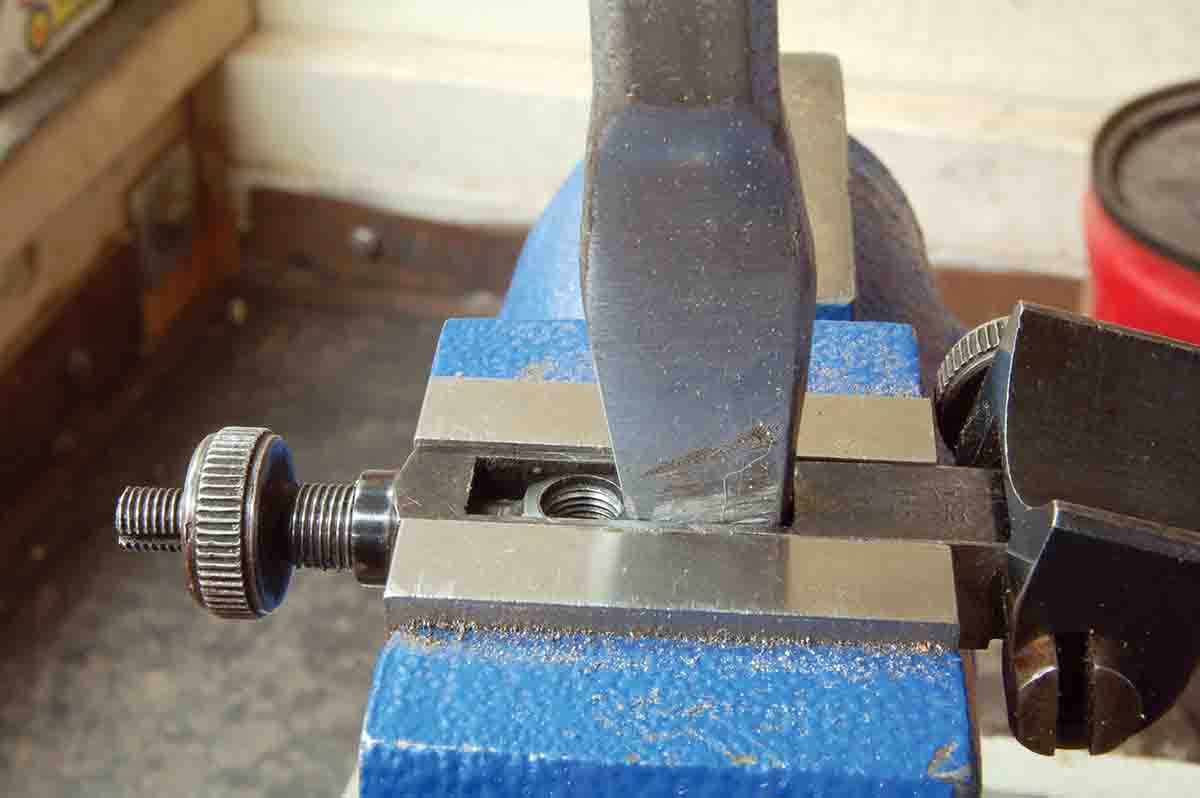
    A photo shows the sight in the smooth vise jaws and an old chisel that has been machined to exactly fit the opening in the sight’s center being tapped through that opening. This removes the part of the S-bend occurring inside the elevation window.

    The sight now moves freely to its highest and lowest settings. Both a sight and a neat old rifle are operational again.

    Wolfe Publishing Group