
Down Range
Moving Iron Sights
column By: Mike Venturino | July, 22
A rifle not zeroed is completely useless in so far as hitting anything specific. My rifle shooting career started with modern optical sights. Getting them mounted and zeroed is a relatively easy chore, which I’ve accomplished with many dozens rifles and scopes. However, sometimes one’s interests take a different path. For decades my primary rifle shooting has been with metallic iron sights. Ironically, zeroing iron-sighted rifles can be more complicated than scopes, because the sights themselves must be physically moved.
First, there’s the matter of proper direction. This rule is simple. Front sight movement is in the opposite direction from which you want bullets to land, and rear sight movement is in the same direction to which bullets are intended.
After that, zeroing iron sights might get complicated. How much sight movement is necessary? I’m sure someone very well versed in mathematics could look at barrel length and distance to target and determine how much sight movement is needed for zeroing. I’m in no way mathematical, being more of a shoot-and-see sort of rifleman.
Always, I start the procedure with targets that are big and close. Big as in a piece of paper about 24 inches square and close as in 25 yards. Several times, I’ve tried starting with a target at 100 yards. Unless lucky, many shots are wasted just getting the first bullet on paper.
Years ago, a friend gave me great advice. He told me that when I start zeroing a dovetailed sight, it is wise to know how far it moved. For this, he said to put a piece of masking tape forward of the iron sight. Then, apply a centered pencil mark. That way, the amount of movement can be judged.
Here is one very important factor; exactly what load will be used for zeroing? My opinion is that choosing the exact load should be of primary importance. It makes no sense to zero for one load and then decide later another is better. (This is where the “standard load” concept comes into play, but that’s fodder for further columns.)
Along the way, 100 yards has become the normal zeroing distance for rifles. However, military ordnance officers in bygone times have had vastly different ideas. For example, in the book, The American Springfield 1903 Rifles by Lt. Col. William S. Brophy, battle zero for that famous rifle was 547 yards (500 meters). Contrarily, my preference is for 03s/03A3s to be dead-on at 100 yards with loads giving 2,700 feet per second (fps) with 150/155-grain bullets. Most military rifles have sights that are easily elevated incrementally, so settings for distance can be recorded with a bit of shooting.
With iron-sighted hunting rifles, I also want a dead-on zero at 100 yards. I never figured on shooting at game with iron sights past that distance. Most of my lever-action shots have been at closer ranges, so a dead center hold on the critter’s body with 100-yard zero won’t be a miss.
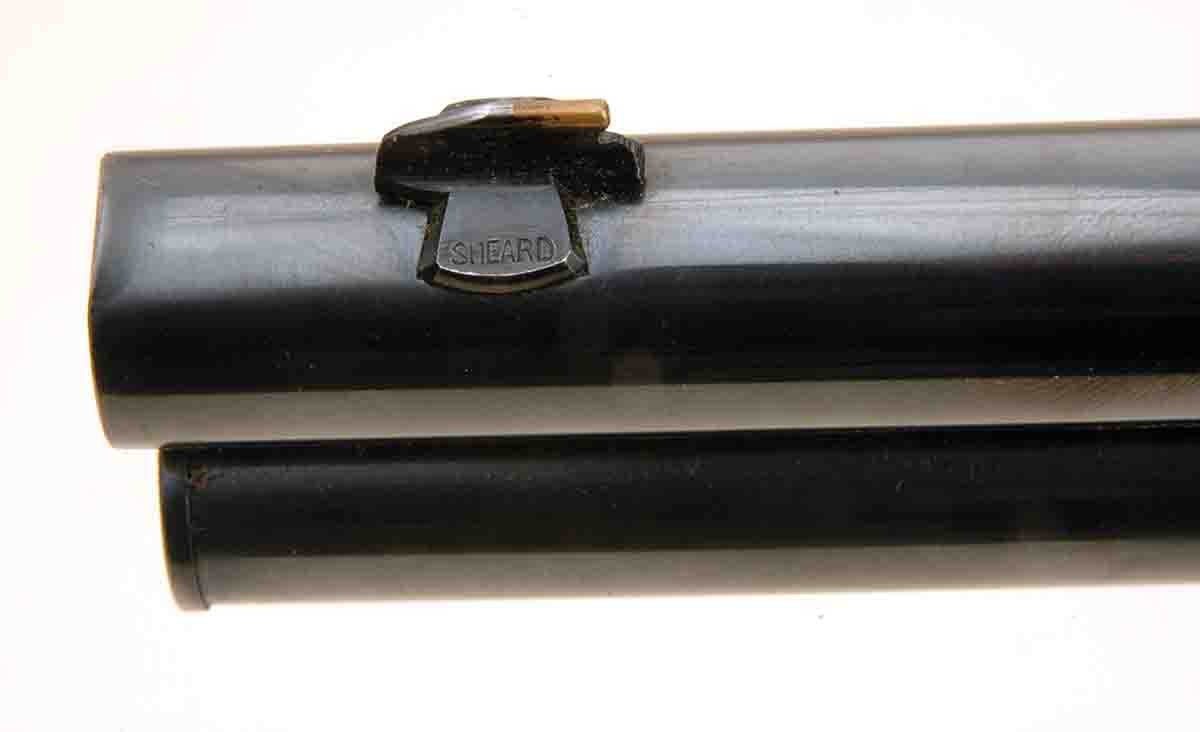
Let’s use Winchester’s lever guns for an example. An 1899 Winchester catalog reprinted by Wolfe Publishing Company in the 1990s is an excellent source of information. Therein, is a chapter titled “Sighting Winchester Rifles.” Explained is that although every rifle was “lined up” at the factory’s range, variances in manufacturing and in peoples’ eyesight and/or shooting styles could result in un-zeroed rifles. Therefore, corrections of both front and rear sights were done by “drifting” them in their dovetails. Carbines all had dovetailed rear sights with fronts sight blades pinned on a post. The pin can be driven out and different heights of blade installed.
Elevation changes are more problematic. Low point of impact means a front sight is too tall and high point of impact means it is too short. Not being an artist with a file, I keep an assortment of various replacement sight blades on hand. There are plenty of choices available from gunsmith supply houses to fit just about any situation encountered. Those for vintage military rifles can often be found on internet websites. Proof that the replacement option was popular to past iron-sight shooters is that many vintage rifles are encountered with brass, ivory or even gold-bead front blades.
Let’s get back to the idea of actually moving iron sights. Winchester also stated in that old catalog that moving the sights must be done very carefully. Brass punches are common but even they should not be pounded excessively. Iron sights are not made from hardened steel. In my enthusiasm, a couple of times I’ve peened their edges even with a brass punch. If a sight is recalcitrant about moving, as often is the case with vintage rifles, DO NOT just get a bigger hammer. It’s better to douse the sight in penetrating oil for a few days.
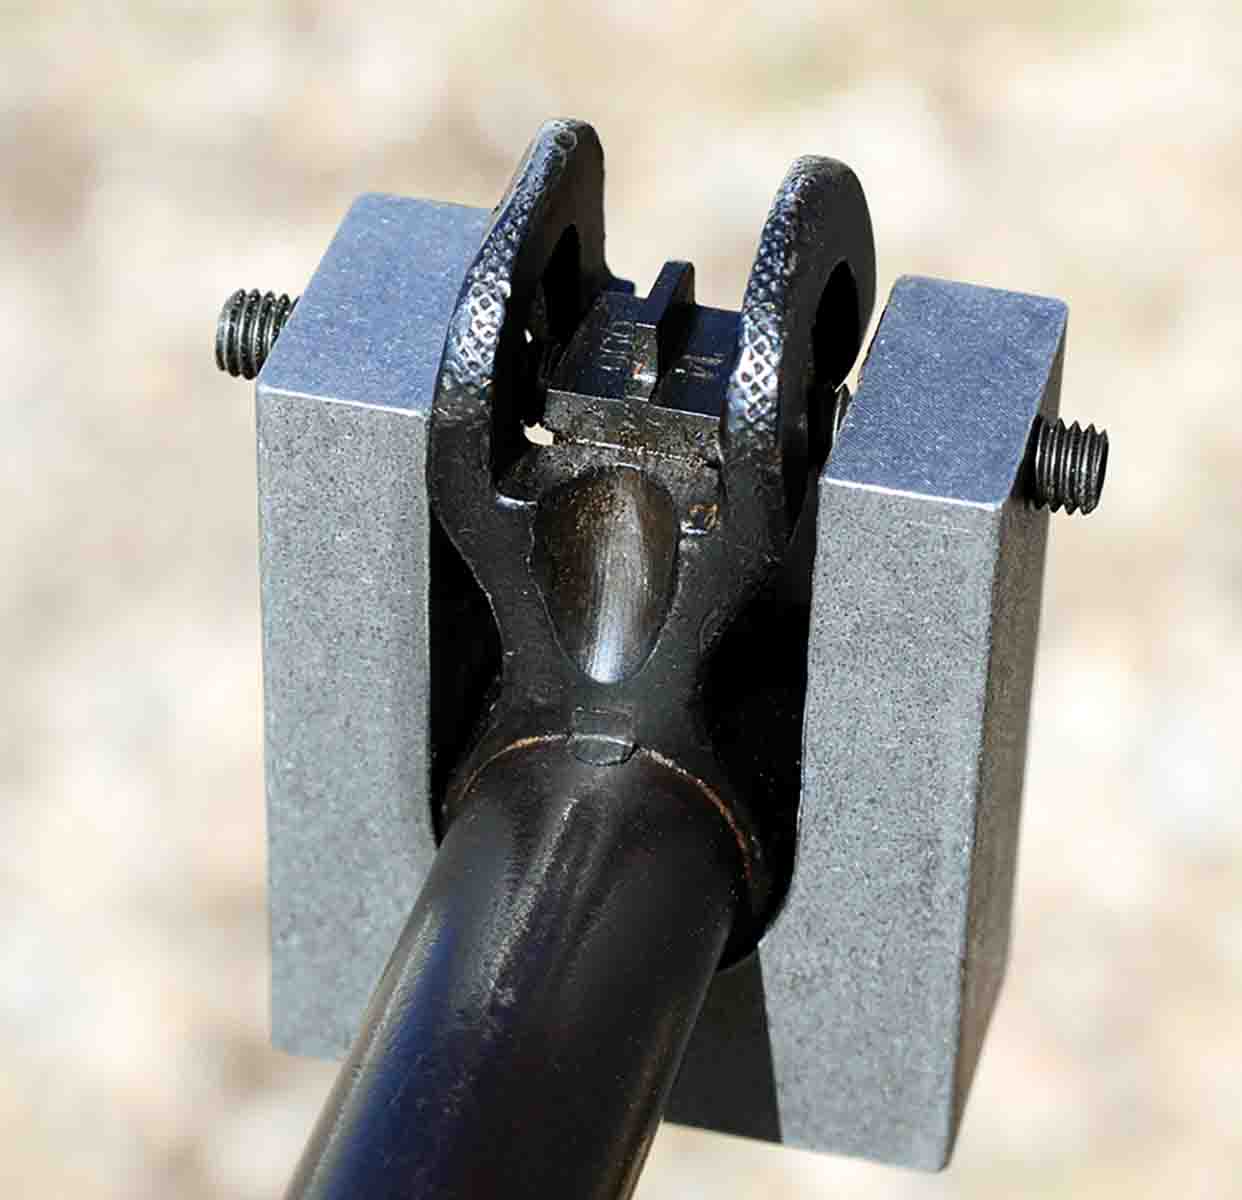
The most precise manner I’ve found to adjust front sights for windage have been with blocks with threaded screws that fit over barrel and sight. Mere hand pressure will turn the screws. Such blocks were part of military armorer’s kits. One that I have fits a U.S. Model 1917/British Pattern 1914 rifle and another fits most military Mausers. Mounting the blocks on rifle barrels takes but a moment and incredibly small movements can be made with them
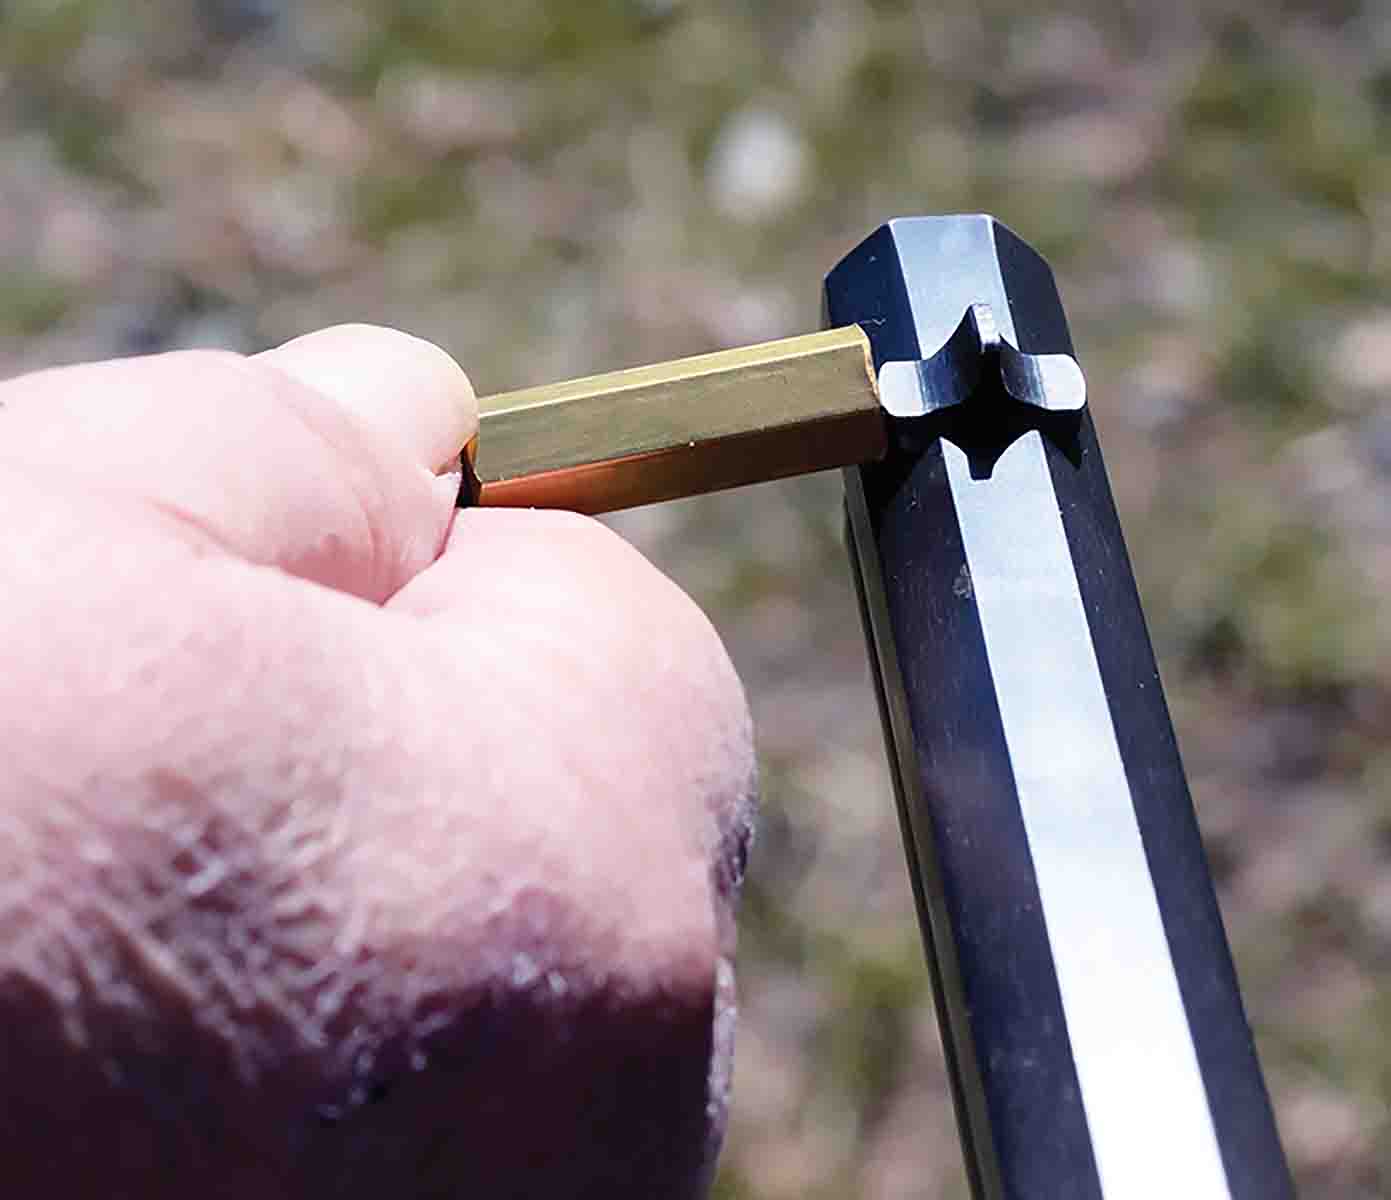
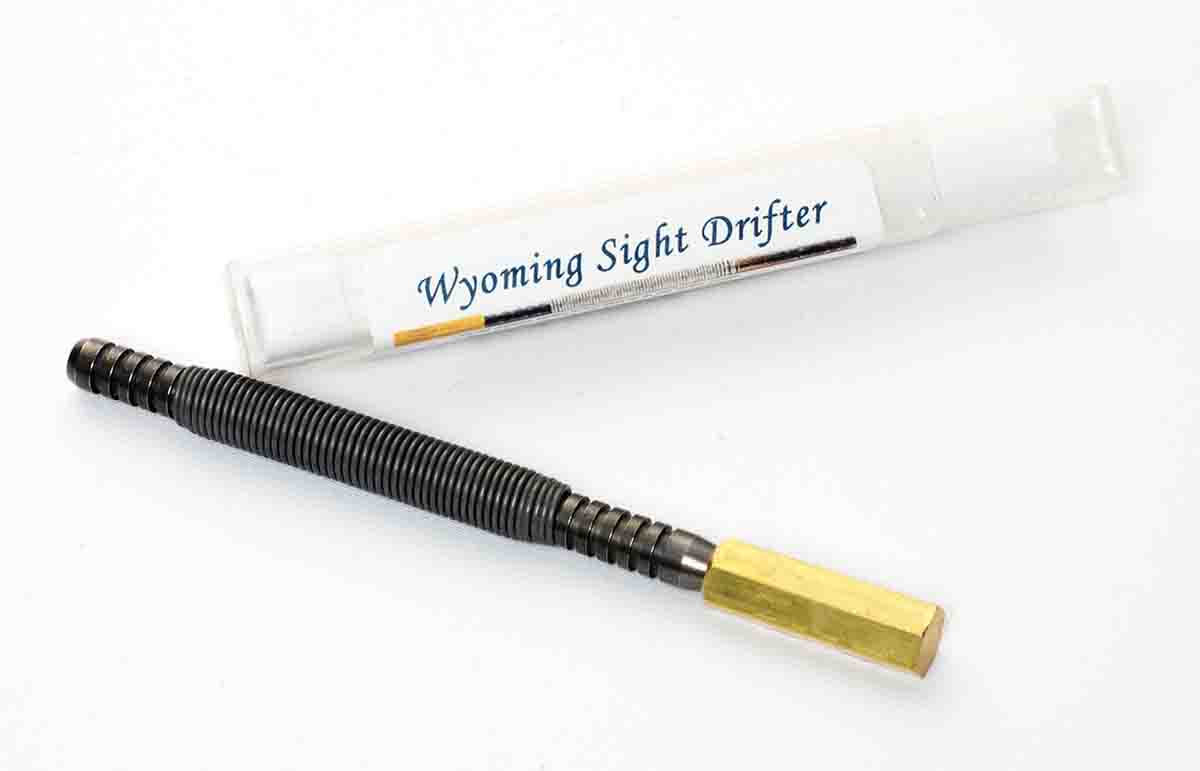
Another tool in my kit has become indispensible. It’s the Wyoming Sight Drifter consisting of rod with brass end. Over the rod is a strong spring. To move the sight, merely place the brass against the sight, compress the spring and let it fly. It’s amazing how much a little spring compression can move a dovetailed sight. Most recently, I bought a Cimarron Model 1873 .32-20 saddle ring carbine. At 25 yards, it put bullets a couple inches left of center. The rear sight’s screw was loosened, a slight whack was given with the Wyoming Sight Drifter tool and bullets then hit center. This tool is a great idea and has made the hammer and brass punch method obsolete. Wyoming Sight Drifters reside on my shooting bench, on my gun vault’s workbench and in my traveling shooting kit.
After many years of fiddling with punches and hammers, I now know that zeroing iron sights can be a minor chore when using better tools.