Login


Wolfe Publishing Group
    Menu

    Light Gunsmithing

    Making Simple Tang Sights Part I

    Project rifles that used simple tang sights (top to bottom): Stevens M44, Hopkins & Allen, Stevens M1915 Favorite action.
    Project rifles that used simple tang sights (top to bottom): Stevens M44, Hopkins & Allen, Stevens M1915 Favorite action.
    The reason for interest in tang sights may be debatable, but among collectors it is certainly a rarity. The number of sporting rifles originally carrying tang sights is small, even though the top tangs of virtually all single shots and lever actions were drilled for such sights until at least World War II. Then too, many of these sights have been removed by later owners (easily seen by blue wear or missing plug screws) because they didn’t understand the sight’s proper use. I have even been told that some auction companies remove tang sights to sell as a separate “lot,” putting profit ahead of preserving an historical artifact. It seems humans are continually finding new ways to demonstrate their ignorance.

    Work begins with a couple pieces of scrap steel.
    Work begins with a couple pieces of scrap steel.
    Then there are single-shot target/match rifles. One of these on a gun show table will cause everyone walking past to stop for a look. Even if the rifles have no engraving or fancy wood, their styling is much more than simply “form follows function.” German and Swiss Schüetzen rifles, 1,000-yard, black-powder target arms, American 200-yard offhand rifles and
    To determine base screw spacing, back out the plug screws a bit, measure across them, then subtract one screw diameter.
    To determine base screw spacing, back out the plug screws a bit, measure across them, then subtract one screw diameter.
    .22 rimfire gallery rifles have an attraction that many feel but can’t describe. Perhaps it is that these objects evoke an earlier time when we made beautiful things; buildings, furniture, art and, yes, firearms. This is far different from today when our progeny strives for meaningless college degrees, during which they are taught that it grants them the right to dismantle and destroy.

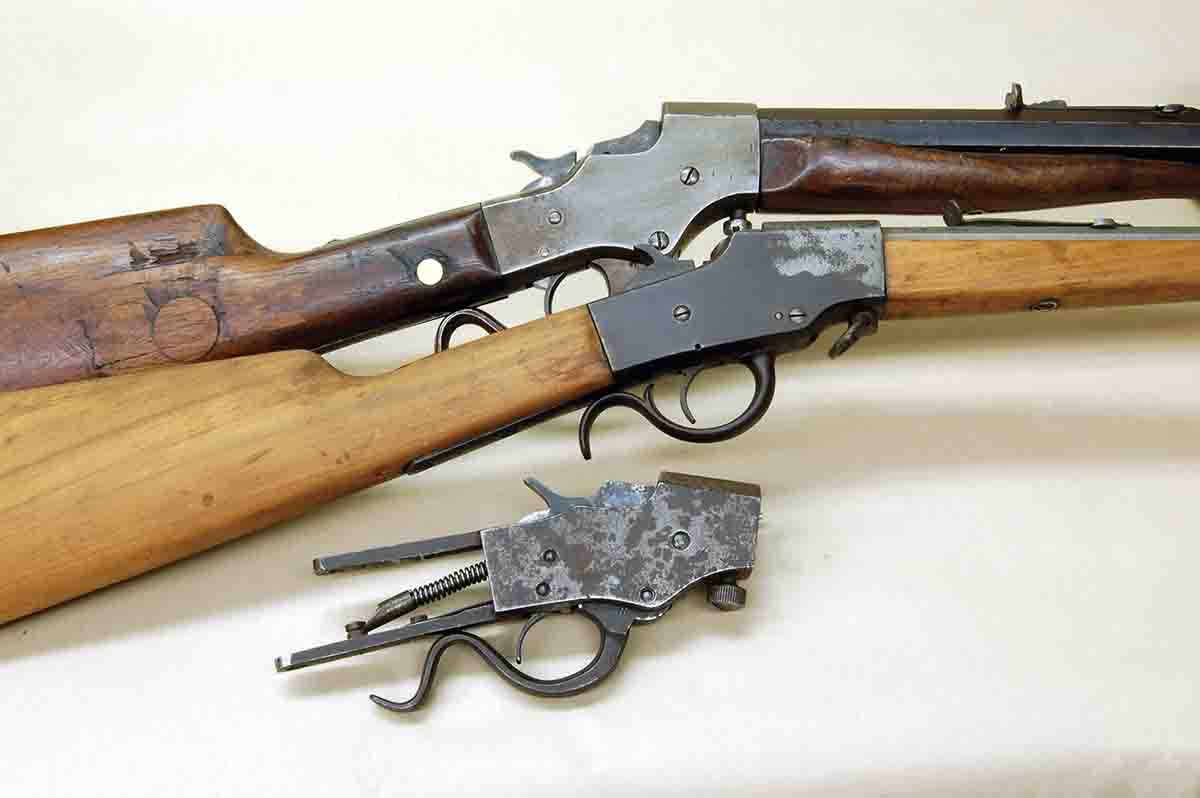
    Our interest here is another rifle that could use a tang sight – the inexpensive .22 rimfire single shot of other than bolt action. These sights, however, were nothing like the precision variety used on target and centerfire hunting rifles. Instead, designs were simple in the extreme, machining quite crude and parts sometimes were sheet metal stampings. Makers of the rifles seem to have also made the sights, so there are lots of them.

    It may seem strange that anyone purchasing a cheap .22 rimfire would want to add the cost of another sight, but the owners knew exactly what they were doing. It is folks today who

    Determine the minimum height of the aperture by placing a straightedge over the open sights and measuring up from the tang.
    Determine the minimum height of the aperture by placing a straightedge over the open sights and measuring up from the tang.
    don’t understand the purpose of a tang sight on hunting rifles.

    Tang sights were never intended for constant use. The sight was to be folded down on the tang when hunting to prevent bending or breakage. Open sights served for normal ranges, say 40 yards, until trajectory caused the bullet to hit low enough that the sights covered the target and impact point was just a guess. The tang sight was adjusted so the bullet hit on top of the front sight at the farthest distance the rifle would be used, about 100 yards for standard velocity .22 Long Rifle rounds.

    The base and staff are drilled for the attaching screw.
    The base and staff are drilled for the attaching screw.
    Holding a bit low was obviously required for ranges under this, but the target could always be seen.

    The efficiency of this system is proven by one of my Stevens Favorites. Its pitted barrel had a liner installed years ago. A simple tang sight was then made for it. A few squirrels are taken every season just for the fun of using the old rifle – and they taste better than any shot with plastic guns!

    How many of these little rifles still exist is unknown, but they are a common sight at gun shows. The cheap tang sights, however, are gone for good, but we can change that because they are simple to make. In this column, one that requires only a drill press and file work will be discussed.

    Metal required consists of a 1⁄2x1⁄2-inch piece of cold rolled steel long enough to be attached to the tang by the existing tapped holes. A 3-inch length of ¼x½-inch cold rolled is needed for the elevation staff. Cold rolled steel is used because of its fine surface finish and dimensional accuracy.

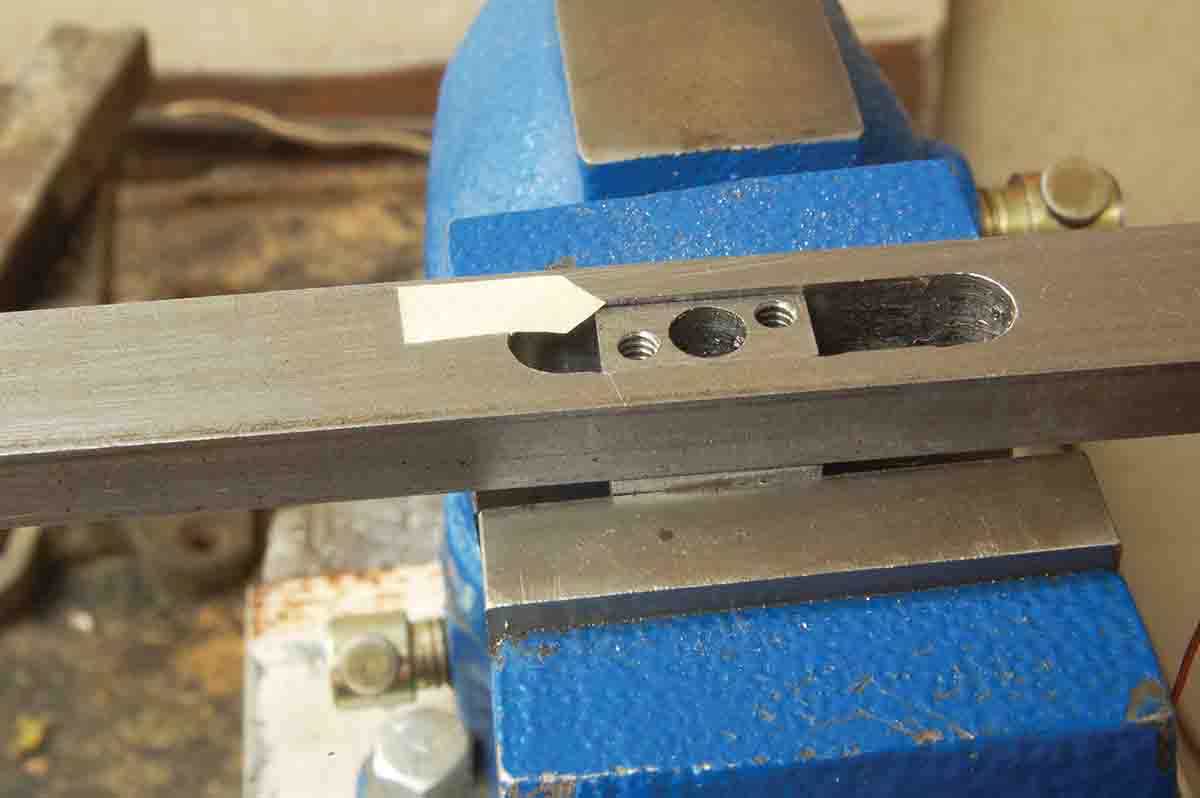
    The first operation is to drill for the screw that will allow the elevation staff to fold down. A standard 6x32 tpi was used here because the size is common and will be found in anyone’s collection of machine screws. The hole is drilled in the center of the half-inch square base and .200 inch down from the top surface. Use a No. 36 tap drill all the way through, then come back and go halfway using a No. 29 clearance drill. Don’t tap this hole just yet. Also, drill through the elevation staff .200 inch from one end using the clearance drill.

    The elevation slider is completely shaped, but not yet drilled.
    The elevation slider is completely shaped, but not yet drilled.
    Now the filing begins. There is a lot of extra iron on the base. Both ends are hacksawed down, leaving a post in the center .400 inch wide and .125 inch thick on the ends for the screws
    Making a slot in the sight staff begins by drilling out as much steel as possible.
    Making a slot in the sight staff begins by drilling out as much steel as possible.
    that will fasten the sight to the rifle’s tang.

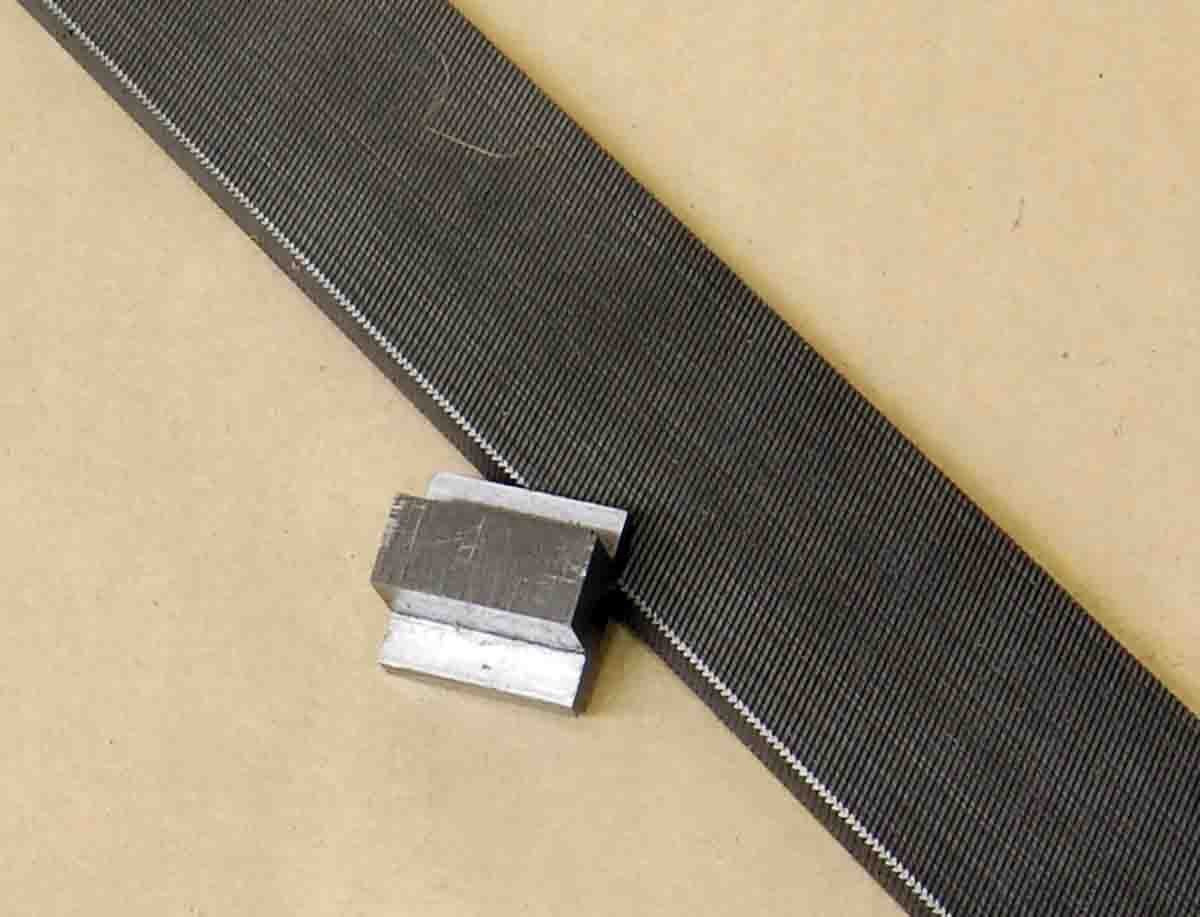
    Rather than slot the base for the elevation staff at this point, the end of the staff is shaped first because it is easier to file flat and square, then fit the base slot to it, rather than the other way around. File each side down .125 inch, the shoulder being .200 inch above center of the screw hole.

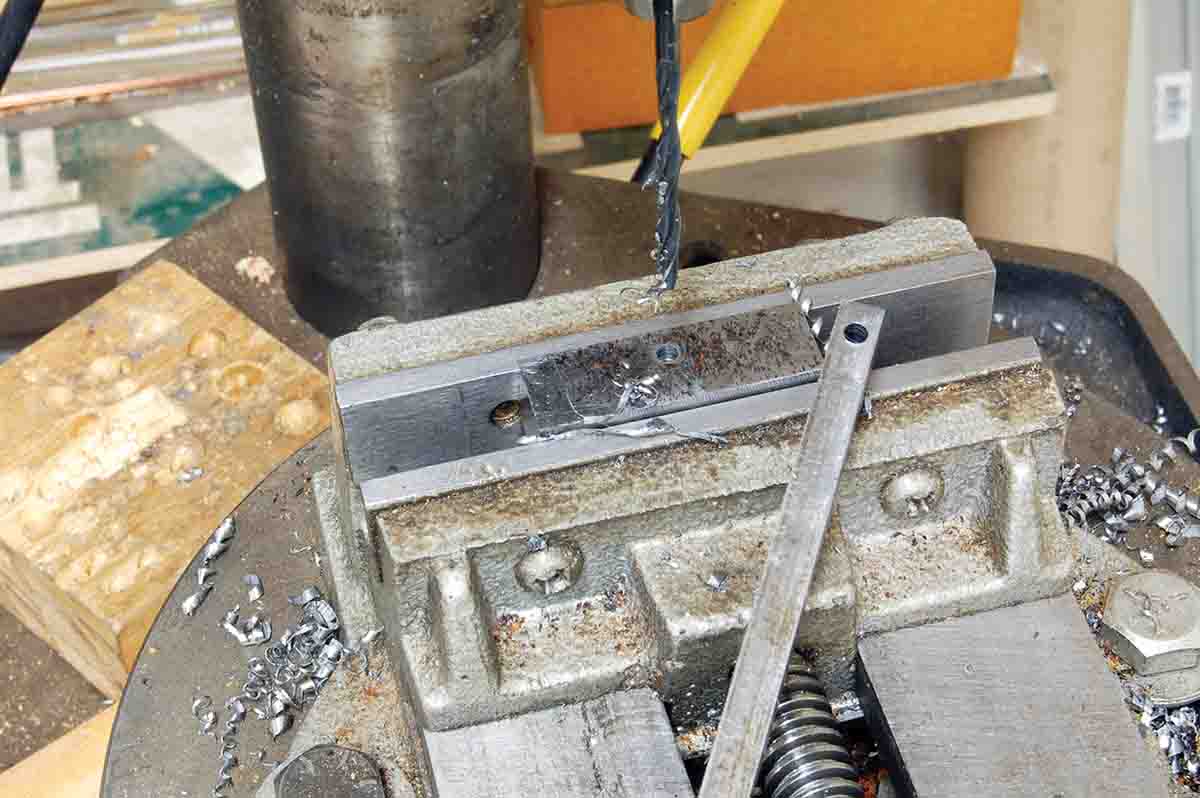
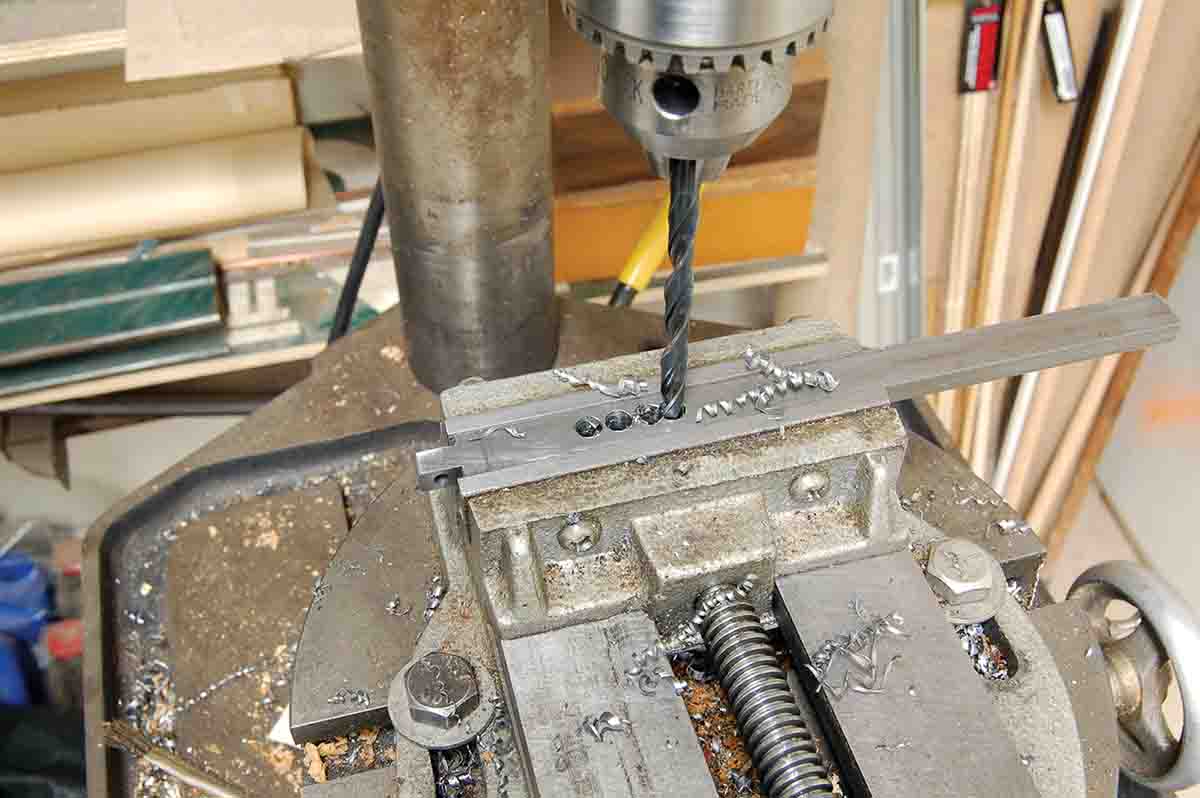
    Obviously, slotting the base for the elevation staff is easier using a milling machine. It was cut here with the edge of a coarse mill file. A photo shows this just beginning. When at full depth, the slot is widened by a small square file starting at the top, pushing the staff down as filing proceeds. This took about two hours and is one of those things that should be done over the course of two or three sessions.

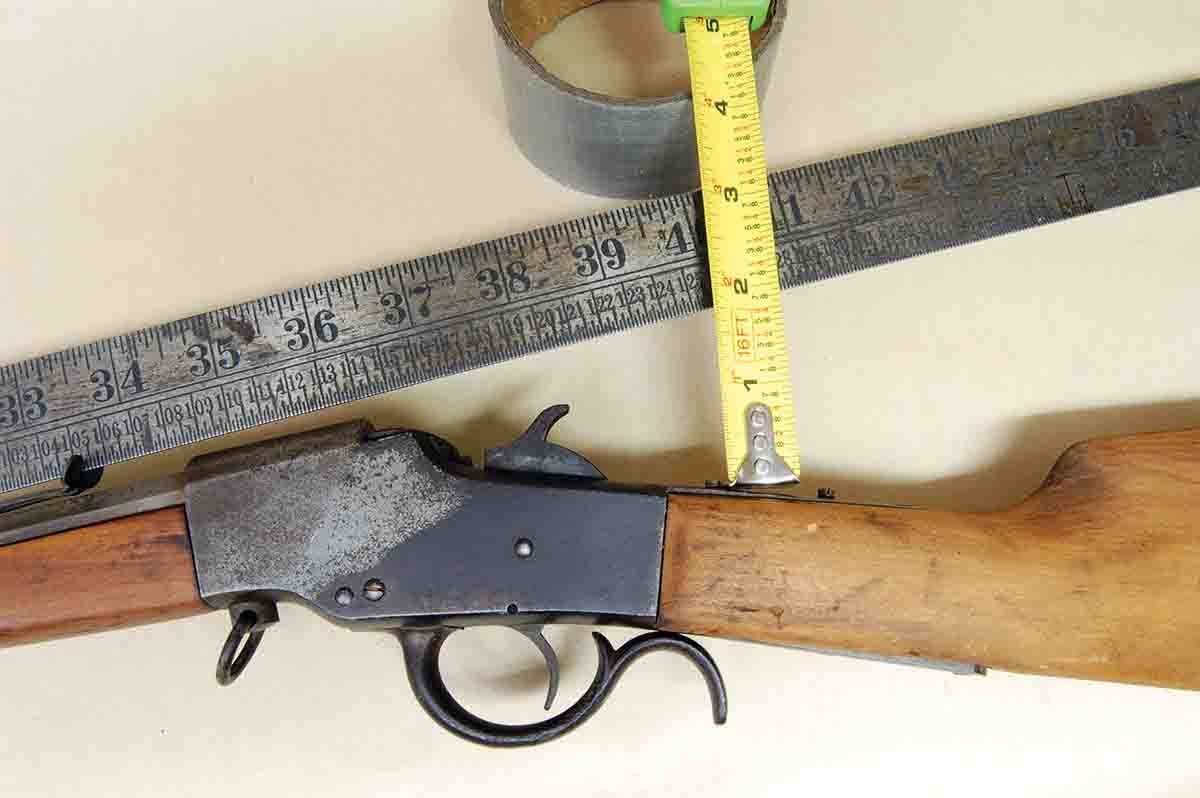
    When the staff is down far enough that the holes in it and the base line up, tap the small side. Insert the screw and round the front and rear of the post so the staff will fold down. Now the location of the slot in the staff for the movable aperture is determined. Lay a straightedge on top of the open sights. Measure up to this from the rifle’s tang. This is as low as the aperture will ever have to go. A half-inch of vertical movement will be plenty for any .22 rimfire.

    Next, make the sliding aperture from a .500-inch square piece of steel .375 inch thick, cut from the same piece as the sight base. Opposing sides are cut down to .125 inch thick and .100 inch in from the edges. This leaves the central portion that will fit in the staff slot at .300 inch wide.

    Left, the two ends of the base are hacksawed down, and the surface is finished with a smooth-cut file.  Middle, the bottom end of the staff is filled exactly .250 inch wide. Right, the elevation staff is held in Gil’s hand. The unfinished base is in the vise.
    Left, the two ends of the base are hacksawed down, and the surface is finished with a smooth-cut file. Middle, the bottom end of the staff is filled exactly .250 inch wide. Right, the elevation staff is held in Gil’s hand. The unfinished base is in the vise.
    Cutting the slot in the staff is now begun by scribing its outline on the staff. The width is .300 inch, but remember that the sliding aperture is .500 inch high. The aperture will be drilled in the center, so .250 inch must be subtracted from the figure previously measured as the aperture’s low point and .250 inch added to the high figure. The slot is now drilled out using a slightly smaller diameter drill. Holes are connected using a round file, and one side filed down to scribed line. See photos. The staff is turned over in the vise and carefully filed, testing the slider fit after each file stroke. The slider should fit the slot as well as possible.

    The aperture slider is fit to the staff. Note that the slider must be a bit thinner than the staff (arrow) for the locking plate to clamp it, preventing movement.
    The aperture slider is fit to the staff. Note that the slider must be a bit thinner than the staff (arrow) for the locking plate to clamp it, preventing movement.
    When the slider fits the slot freely, note that its rear surface must be just a bit below flush with the staff. This is necessary so a locking plate can clamp the aperture, preventing movement. A photo shows this with plate and aperture holes also drilled, which we don’t have space to do at this time.

    In the next column, I will drill the aperture, install the locking plate and make a spring to hold the staff either upright or folded. Another tang sight will also be made, this one even simpler and requiring much less filing. The little rifles never had it so good.


    Wolfe Publishing Group