
Light Gunsmithing
Savage Model 99
column By: Gil Sengel | September, 17
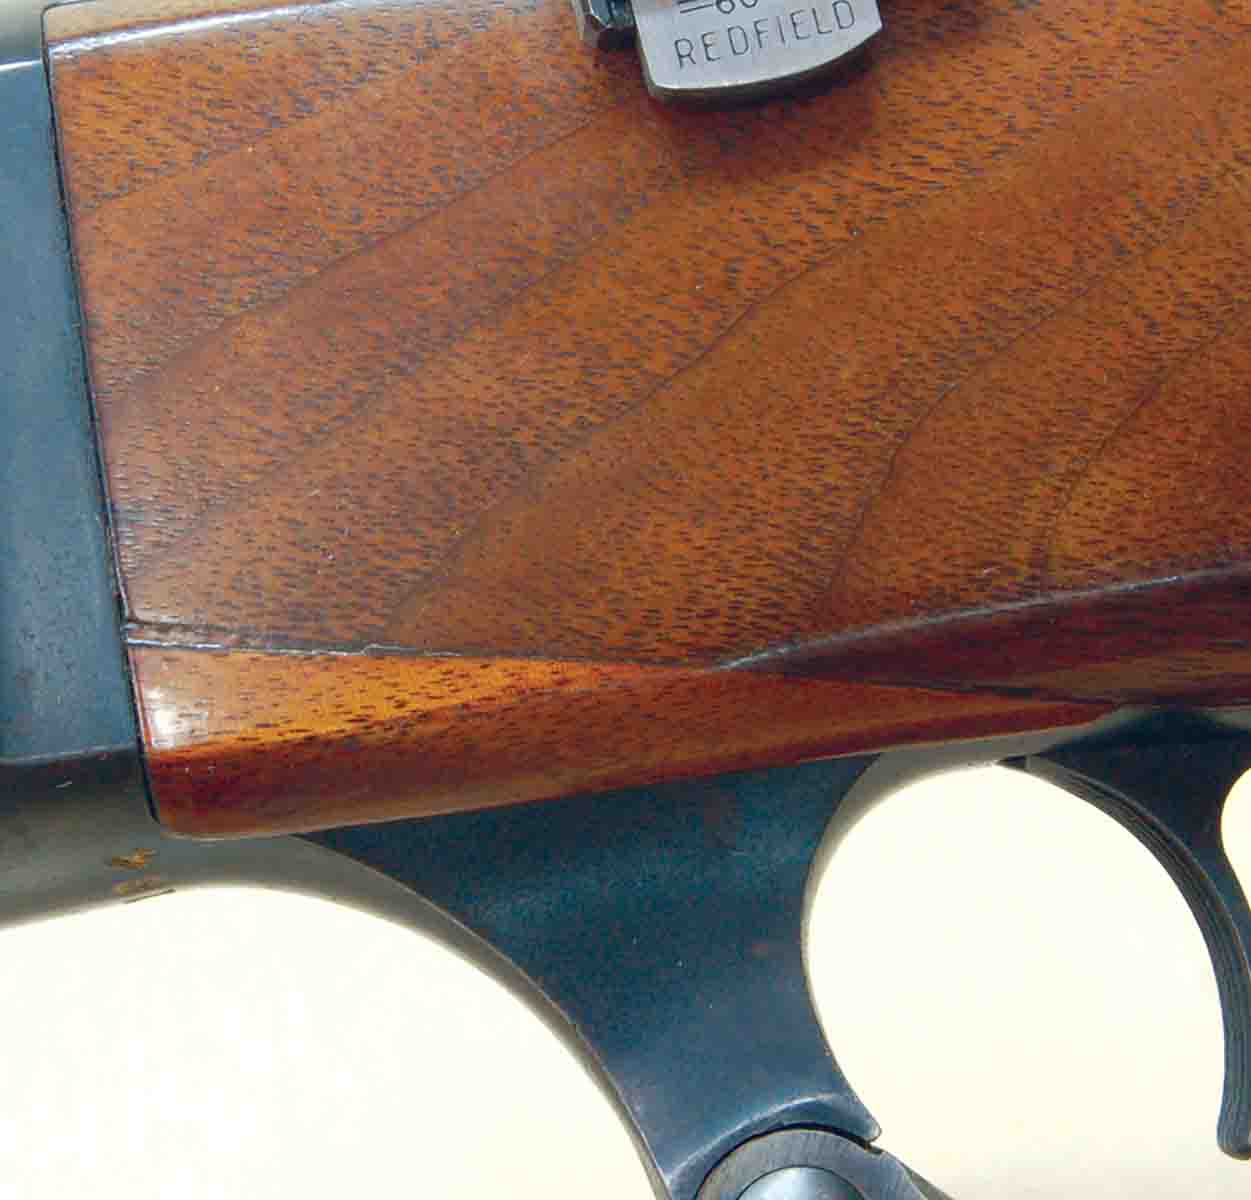
If ever a mechanical device deserved the term “classic,” it’s the Savage 99. It is not, however, without its idiosyncrasies. The first of these is buttstock fit to the action, where many accuracy problems originate. Removing the bullstock is easy, because it is held on by a longitudinal bolt. As the stock slides back, we are treated to an amazing sight. The top action tang is wide, thin and only a little over half as long as the bottom tang – and it is attached to nothing at all! It protrudes from the back of the receiver like a swimming pool diving board. The bottom tang looks more sturdy, but it’s riddled with grooves, slots and pinholes required to fit a half-dozen moving parts.
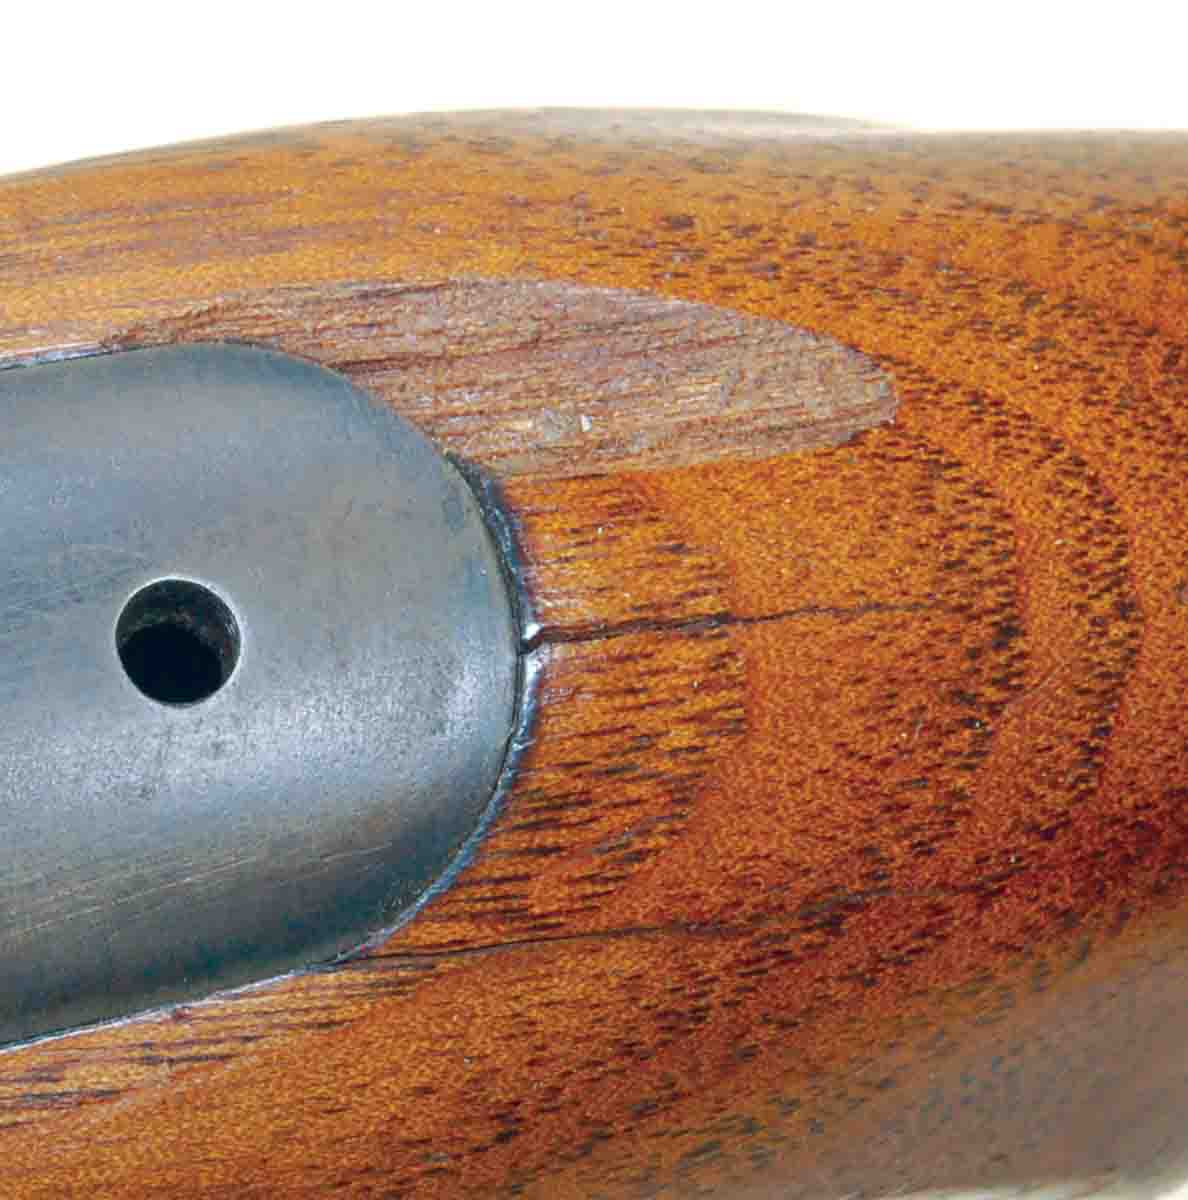
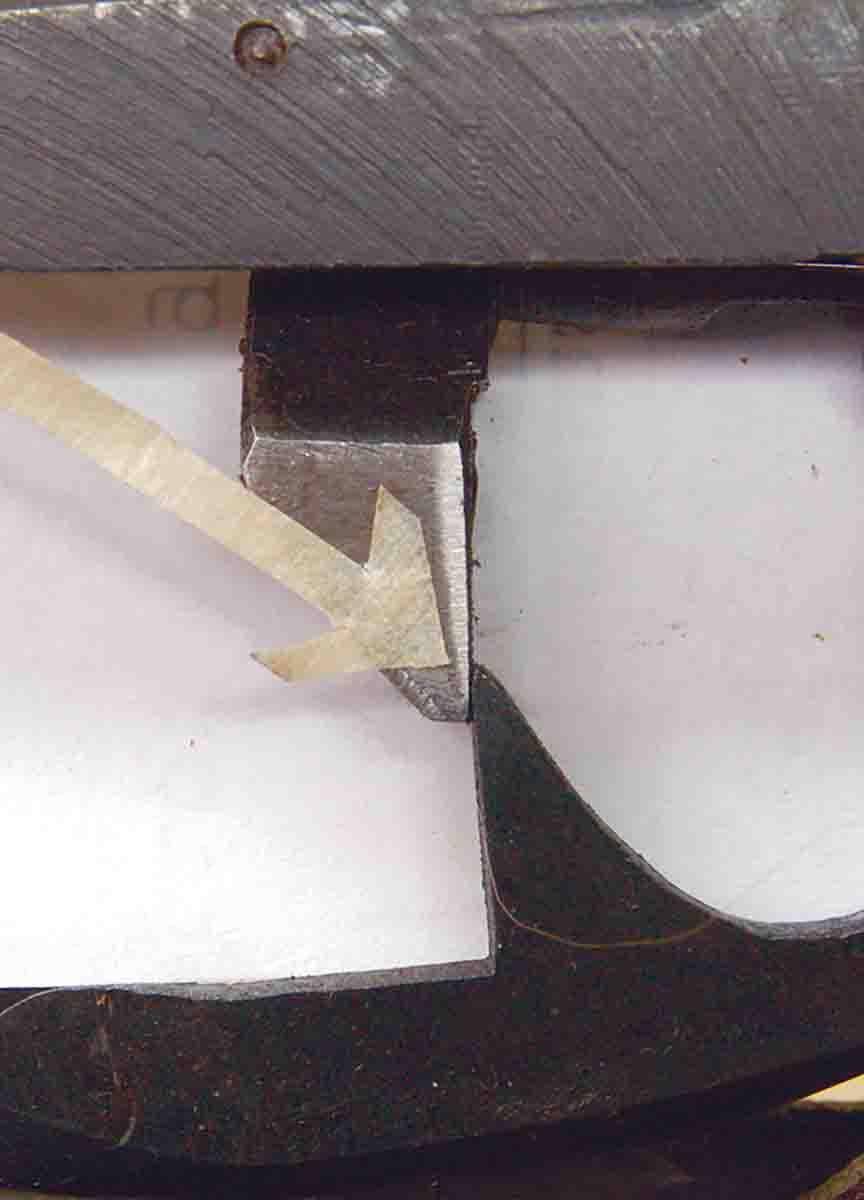
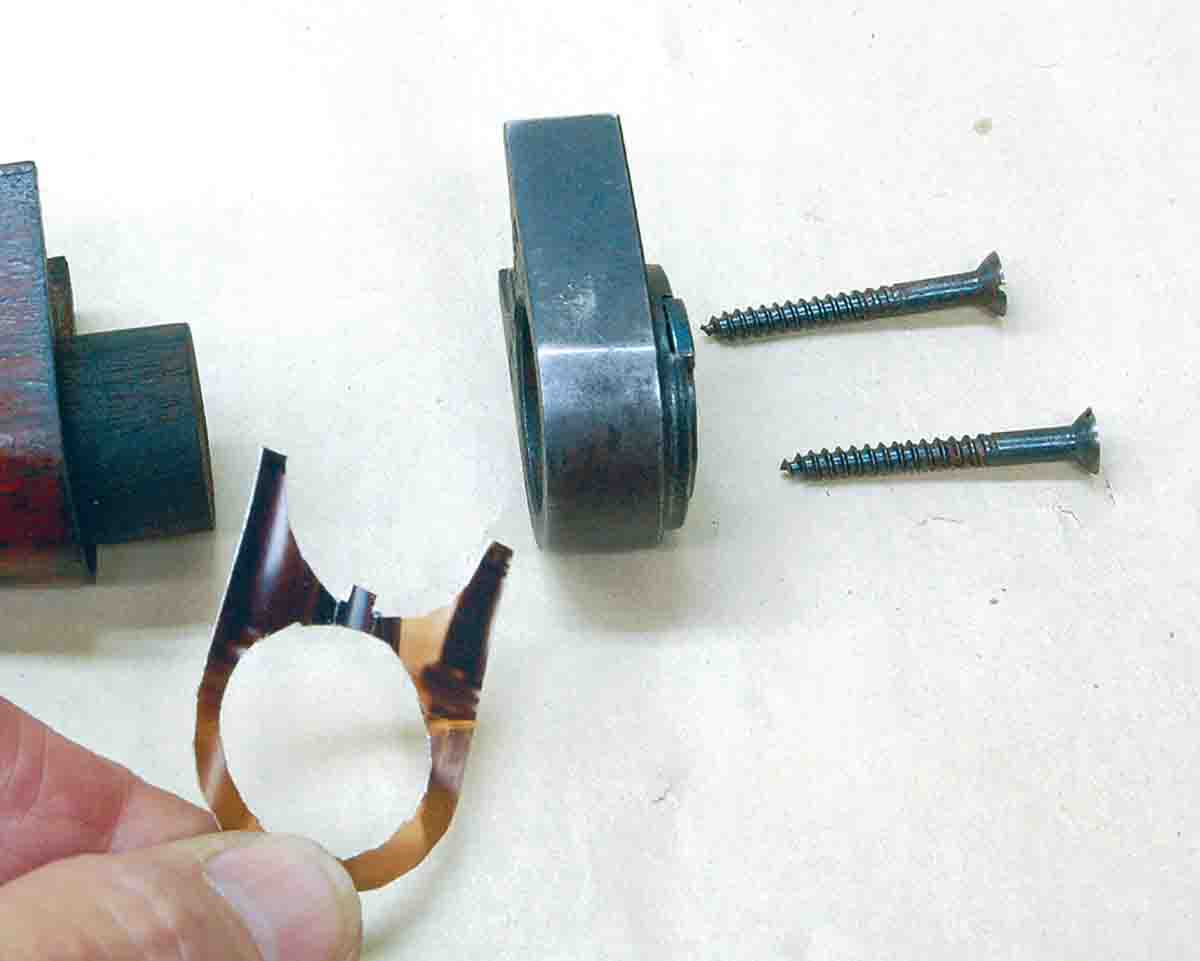
Because the upper and lower tangs are not connected, the stock bolt threads into the rear of the bottom tang. It is about an inch tall and rounded in the rear with a threaded hole at the top to accept the stock bolt. One searches frantically for bedding surfaces, but there is only the tiny rear of the bottom tang. Yes, the stock side panels touch the rear of the receiver sides, yet they are only .25 inch wide, and half that thickness tucks inside the receiver to keep the wood from bending outward due to warpage over time. Any wood shrinkage means the stocks don’t bear solidly; recoil drives the top tang back, chipping out wood. Side pressure on the stock (from a fall or just dropping the rifle) will cause a crack to form. Up or down pressure on toe or heel can chip wood off the side panels where they touch the receiver. If ever a rifle needed a lain-up fiberglass stock, this is it!
All that can be done if the stock is loose or cracked/chipped is fix the breaks with epoxy, then cut a large recess at least .25 inch deep behind the rear of the lower tang. This should not show from the outside. Relieve the stock behind the top tang just a bit, allowing the stock to move forward enough to make full contact with the side panels at the rear of the receiver. Now fill the large recess with epoxy that dries rock hard, like Brownells ACRAGLAS. Install the stock bolt but don’t tighten it; it is for alignment only. Set the rifle butt-down until the epoxy hardens. It may take a couple of applications to get 100 percent contact with the tang’s rear. When complete, secure the stock only firmly not tightly. This makes the best of a bad situation.
Here is a good place to emphasize a seemingly unrecognized fact of firearm history: None of the early inventors were designing accurate or pretty rifles; they were designing repeating rifles. So long as their idea functioned, that was all that mattered. If the stock became loose or broken, it could be replaced.
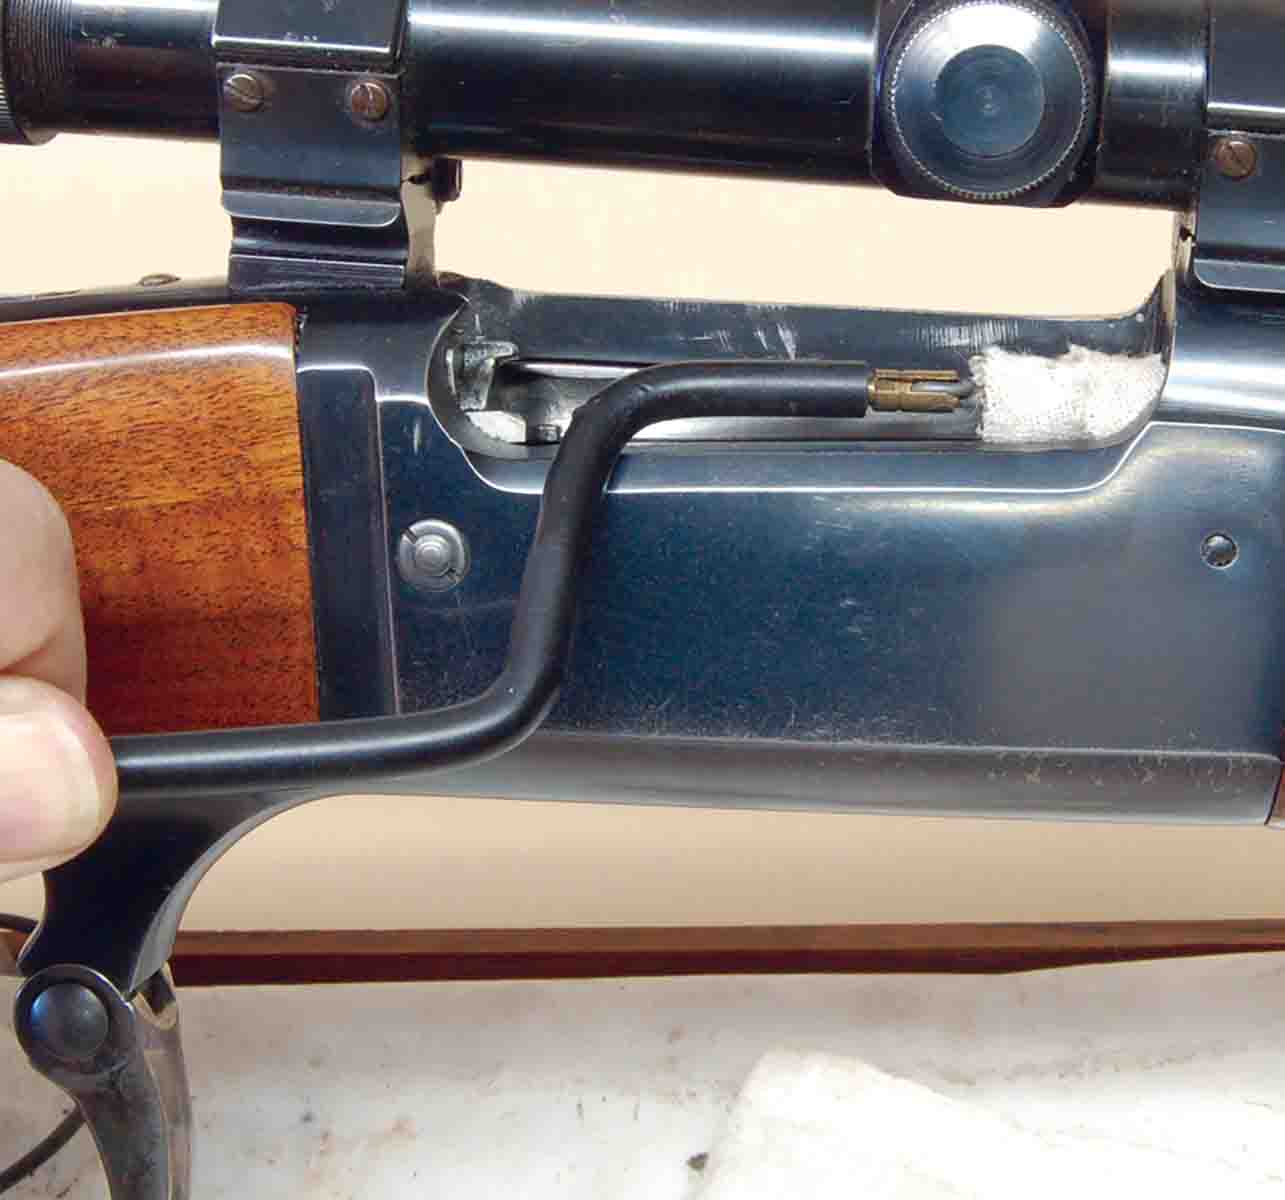
Other accuracy problems involve the forearm if the rifle is a takedown. Takedowns became available about 1909, probably because it made the rifle more compact for storage and travel. Solid- frame rifles also had to be cleaned from the muzzle, which wore the rifling away unless a muzzle protector was used. This is easily made by cutting off a cartridge case. Then too, when an oily patch is pushed down the bore from the muzzle, it will expand enough to coat the chamber neck but not enough to touch the chamber wall. Storage in a humid environment then causes the chamber wall to rust. Some means must be used to oil the chamber after cleaning. The bent acetal rod (available at a hobby shop) I use is threaded for a brass bore brush. The brush firmly holds a patch to both clean and lube the chamber.
Getting back to takedown Savage 99s, the barrel screws into the receiver but fits loosely enough to allow removal by hand. There is no means to take up wear that will occur after many disassemblies, thus the barrels of most takedown models have a bit of looseness when assembled. This does not help accuracy. Here again is a situation for which there is no perfect solution. The best I have seen is to place a steel shim about .010 inch thick between the forearm takedown adapter and forearm wood. This pushes the forearm/barrel lock forward, removes the looseness and can noticeably improve accuracy. Just don’t overdo shim thickness.
Then there is yet another aspect of the Model 99 that disturbs some owners: trigger pull. A crisp 2-pound trigger with no creep is possible but is definitely not desirable. The reason is that there is nothing to prevent the trigger from coming back if it is bumped during the up-stroke of the lever. Wearing gloves in cold weather magnifies the problem. When the lever reaches the cocking point (the Model 99 cocks during the last inch or so of the closing stroke), it is natural for the shooter’s fingers to curl inward around the lever, because compressing the mainspring takes quite a bit of force. If the trigger finger curls a little, it can brush the trigger until the rifle fires when it’s not supposed to.
As an example, I checked pull weights of 16 Savage 99s made from 1904 to 1982. The lightest was 3 pounds even; the heaviest 3 pounds, 15 ounces. All had enough creep (sear engagement) that it could be easily felt. The heaviest seven pulls were all on rifles having the top tang safety that replaced the original bottom tang tab safety in 1960.
Finally, there is some good news. Leverguns respond well to proper lubrication. Molybdenum gun grease or automotive wheel-bearing grease containing molybdenum (the black stuff) works best. No oil is needed, because internal parts are hardened and pivot on hard pins. They don’t really require lube unless water has gotten into the receiver.
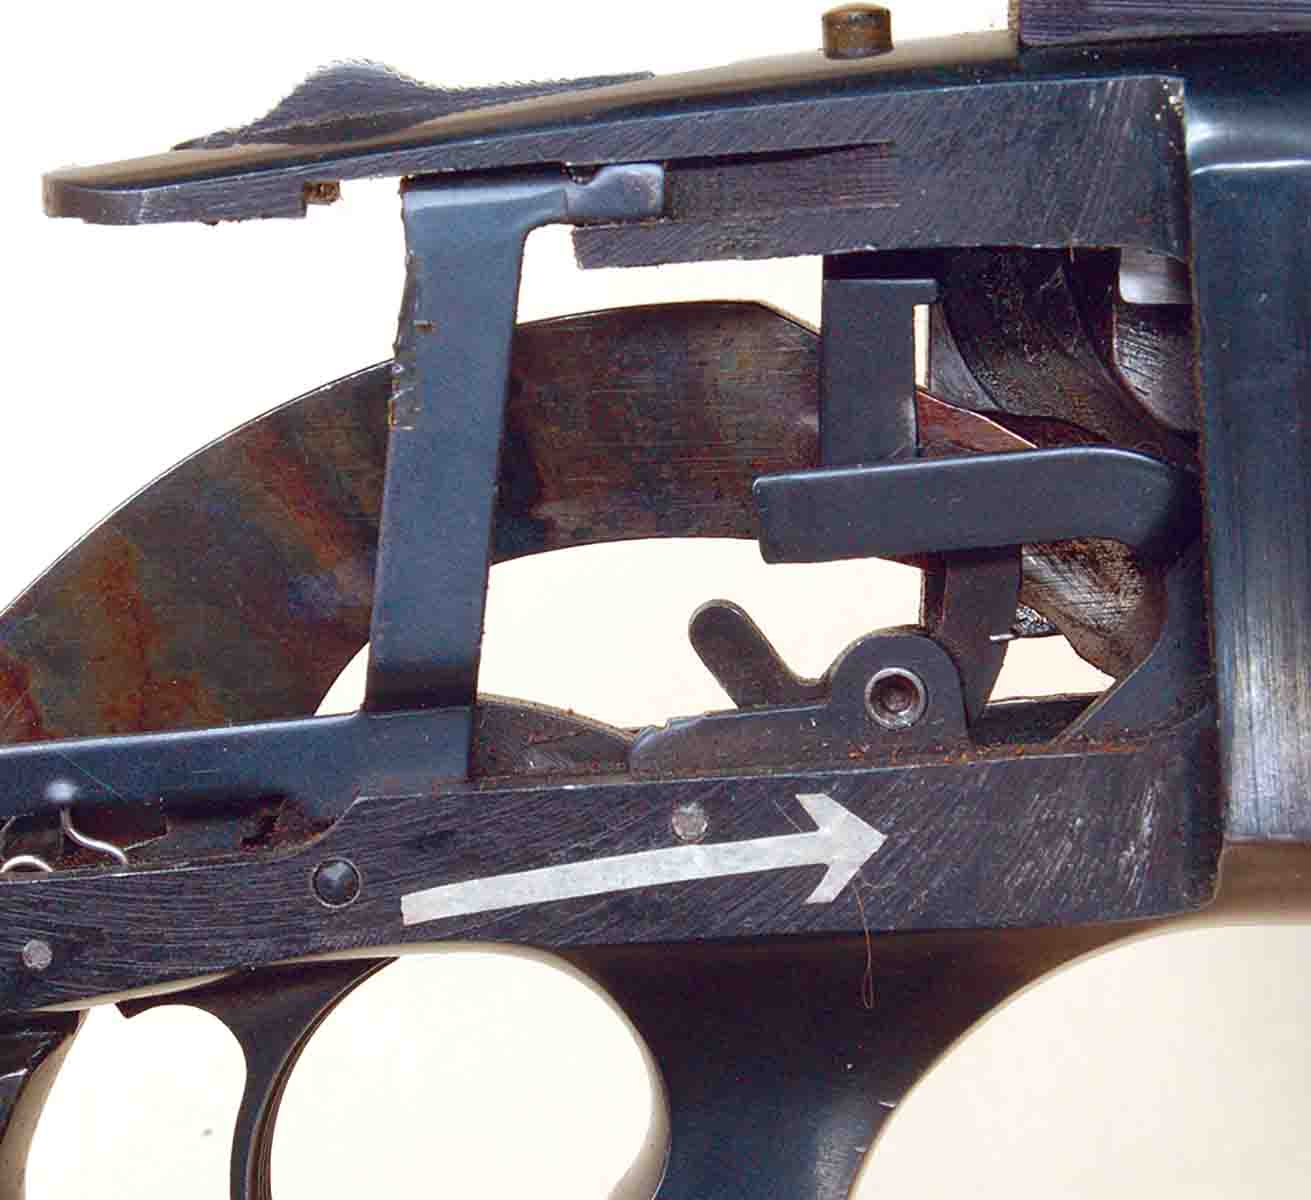
With the buttstock removed and action open, rub a light coat of grease on the left and right sides of the breechblock and its rear locking surface. Use a small screwdriver to place grease into the breechblock slot where the end of the lever moves to open and close the action. Lastly, remove the retaining screw and tap out the lever pivot pin. Pull the lever out of contact with the receiver, wipe on some grease, then push it back. Wipe grease inside the pivot hole with a toothpick. When replacing the pin, note that it has a small lug beneath its head. The lug fits into a like recess machined into the lever to prevent the pin from turning when its retaining screw is tightened. The head of the pin must be flush with the side of the lever before the screw is inserted. If not, tap out the pin and realign the lug. This is a trial-and-error process.
Some Model 99 owners may now want to disassemble and lube the magazine rotor, but that is ill-advised due to retensioning of its spring. A couple of these I have removed, because dirt and sand had gotten into the magazine. Grease was already on the magazine spindle, presumably placed there when the rifle was factory assembled. No further lube would have ever been needed.