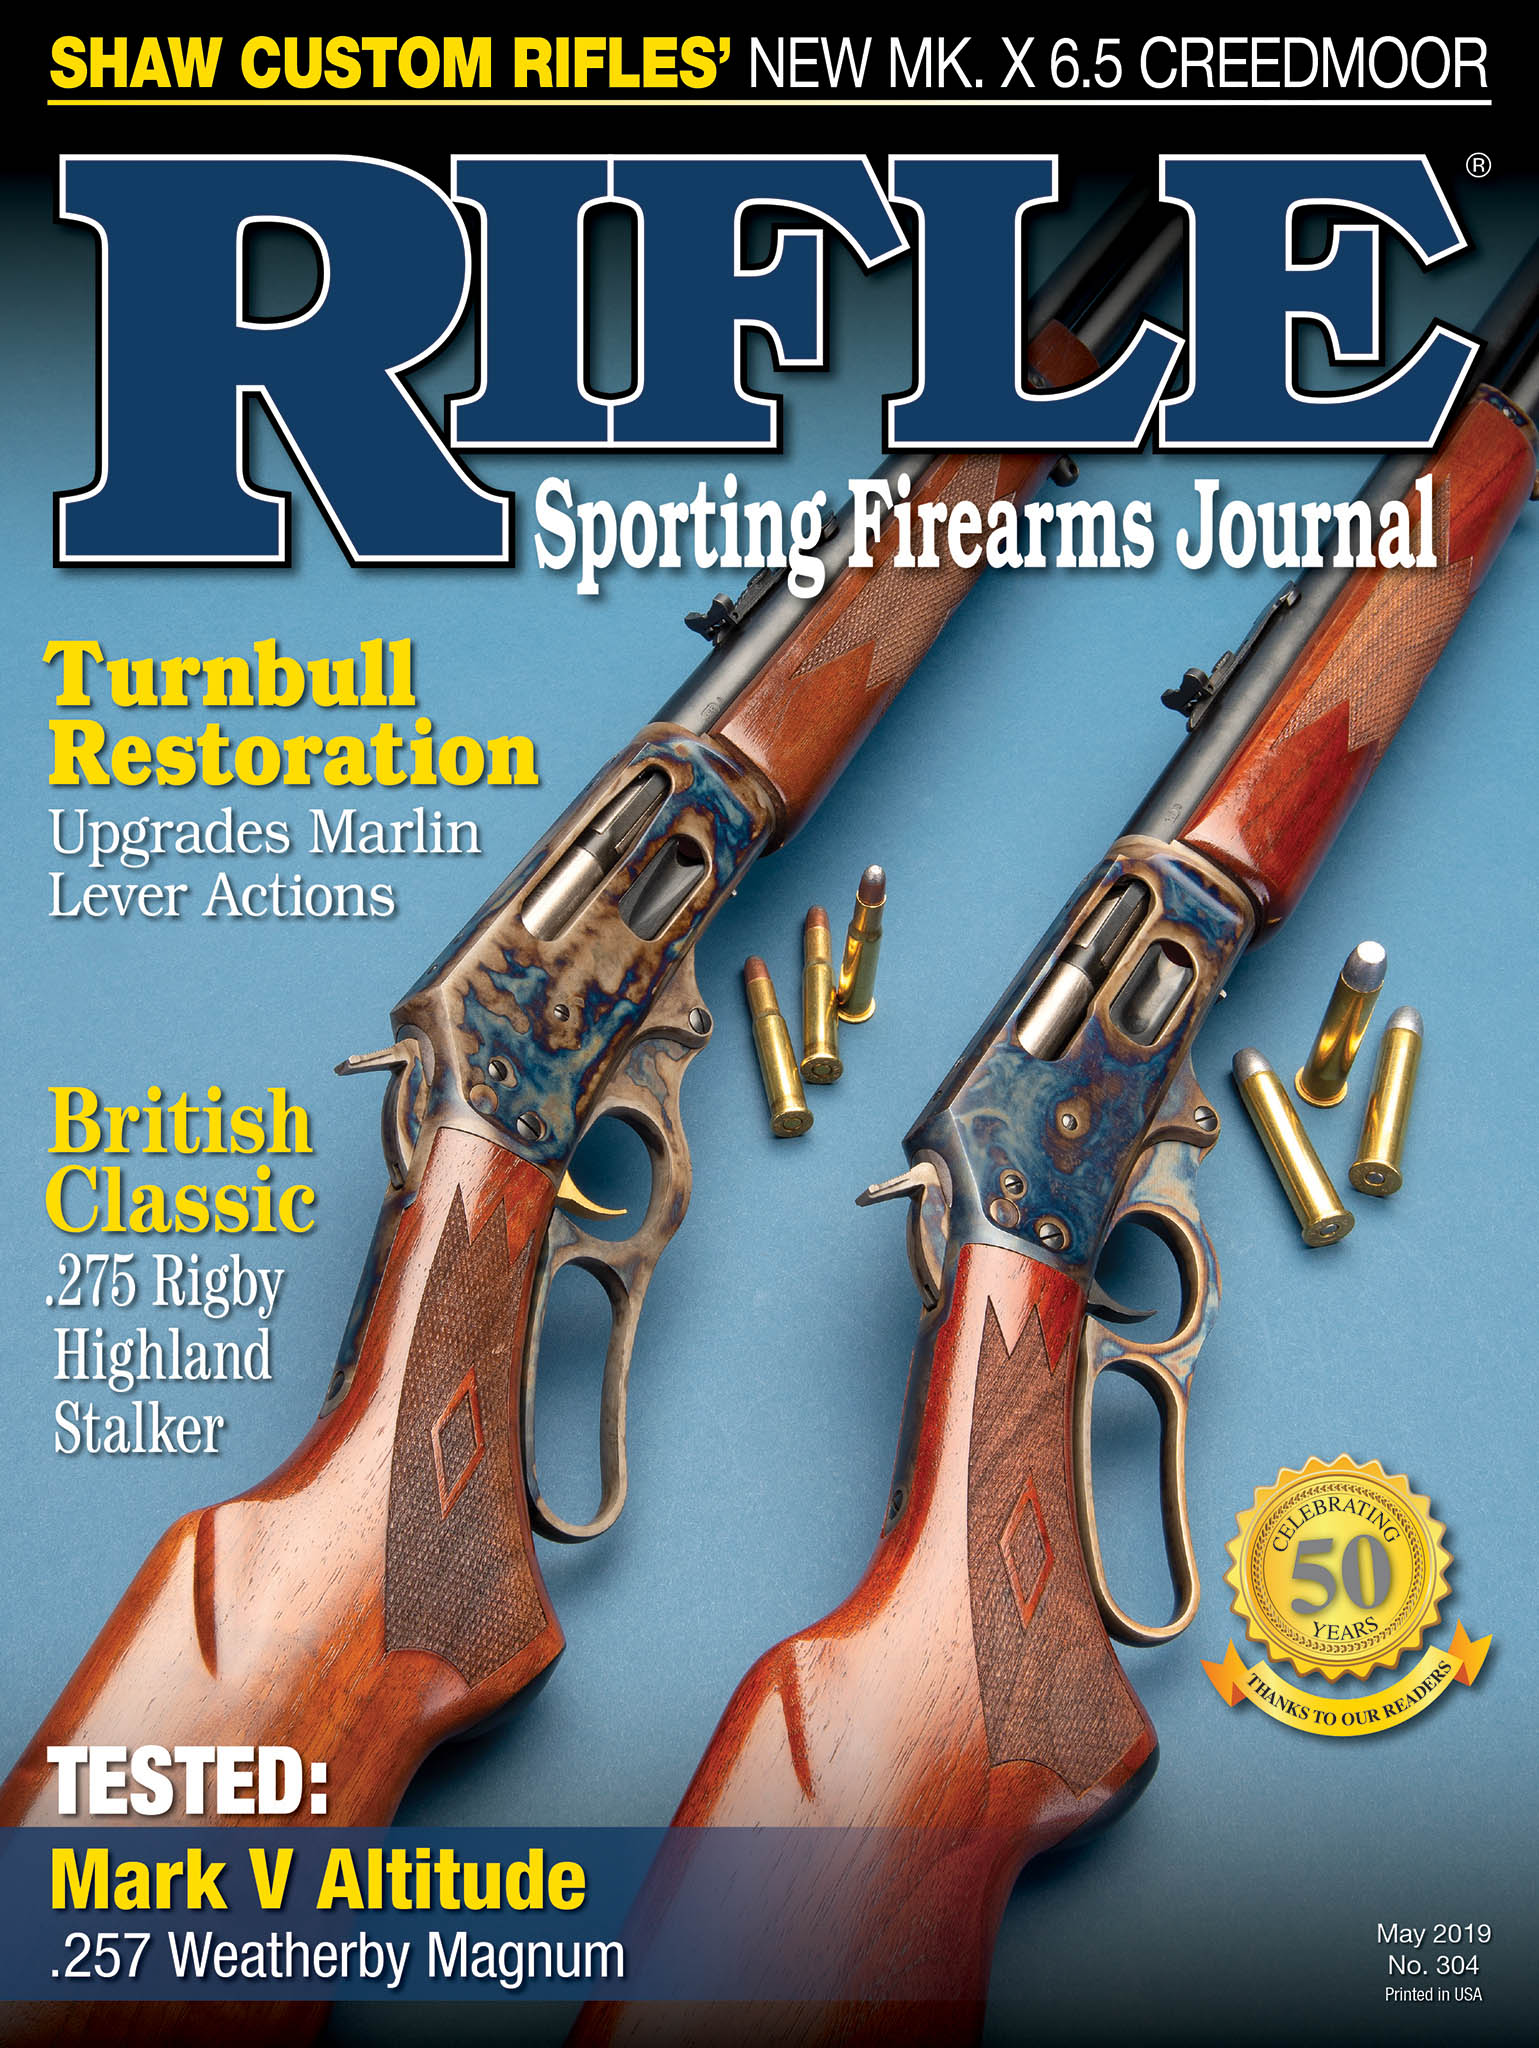
The rounded cavity in the receiver leads to a loose-fitting stock.
All serious riflefolk believe there is always a need to own just one more rifle. There may even be some justification for this. For example, a desire to try the latest and greatest new round should qualify; so would a rifle chambered for an old cartridge with which a rifleman happens to have no experience.
For others, the rifle itself is more important than the cartridge it fires. These folks tend to be more experienced and often favor single shots. Perhaps this is because such rifles are made of blued steel and walnut instead of plastic and aluminum that is painted to look like the stomach contents of a giant plant-eating dinosaur. Just a thought.
There is a problem, however, in that arguably the most interesting single-shot hunting rifle is seldom seen here. This is the break-open gun, which has always been common in Europe. It opens just like a double shotgun. Lack of popularity is no doubt due to hand-fitting costs. Falling blocks are simply cheaper to make.
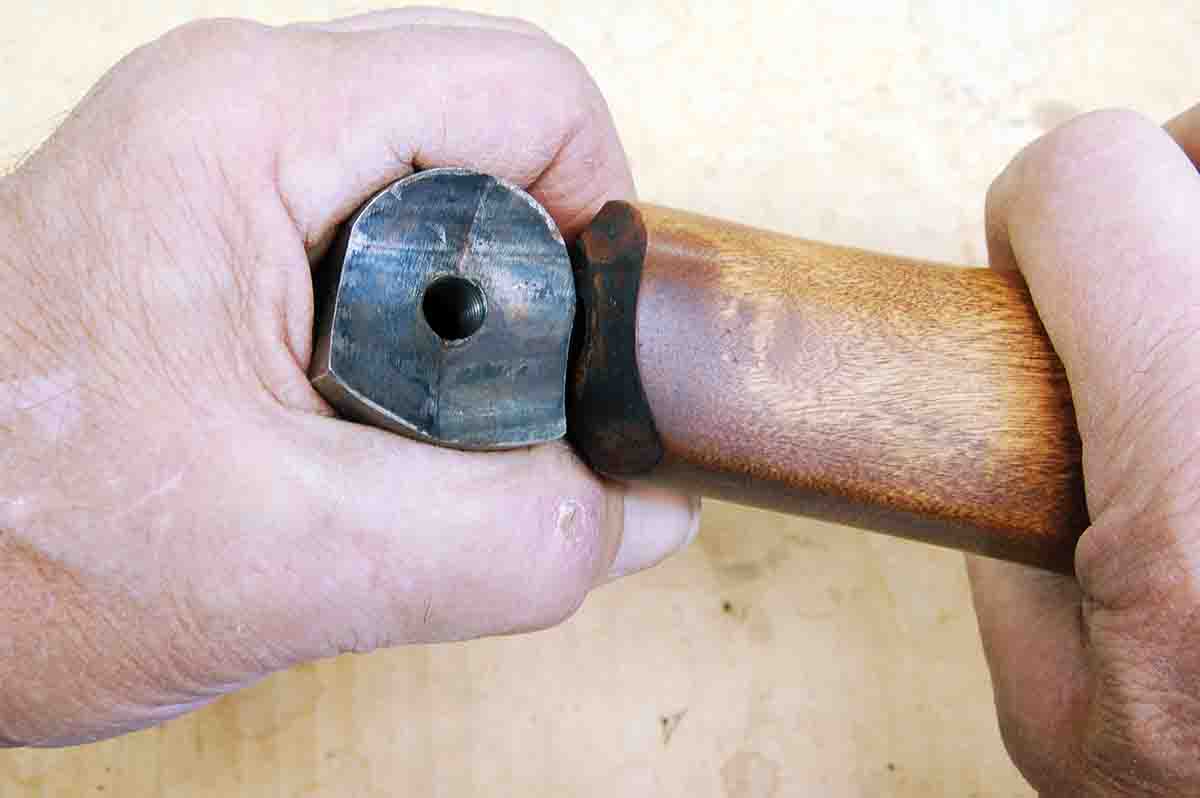
Flatten the rear of the receiver with a large file.
A couple of exceptions exist, but these are far different than the guns made in Europe. Rifle barrels were simply fit to inexpensive American break-open shotgun actions. Great War-era examples had cast iron receivers and chambered small rounds like .25-20, .32-20 and .44-40. Most had watertables and sliding locking bolts, but fitting was questionable.
When filing, check frequently to be certain the surface is at a right angle to the stock bolt. Cloth in the open cavity of the receiver keeps filings out.
After several hundred rounds they rattled like a rock in a tin can. A simpler design then evolved in which a pivoting block held the barrel down when the top rear of the barrel contacted the standing breech. The idea worked so well it quickly became almost universal.
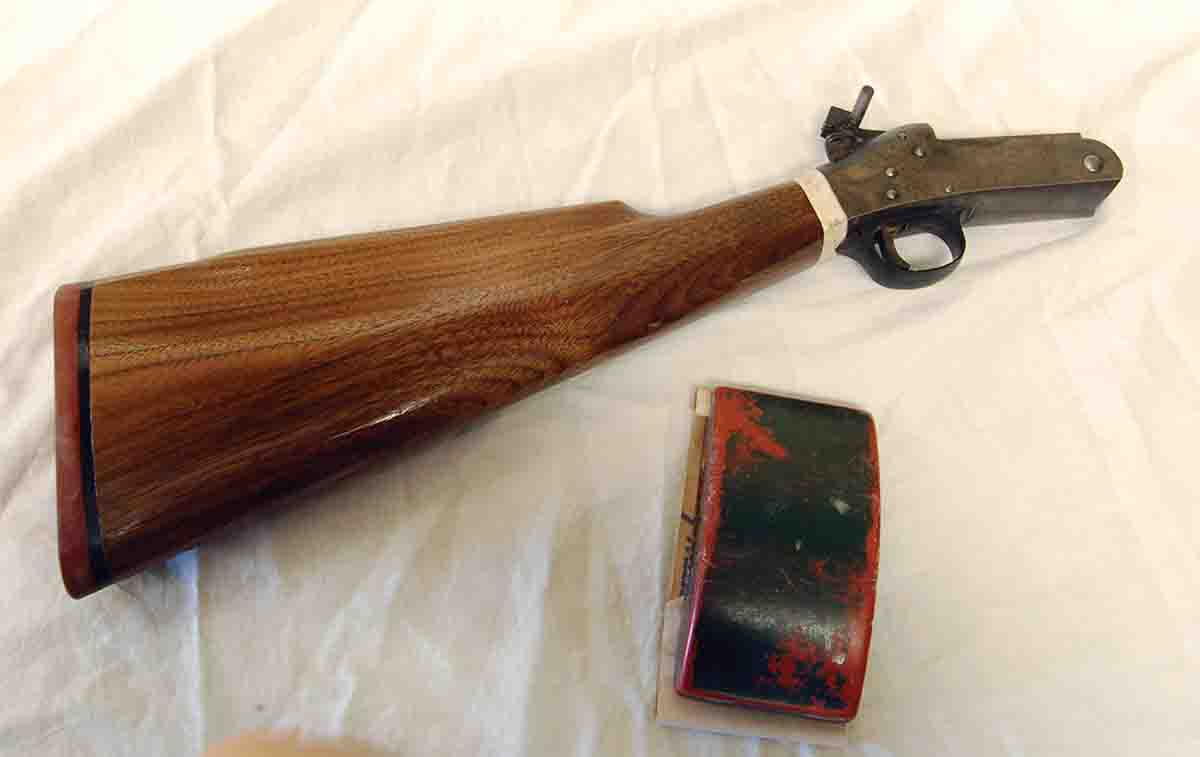
Sometime in the 1950s (perhaps earlier) Harrington & Richardson Arms Co. (H&R) began using a mousetrap mainspring that did away with the need for tangs on receivers. The stock was secured by a longitudinal bolt. These were mostly shotguns, but a few had .22 Hornet, .22 Jet and .30-30 barrels attached. I believe the first of these used a half-cock notch on the hammer, but this was replaced by a transfer bar on the trigger, making a negligent discharge nearly impossible. This is the action used here.
Do not make the entire rear of the receiver flat. Instead, create a flat border around the edges.
Unfortunately, these rifles were discontinued about four years ago, yet they are commonly seen. Chamberings included at least the above plus the .44 Magnum and .45-70 on the ductile iron frame. An investment cast 4141 receiver was used for .223, .22-250, .243, .25-06, .270, .30-06 and perhaps others. While these rifles are not a Merkel or Francotte, they are more than adequate; with a little gunsmithing they can be made even better.
The work involves correcting looseness in the attachment of stock and forearm. As anyone who enjoys single shots knows, any lack of solidity affects accuracy in unpredictable ways. Correcting this is not difficult, but it requires a bit of explanation, so the buttstock will be covered here and the forearm next time.
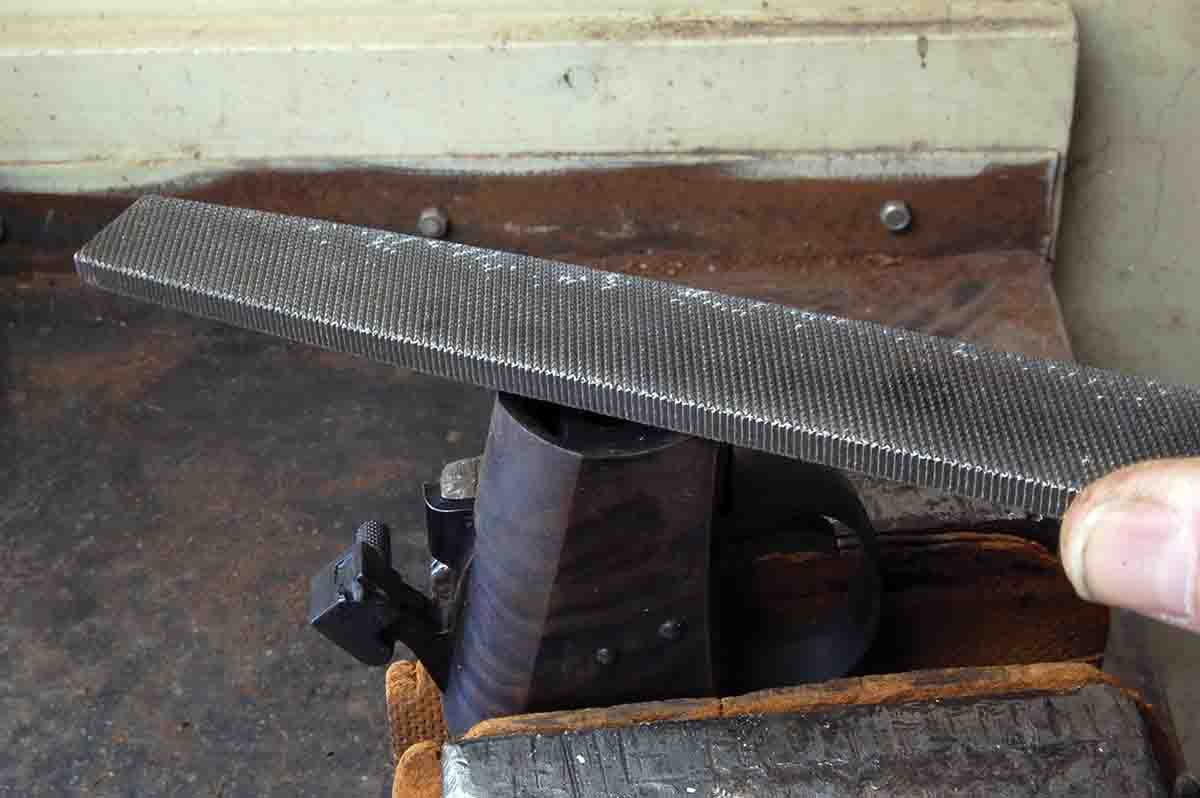
Cut the mortise in the receiver with a Dremel tool using a carbide cutter.
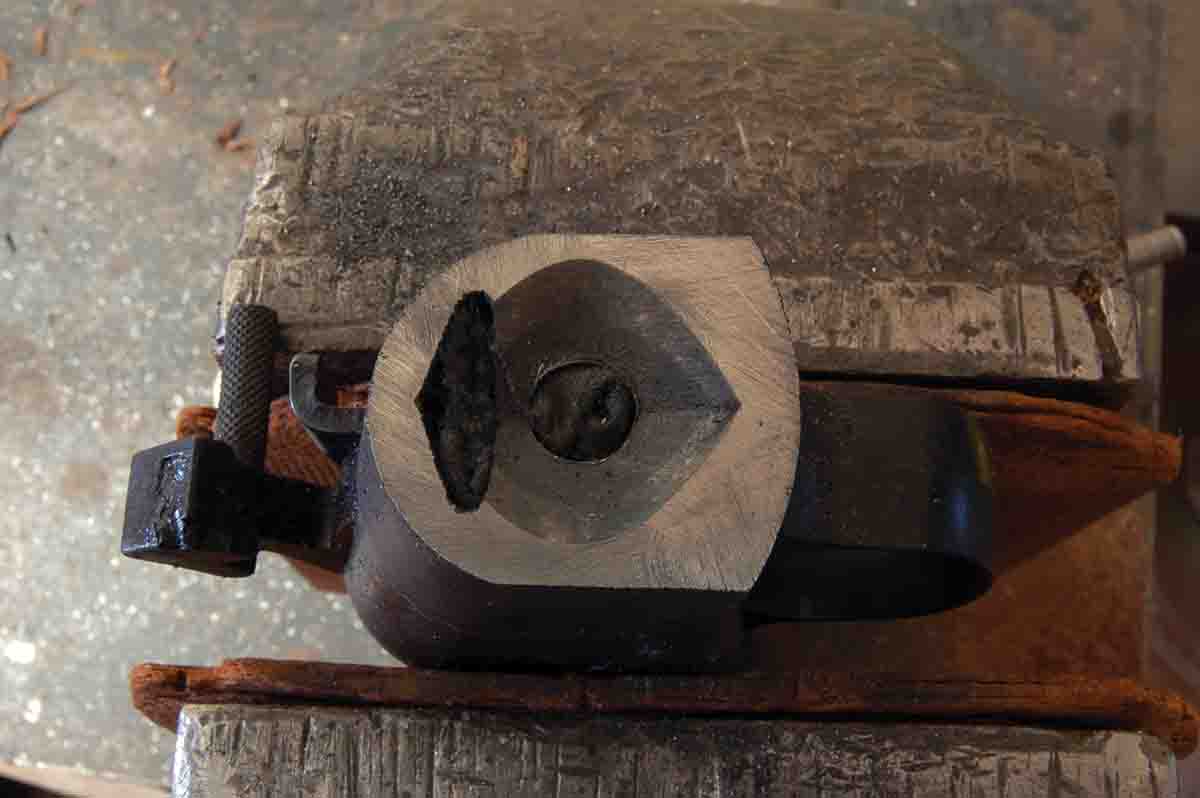
The shape of the rear of the receiver where it joins the stock is sort of a concave “V” with a hole for the stock bolt in the center. If the bolt hole in the wood is even a few thousandths-inch larger than the bolt, vertical looseness in the joint will occur. Pulling the bolt tighter may help for a while, but the movement will come back. To correct this, the joint must be made
flat at a right angle to the stock bolt and include a shallow mortise cut around the bolt hole.
Sharp corners at the bottom rear of the receiver should be rounded.
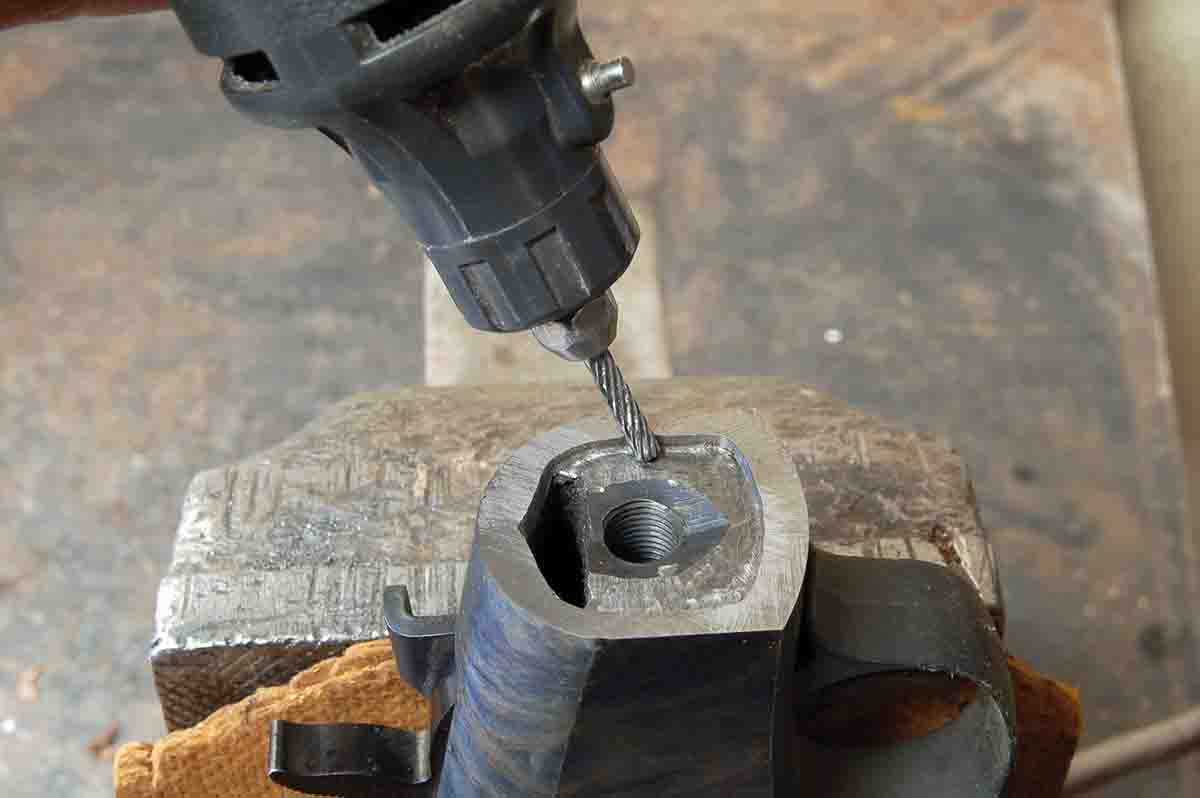
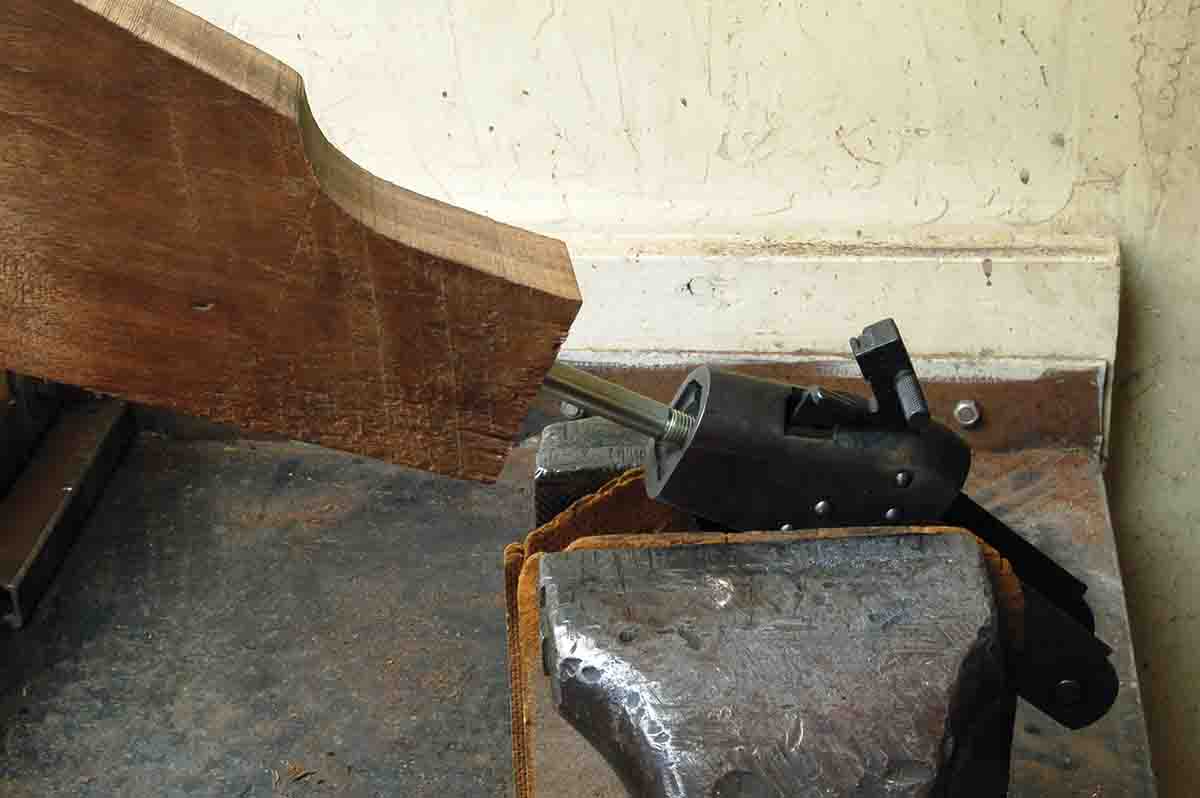
Reshaping the rear of the receiver requires simple file work. A wider file works better, because it is easier to cut a flat surface. Work slowly because the receiver steel cuts easily. Check frequently to be certain the cut is flat and perpendicular to the stock bolt. A photo shows the use of a small square for this. Note that a cleaning patch has been poked into the oddly shaped opening above the bolt hole to keep filings out of the action. A similar “plug” goes into the bolt hole when filing.
Flattening the rear of the receiver removes about a quarter inch of steel. Cut back the original stock and glass bed it into the receiver mortise.
It is not necessary to make the whole rear of the receiver flat. Then cut a shallow (1⁄8-inch or a bit less) recess to prevent the stock from turning on the flat surface just created. Normally a machining operation, the H&R receiver cuts so well that the work can be done with a
carbide cutter in a Dremel tool. Just go slowly, as carbide is brittle and its cutting edges can chip. It should also be mentioned that I got a bit carried away cutting the recess shown; it doesn’t need to be this large. Simply outlining the remaining concave surface in the receiver is good enough.
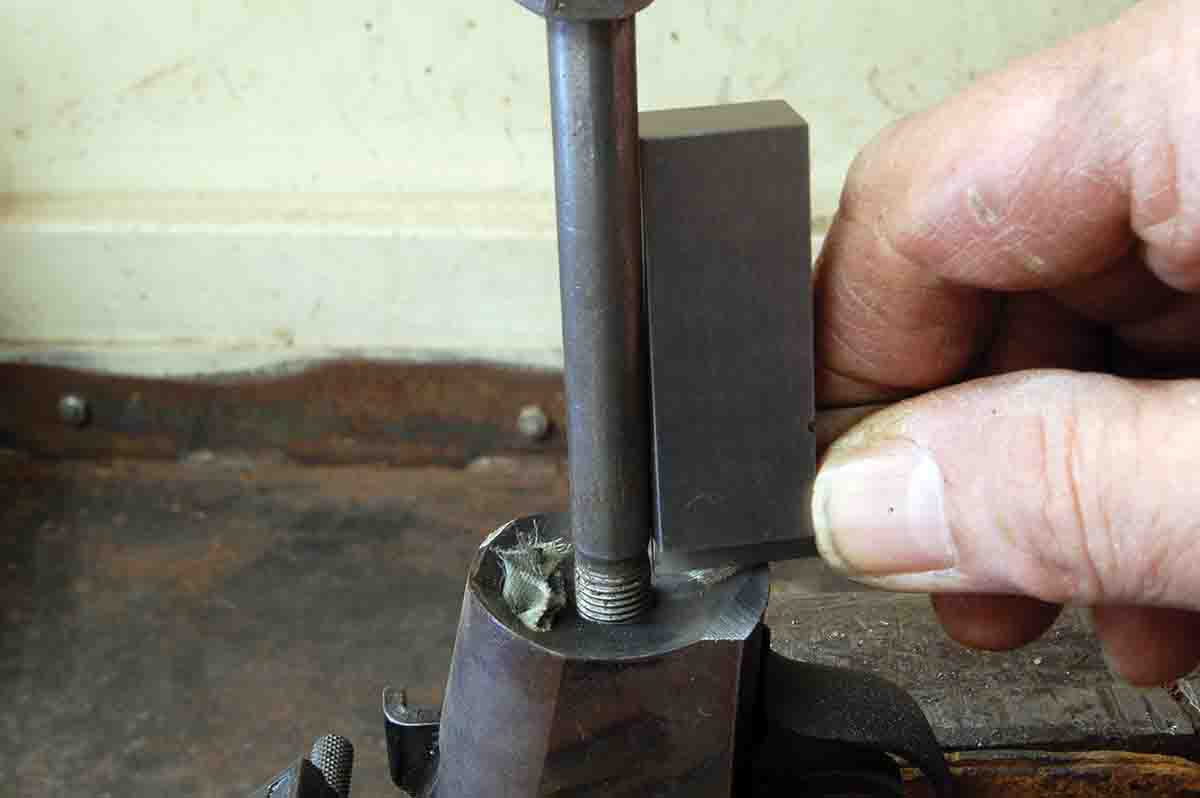
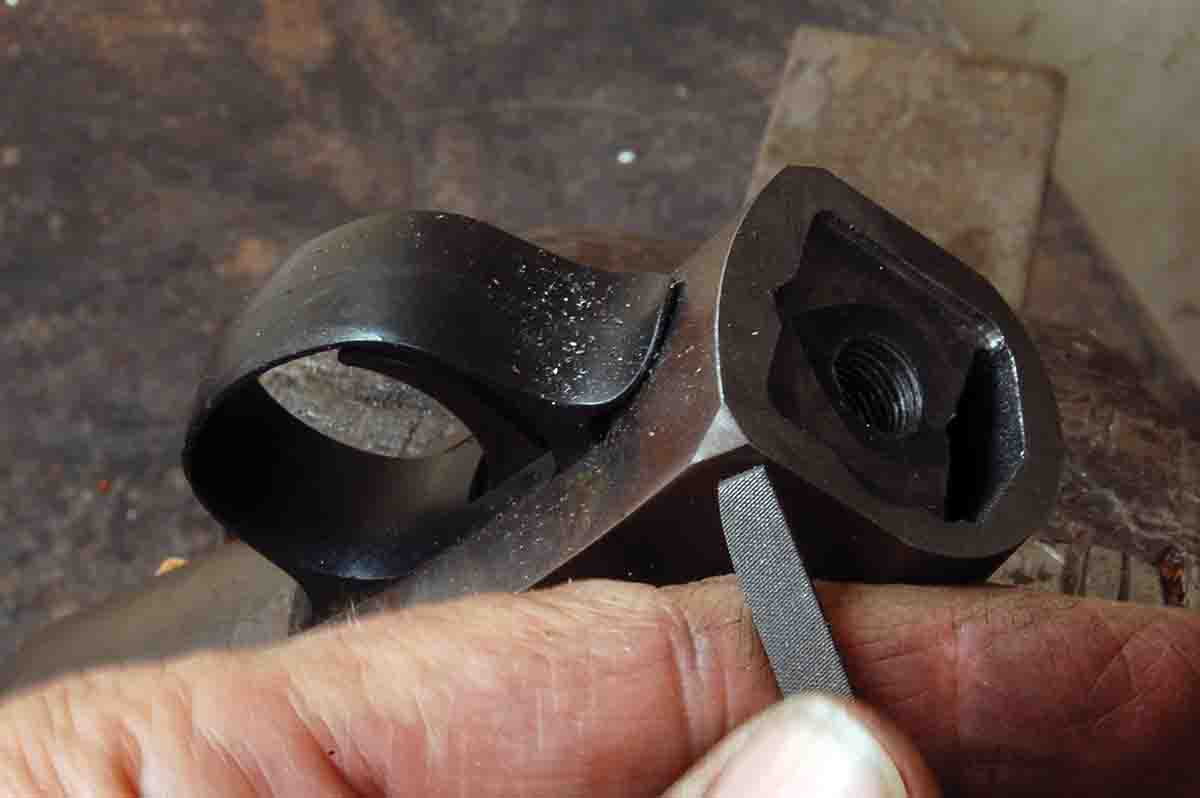
It is now obvious that the original stock does not fit the altered receiver. To remedy this, use the stock bolt, square and file to flatten the front of the stock in exactly the same way as they were used on the receiver. Forming the wood to fit the shallow mortise made in the receiver is not necessary. A bit of epoxy bedding
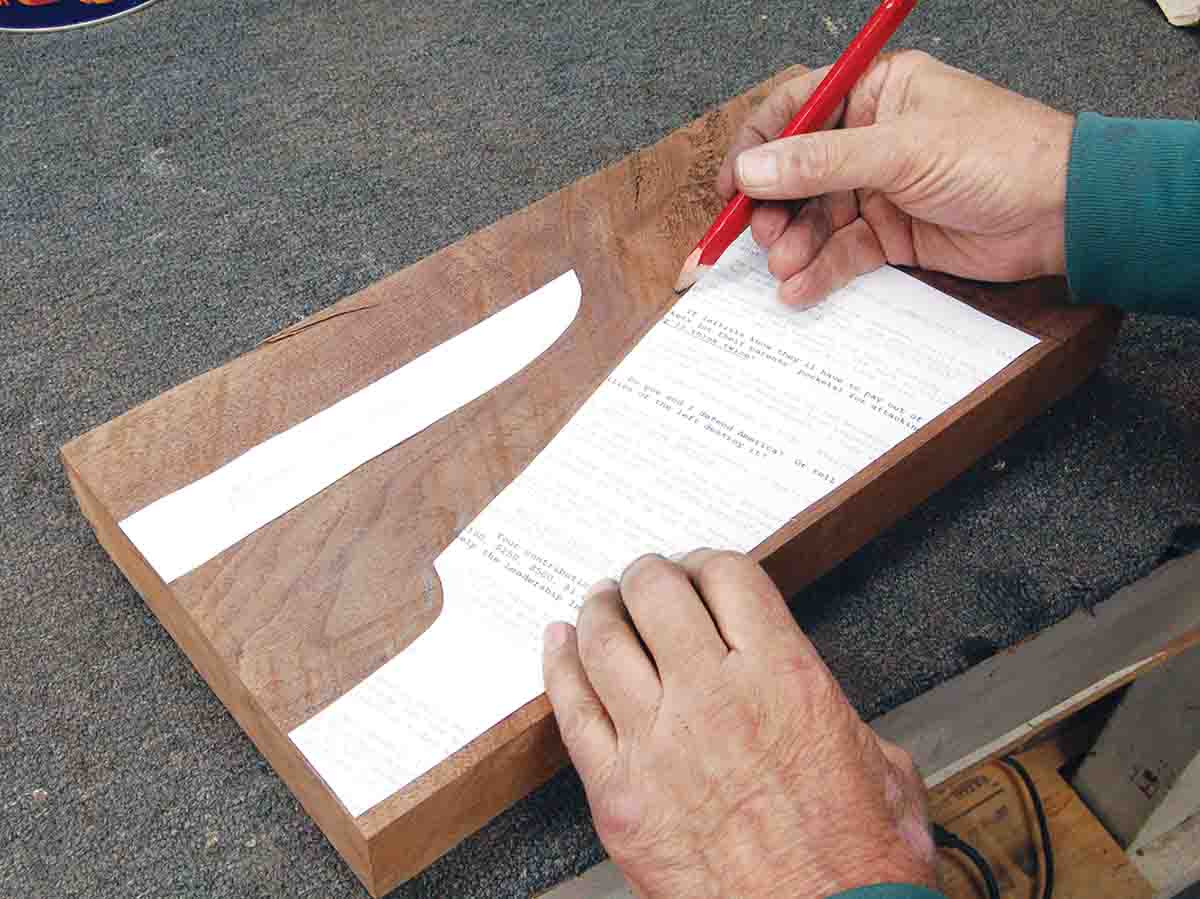
To make a replacement stock, templates are traced on a piece of walnut. Cut the blanks on a band saw.
compound will create the necessary tenon, fitting wood to metal perfectly. Just remember to fill the odd-shaped hole at the top rear of the action with modeling clay to prevent epoxy from entering and locking metal to wood permanently! The altered stock will, however, be more than ¼-inch shorter in length of pull. These stocks run a bit short anyway, so a spacer will be needed under the buttplate; perhaps a recoil pad would be a better option.
One final point regarding the altered stock is that the stock bolt now protrudes farther into the action. The result is that the nose of the bolt will probably strike the rear of the hammer, preventing it from coming back far enough to engage the sear. This is undesirable, so a few flat washers under the bolt head will be needed to space it back and restore normal operation.

The easiest way to drill the stock bolt hole is by using a lathe.
The new stock is inletted by sliding on a guide pin made by cutting the bolt head off.
The shaped stock is ready to have its filler coat sanded off.
The photos show that a new stock was made for this project to better fit its owner. For anyone who would like to try their hand at stockmaking, this is an easy place to start. The only drawback is that the .375-inch stock bolt hole is most easily drilled on a lathe, though it is possible using a floor-model drill press. A 10-inch-long drill bit is needed (drill from both ends of the blank). These are available from wood hobby shops or tool stores. A photo shows the new stock inletted using a stockmaker’s guide pin, which is just a bolt with the head cut off. The bolt is a standard 3⁄8x24 tpi. Of course, inletting can be done with the stock bolt; file and square as was done for the factory wood.
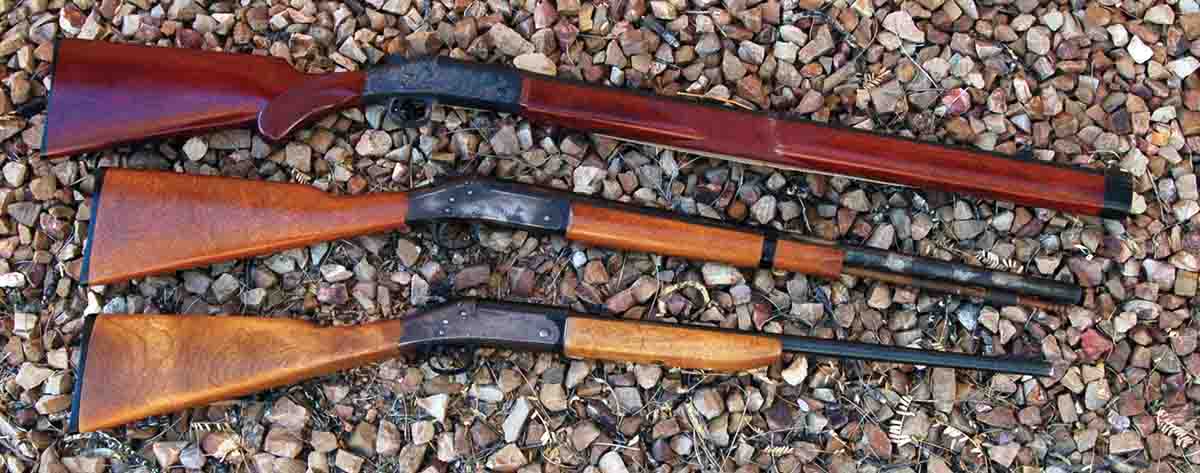
These H&R single shots include (top to bottom): a .45-70 restocked in exotic hardwood to add weight, a .44 Magnum with a cleaning rod and a .30-30 Winchester.
An important consideration if making a new stock is rounding off the rear of those annoying sharp ridges running down the bottom of the receiver at the point where they touch the stock wood. They make the grip feel square and dig into the trigger finger. A touch of cold blue covers the file marks.
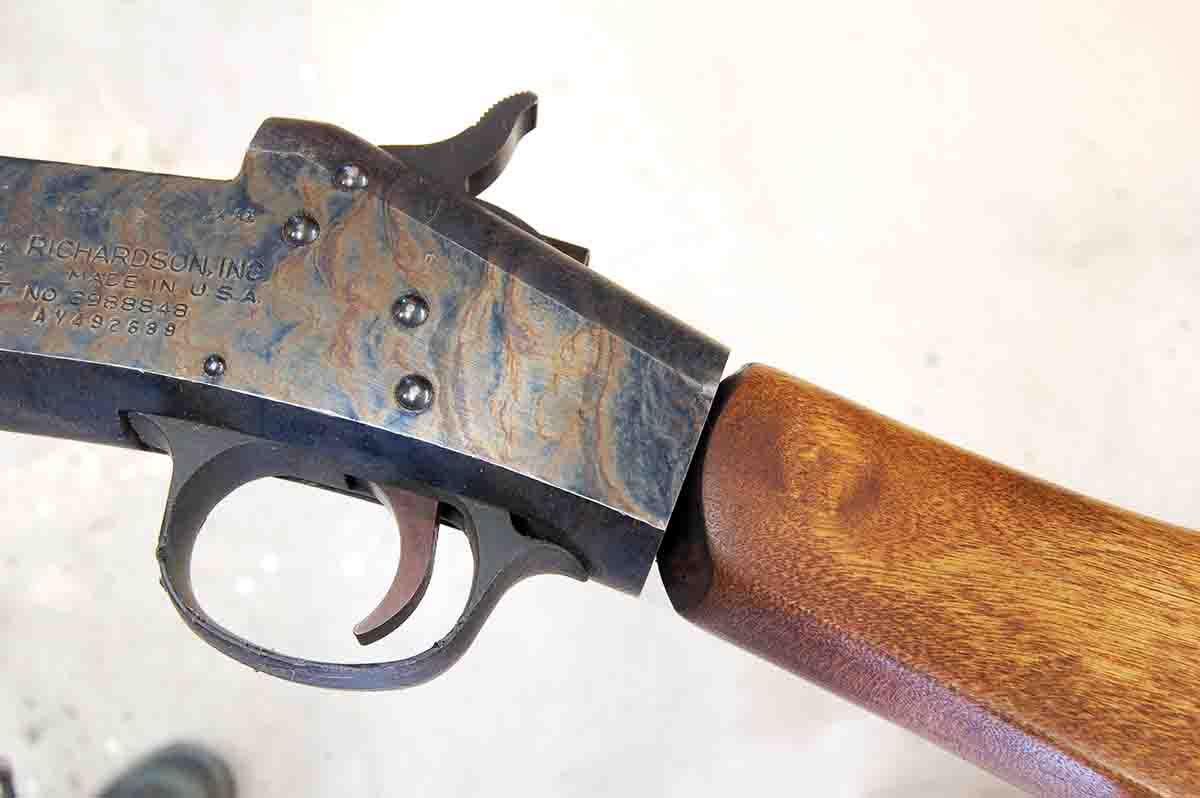
The buttstock now fits solidly into the receiver as it must for best accuracy. Next time, the forearm will be altered to eliminate looseness there. With a new solid feel, new wood and better accuracy, the little rifle will become something its owner may not recognize.