Light Gunsmithing
Cheekpieces on Rifle Stocks
column By: Gil Sengel | November, 19

Just where and when the idea of the cheekpiece originated is unknown. It is found on guns having ignition systems prior to the flintlock, and even on crossbow stocks. Most non-military flintlock and percussion muskets and rifles in both Europe and America used cheekpiece stocks. This began to change when double-barrel percussion shotguns and wingshooting came on the scene. Gun fit suddenly became important. It was quickly learned a cheekpiece on a shotgun added nothing that couldn’t be done just as well by a conventional stock or one with a Monte Carlo comb – and at far less labor cost.
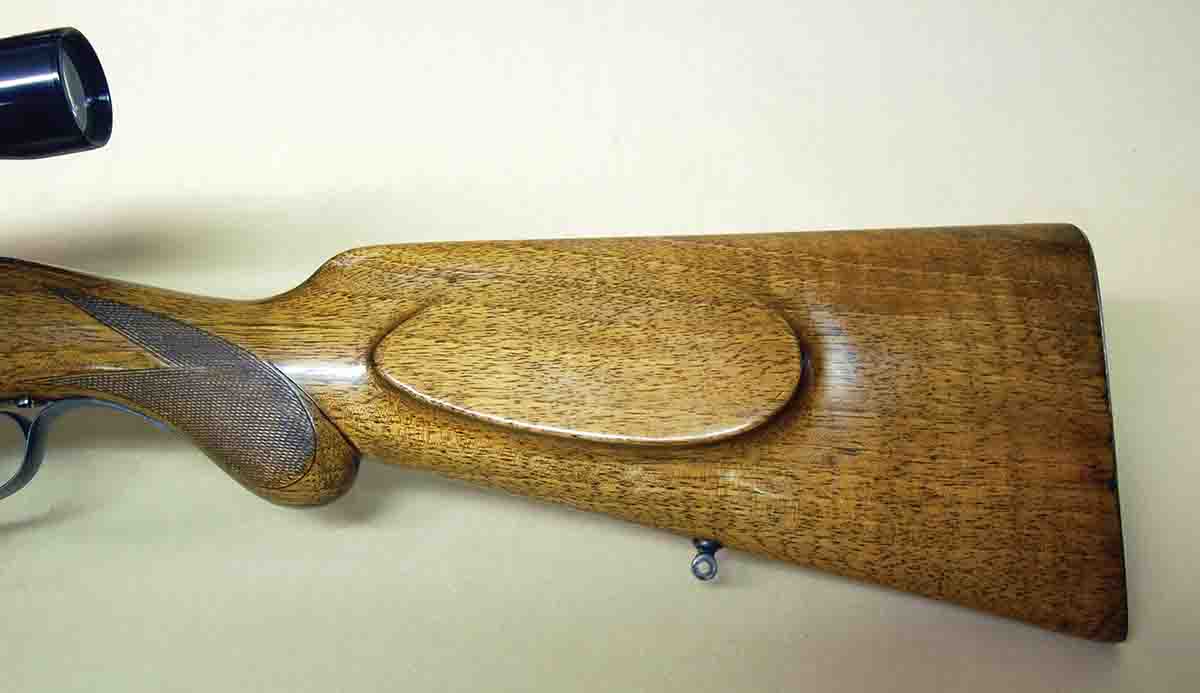
On rifles, cheekpieces come in three varieties: (1) The so-called rollover, which looks like a thick pancake flopped over the comb of the stock. A nearby illustration comes from an undated catalog of the long defunct Reinhart Fajen Company. Several gunwriters of 40 years ago thought stocks thus equipped did everything for everybody and constantly said so in popular magazines. I believe it was writer Jack O’Connor who said the mere sight of the things “gave him the vapors!” (2) This is much the same as the first type, except it thins and stops at the top of the comb, which always has a Monte Carlo rise at the rear. (3) The European-style cheekpiece is thin, low on the stock and of questionable use, but adds greatly to the appearance of otherwise plain, unfigured wood.
Assuming the shooter is right-handed, pick a “target” some distance away that is near eye level. Stand normally as if to fire at this target. Now raise the right arm straight up and extend the index finger to point at the target. The idea is to have the right eye looking along the top of the finger as it points on the target. Carefully note what takes place. As the arm comes up and the finger is almost on target, the head moves slightly down and to the right to meet the finger as it reaches the target. It is this slight movement that the stock comb is made to fit. There is no need for an add-on cheekpiece.

Nevertheless, big cheekpieces became all the rage in the 1960s-1980s. Companies selling semi-finished stocks for sporterizing military rifles pushed the buttplate over to the right (castoff) to allow for a thick cheekpiece. This moved the buttplate out of its proper location and onto the shoulder joint. If the original hard plastic buttplate was retained, recoil could be painful after a few shots. Also, the crooked stock meant recoil no longer came straight back but had a component that slapped the shooter on the cheek. A recoil pad is pretty much mandatory.
These old rifles are now rather common on used gun racks and at gun shows at very good prices. They have few buyers because new “entry level” hunting rifles can be had for under $400, and no one wants a .30-06 when they can have the latest and greatest 6.5 whatever.
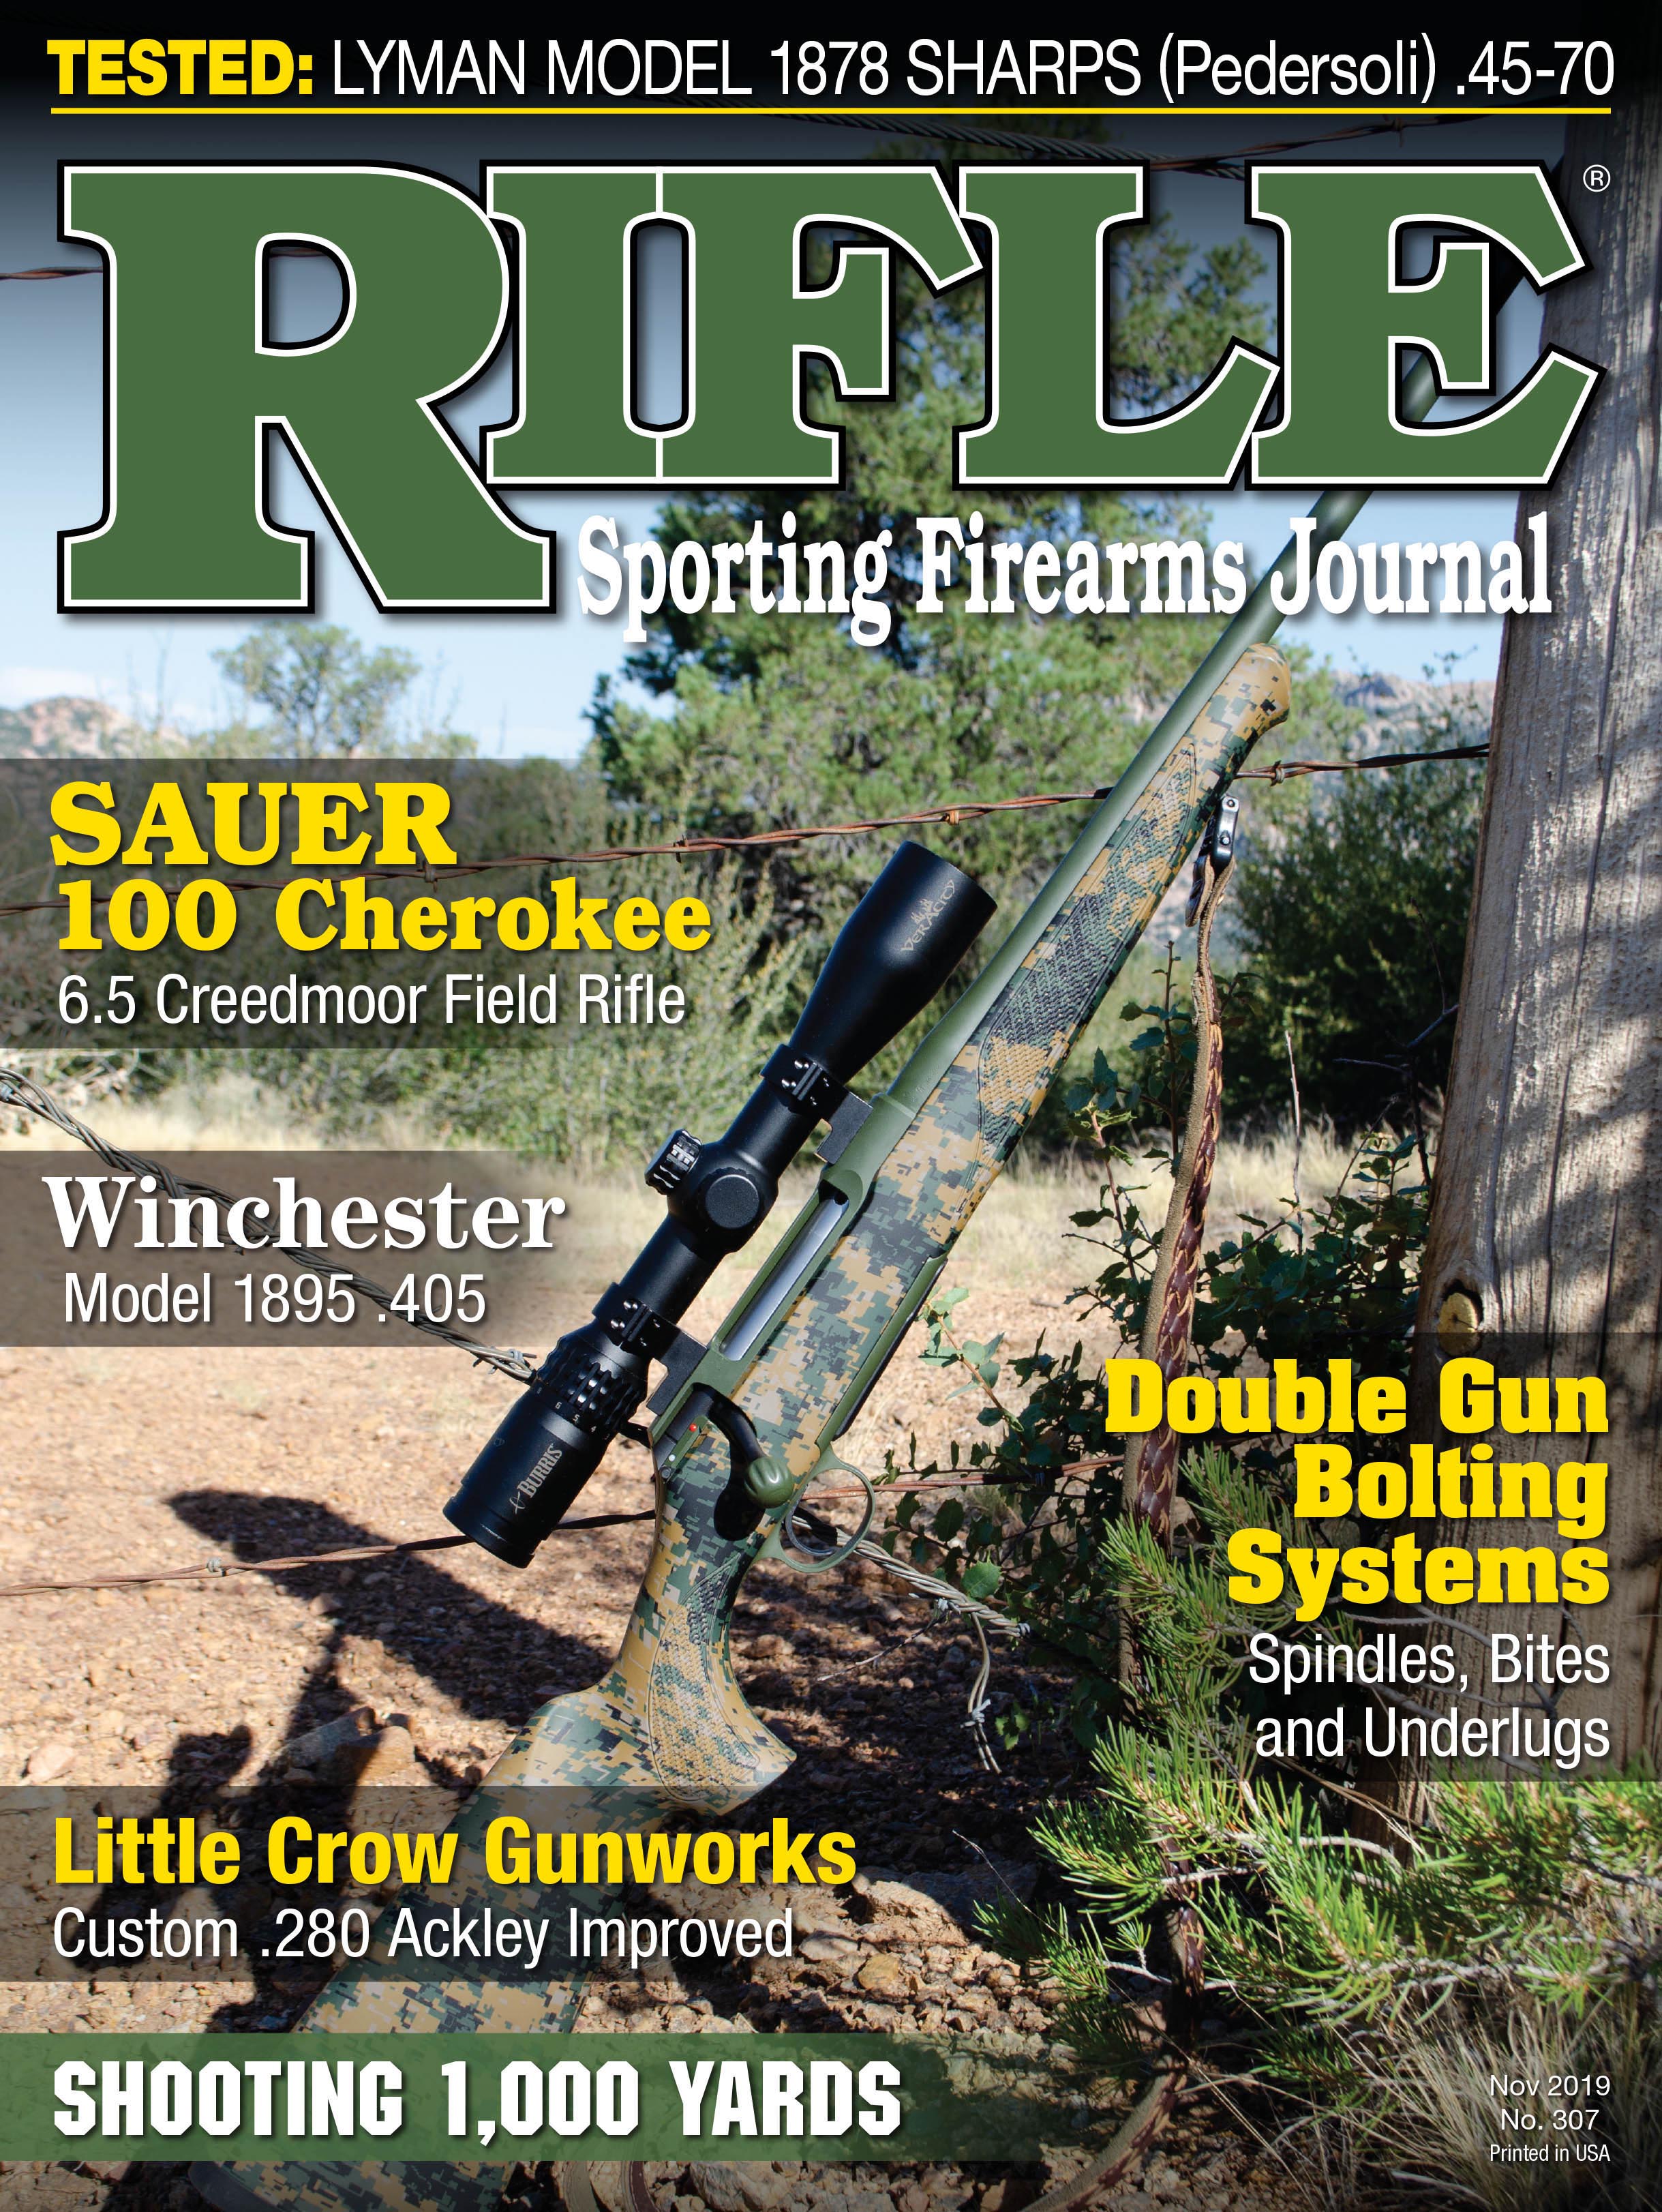
The cheekpiece being modified in the photos is on an originally semi-finished replacement stock for a 1903 Springfield. A photo shows the original shooters-eye view. A 1960s import scope was attached using “tunnel mounts,” which are rings having a huge hole under the scope to supposedly allow using the iron sights with a scope in place. Obviously, that wasn’t possible in this case. Scope and mount went down the road instantly!
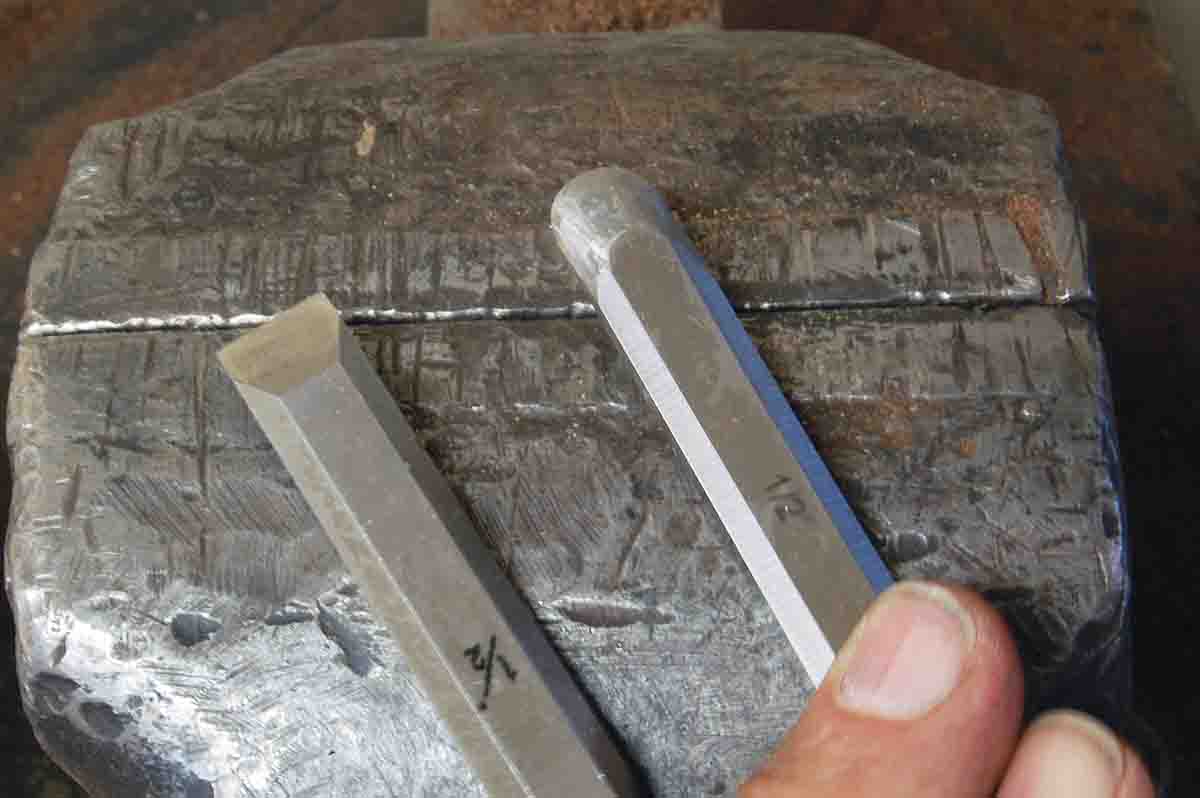
After fitting, the one thing style- conscious riflefolk will want to add is a shadowline. This is the small drop-off that is cut into the concave surface surrounding the cheekpiece. Often described as too difficult for amateurs, it really isn’t if the right tools are used. These are a half-inch wood chisel reground to a rounded point as shown in the photo, and a 10-inch, bastard-cut mill file. The file is important because this length and cut has tooth spacing ideal for doing this job. It is American-made by Nicholson and may cost a couple dollars more than others but is well worth it.
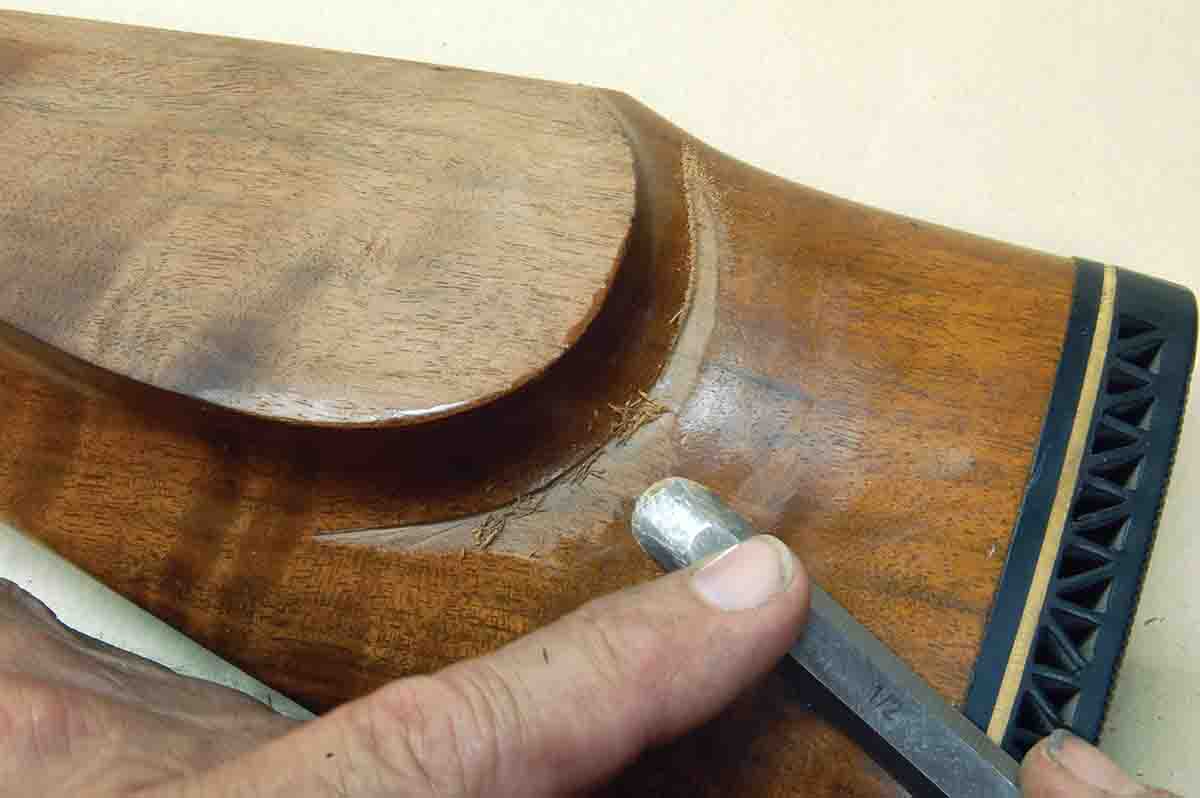
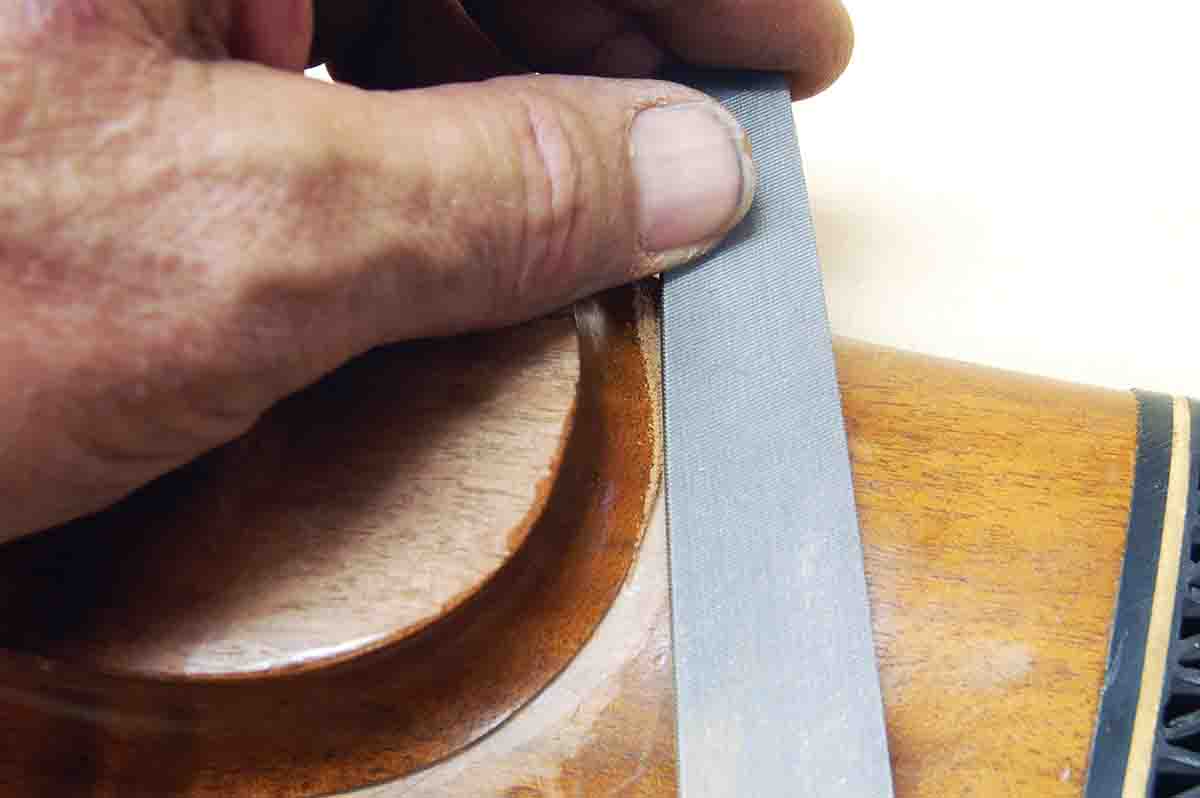
To begin cutting the shadowline, lay the wide face of the file on the stock, then lift it only enough so the wide edge doesn’t cut. Cut only with the thin edge. Put a finger tip on the file to keep it from riding up over and ruining the edge being formed. The photo shows this better than words. Height of drop-off is about .065 inch, or 1⁄16 inch.
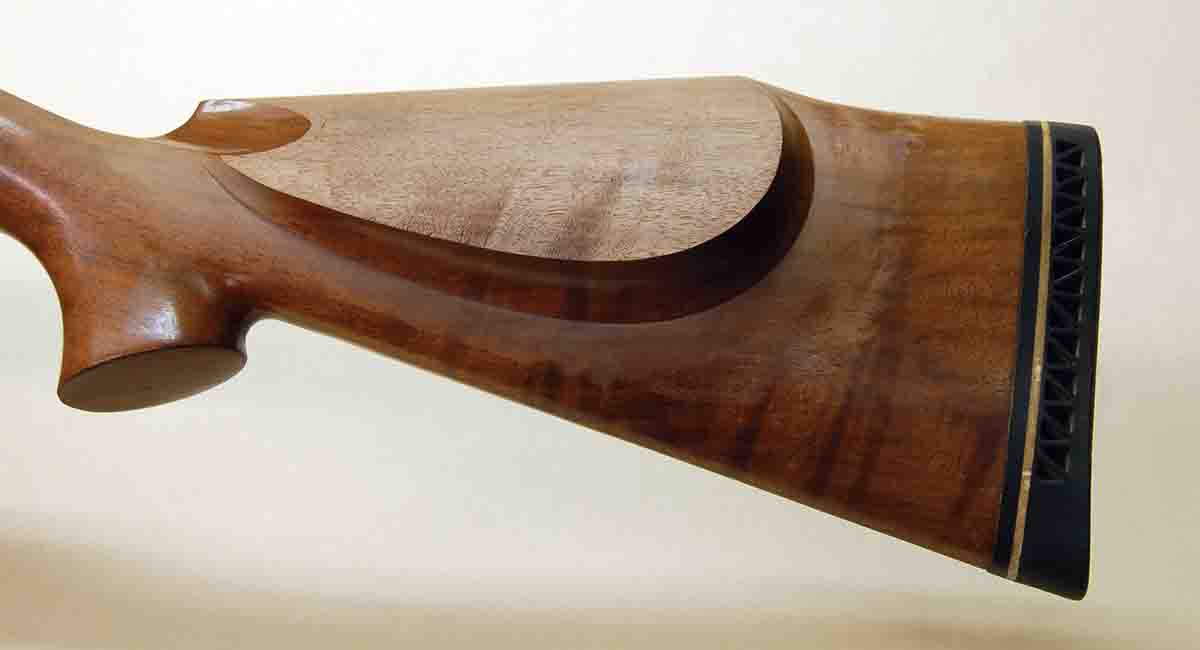
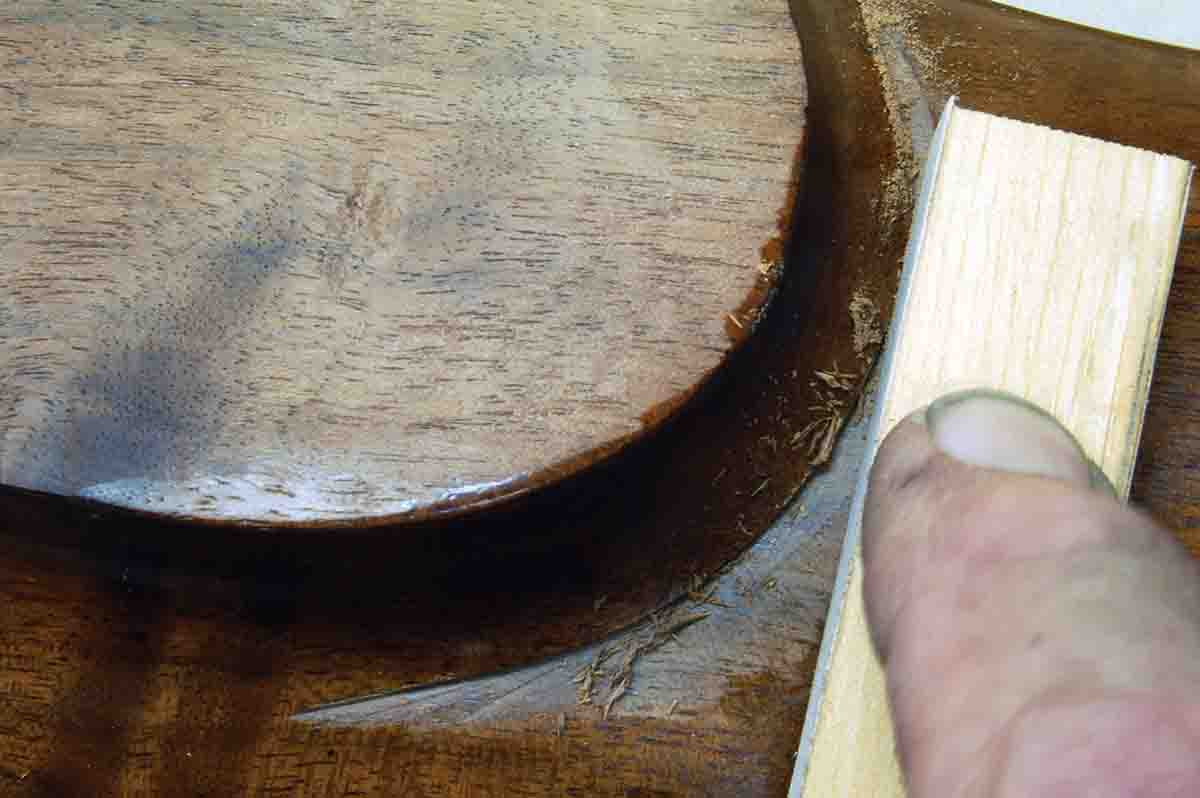
Final finish sanding is done with 300-grit abrasive paper glued to small, square wood blocks about 4 inches long.
Abrasive is only attached on opposing edges so that when sanding the stock surface a “safe” edge is against the shadowline. This is very important for maintaining a clean, crisp edge. Work slowly. Practice file and chisel work on scrap wood to get the feel of how they cut.
Unfortunately, the 1960s-era stock I have been working on has several other annoying features that were once considered the shape of things to come. Since some of these appear on other stocks in need of refinishing or repair, I will show how to correct them in the next issue.