Light Gunsmithing
Alternative to Iron Sights
column By: Gil Sengel | January, 23
At one time, all rifles, with the exception of a few target models, left the factory carrying some form of open iron sights. Many folks were not happy with run-of-the-mill open sights and mounted aperture target sights (peep sights) on the rear tangs of their hunting rifles. These were dangerously close to the eye on rifles that had much recoil. The aperture was quietly moved forward to the rear of the rifle’s receiver. There was nothing wrong with these sights (for folks having good eyesight) in the 1920s, 1960s or today.
Nevertheless, the coming of the affordable telescopic rifle sight ended the reign of all metallic sights rather quickly. This created a lot of old leverguns and single shots that don’t get used anymore because scopes can’t be easily installed. Even if they can be modified for scope mounting, it decreases the collector value of the gun, which today, can be half or more of its worth. Rimfires are a major consideration here because they are becoming more popular with collectors as centerfire prices rise out of sight.
Fortunately, there is a non-magnifying optical sight that can be fitted to any of these rifles, which offers all the benefits of iron sights, yet gives perfect clarity for older eyes. The device can be attached to the rifle with absolutely no permanent modifications, so the collector value is retained. I will be making the mounting bracket, but first, let’s look at the optical device.
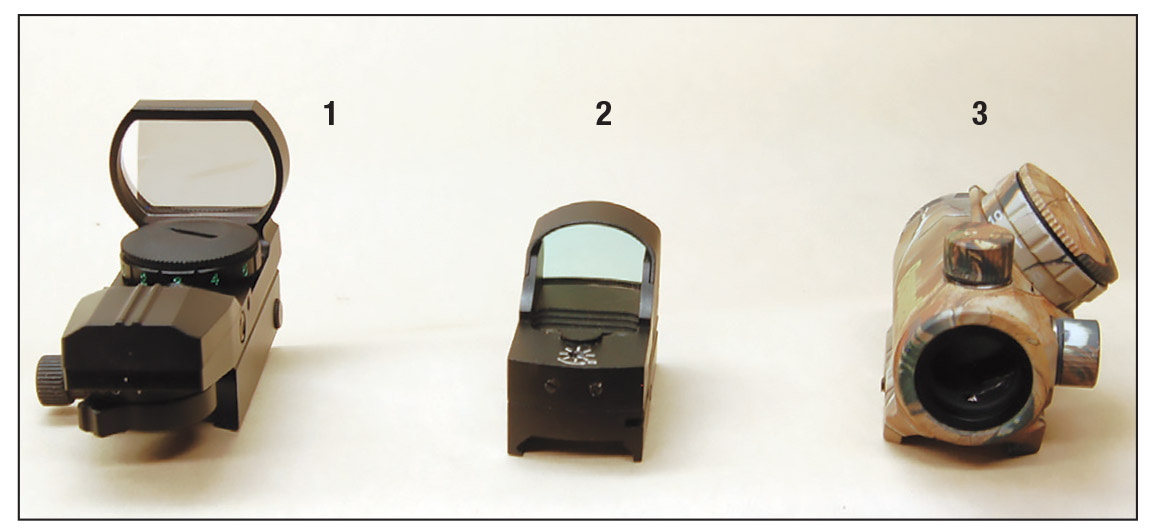
These little aluminum and plastic gadgets come in two varieties. One is called an open red dot sight or sometimes, a reflex red dot sight. It has a view screen that stands up at a right angle to the sight body. A small red dot is projected onto the screen. Properly sighted-in, the dot is where the bullet hits. There is no focus, eye-relief or magnification. Just look through the sight and squeeze the trigger when the red dot is in the right place. It couldn’t be any easier. Also, new shooters will love the things because they are battery powered! New models seem to appear monthly.
The second type of red dot sight is called a closed red dot or traditional red dot. Looking like an extremely short scope, it is probably more rugged than the open red dots and certainly less affected by rain or snow. It operates exactly like the open red dot.
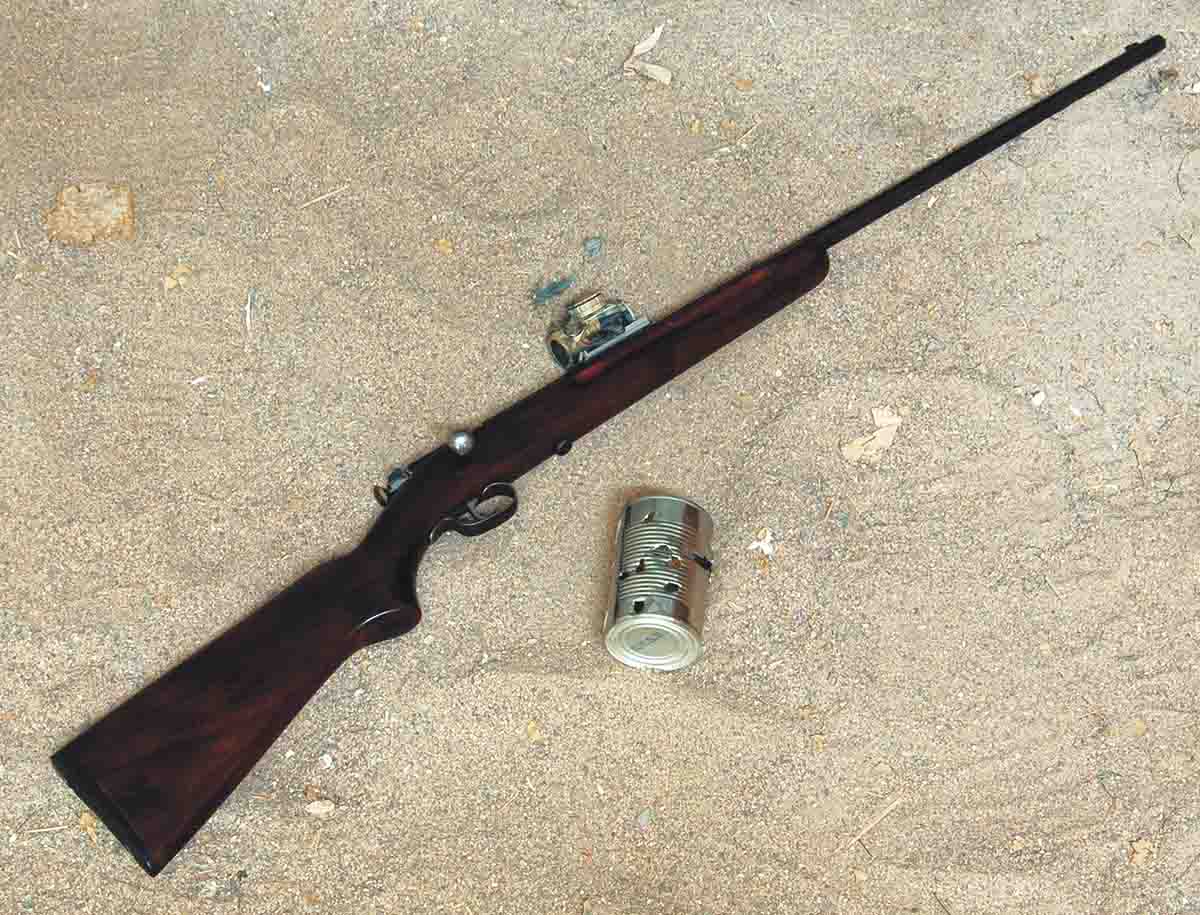
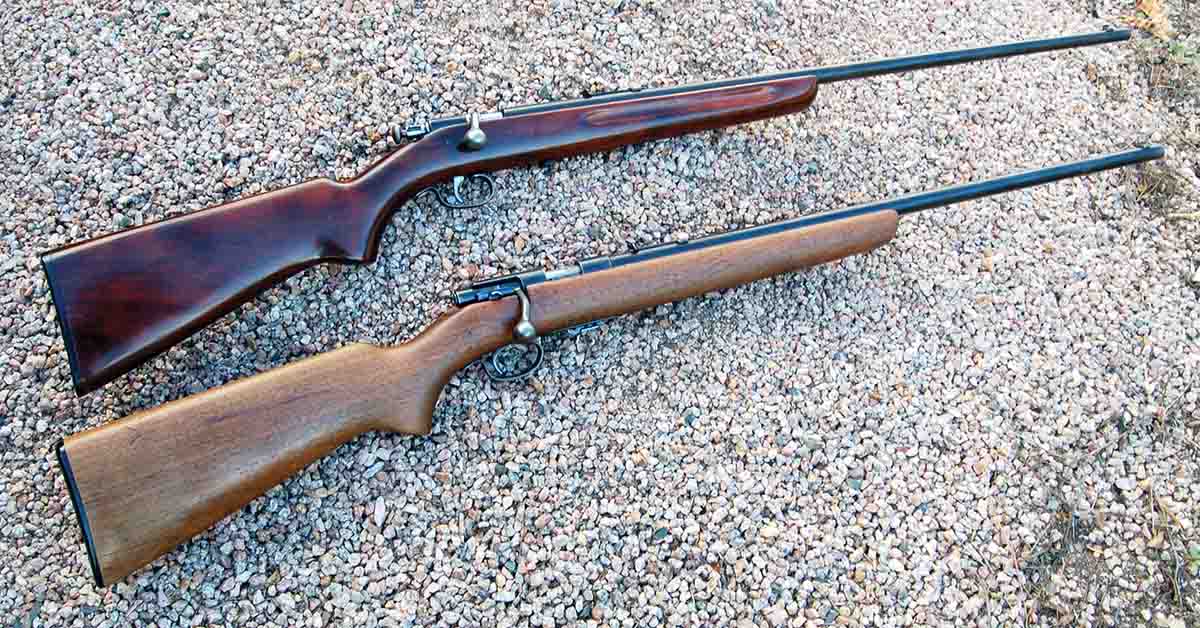
In order to attach a red dot sight to an old rifle having only iron sights, it is necessary that there be a rear sight dovetail in the barrel. The photos show an early Winchester M67 .22 rimfire single shot, a perfect candidate for a red dot sight if its crude iron sights have become blurry over the years.
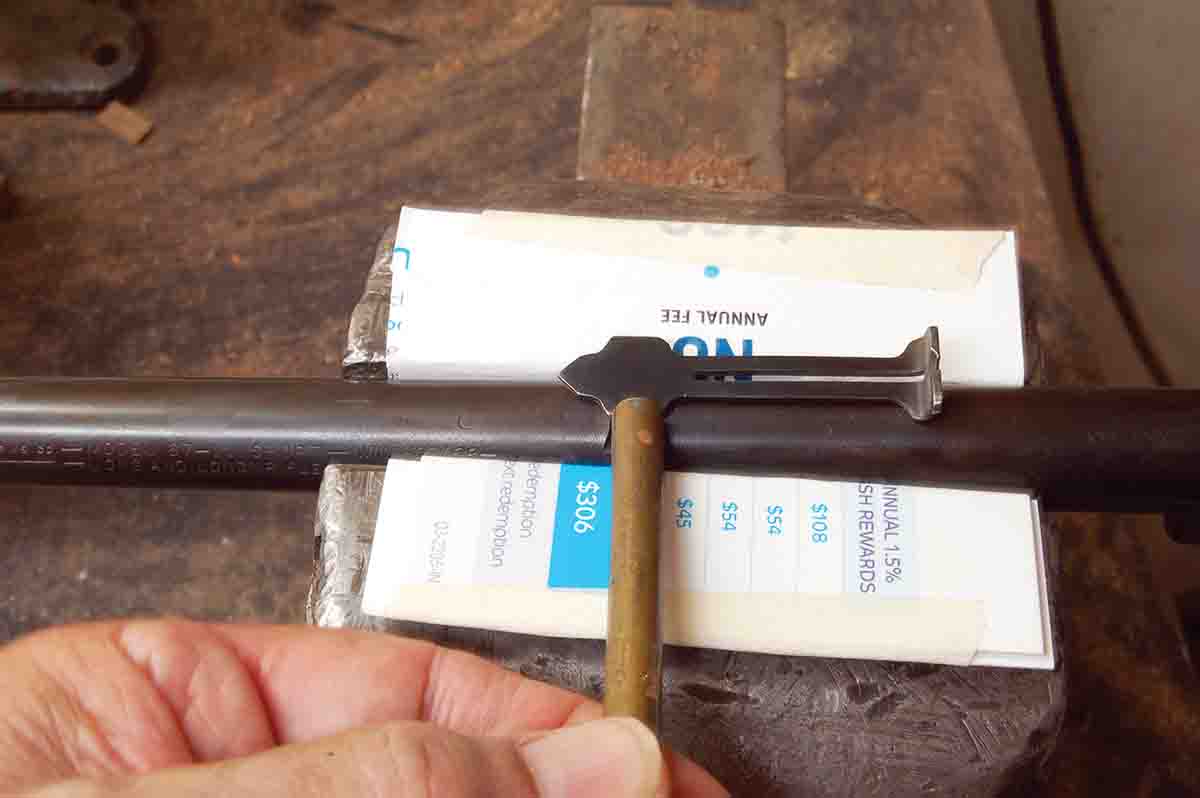
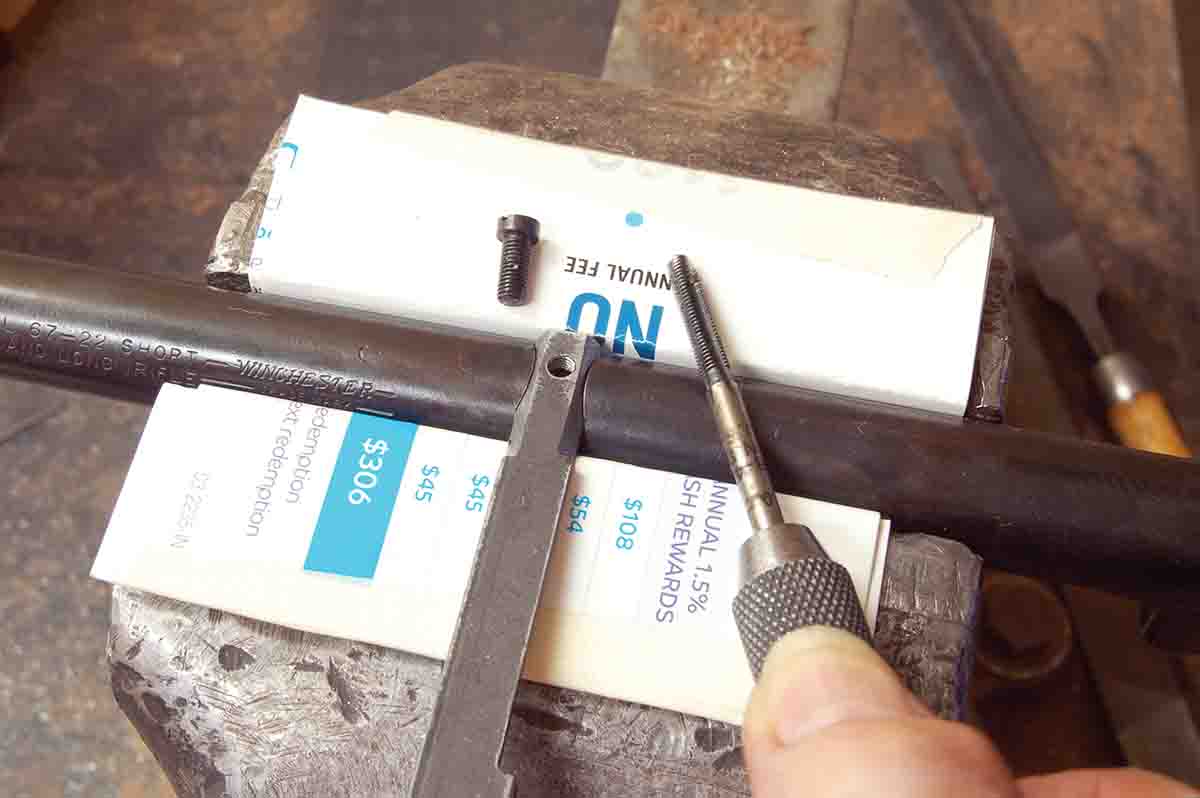
The first order of business is to remove the existing rear sight. This may be easier said than done. Resting there undisturbed for 50-100 years, the sight may be rusted in place even though no rust is visible on the outside. In every case, it is best to assume the worst and do the job correctly. By removing the iron from the wood, then clamping the barrel in padded vise jaws as shown in a photo. The sight can now be tapped out (left to right) using a brass punch. If the sight refuses to move, a couple of drops of penetrating oil may be necessary. This never fails and nothing gets bent or broken in the process.
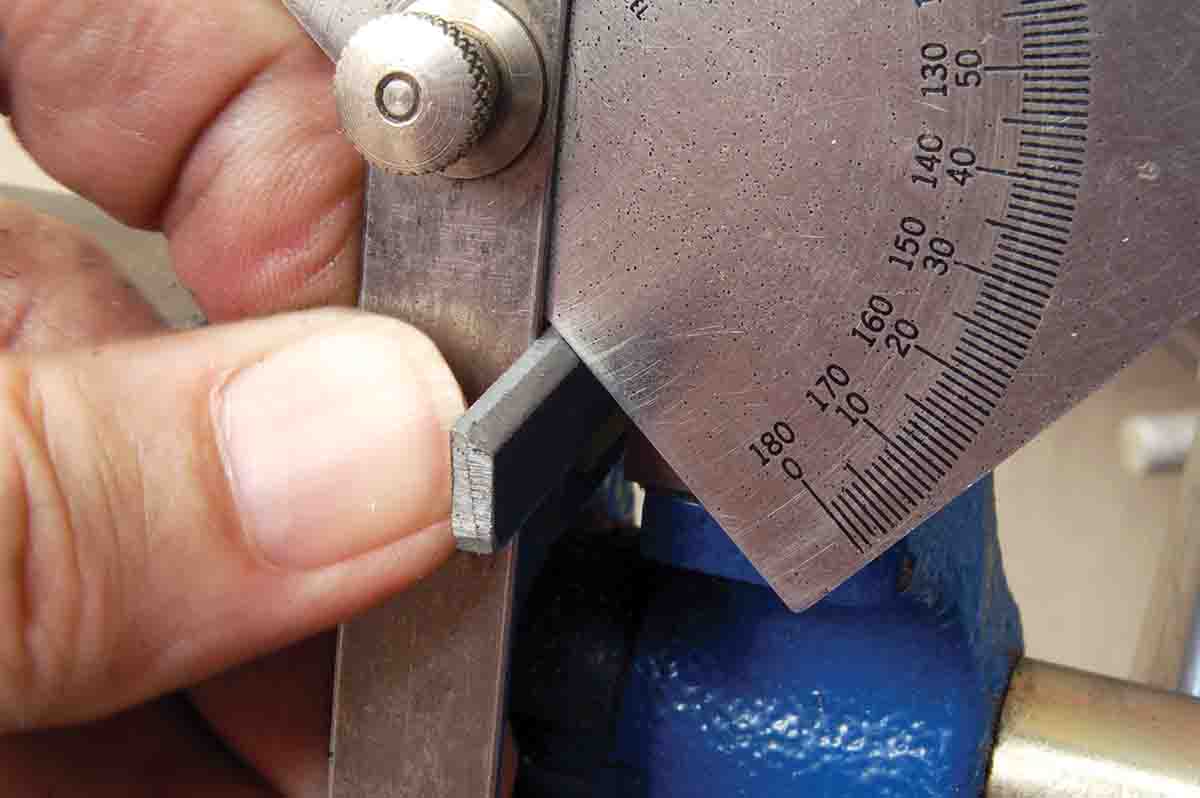
Now, reassemble the rifle and clamp it in some type of holding fixture (gun vise). Clean the dovetail slot thoroughly with a small wire brush. A piece of steel must now be filed to exactly fit this dovetail cut. Not a friction or drive fit, but just loose enough to be inserted with the fingers. Standard dovetails are .375-inch wide at the bottom and .100 to .125-inch high. This will be the anchor for the red dot mounting base.
Such a small piece would seem hard to shape, but it becomes easy when formed on the end of a larger piece held in a bench vise. Only a dozen or so strokes with a wide mill file are needed. If the angle is a bit off and the piece too loose a fit, just cut it off and try again! The final operations on the anchor are drilling and tapping an 8x40 tpi hole for the anchor screw in the center and shaping the ends so they are slightly below the surface of the barrel.
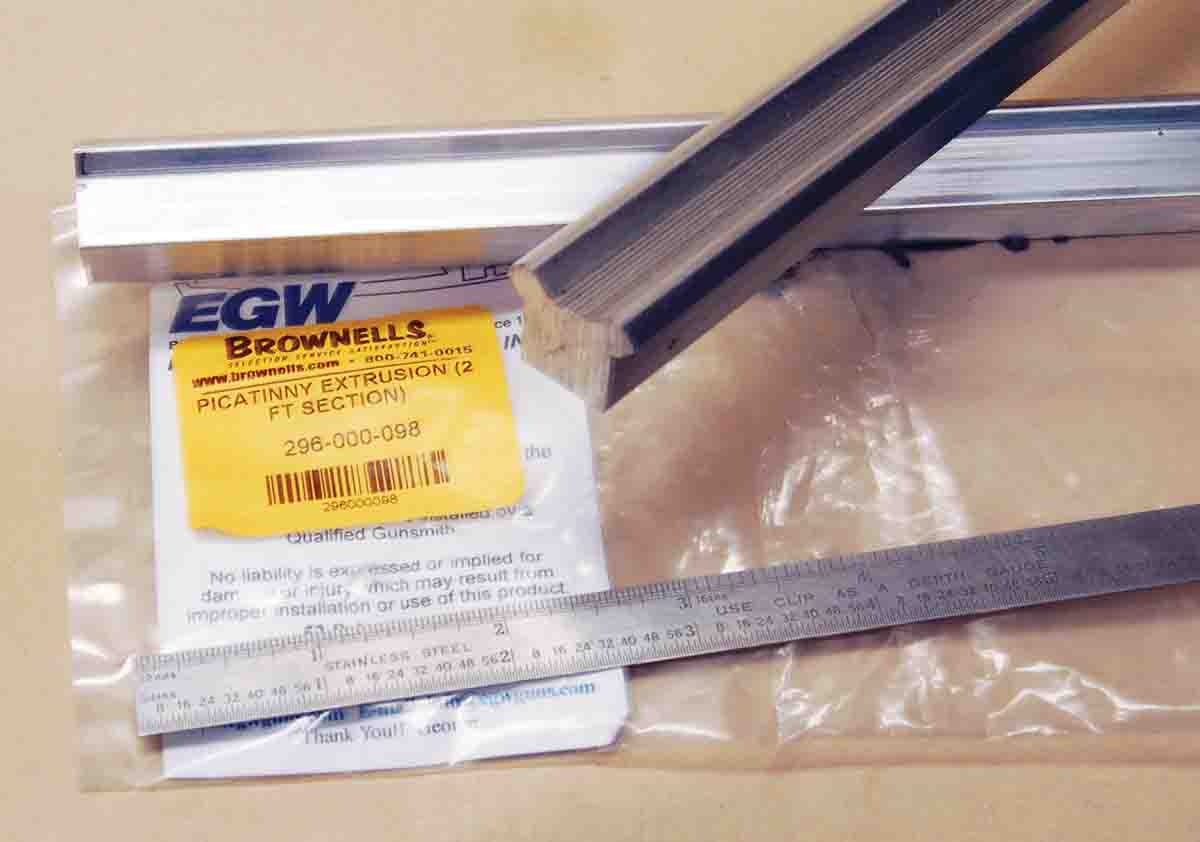
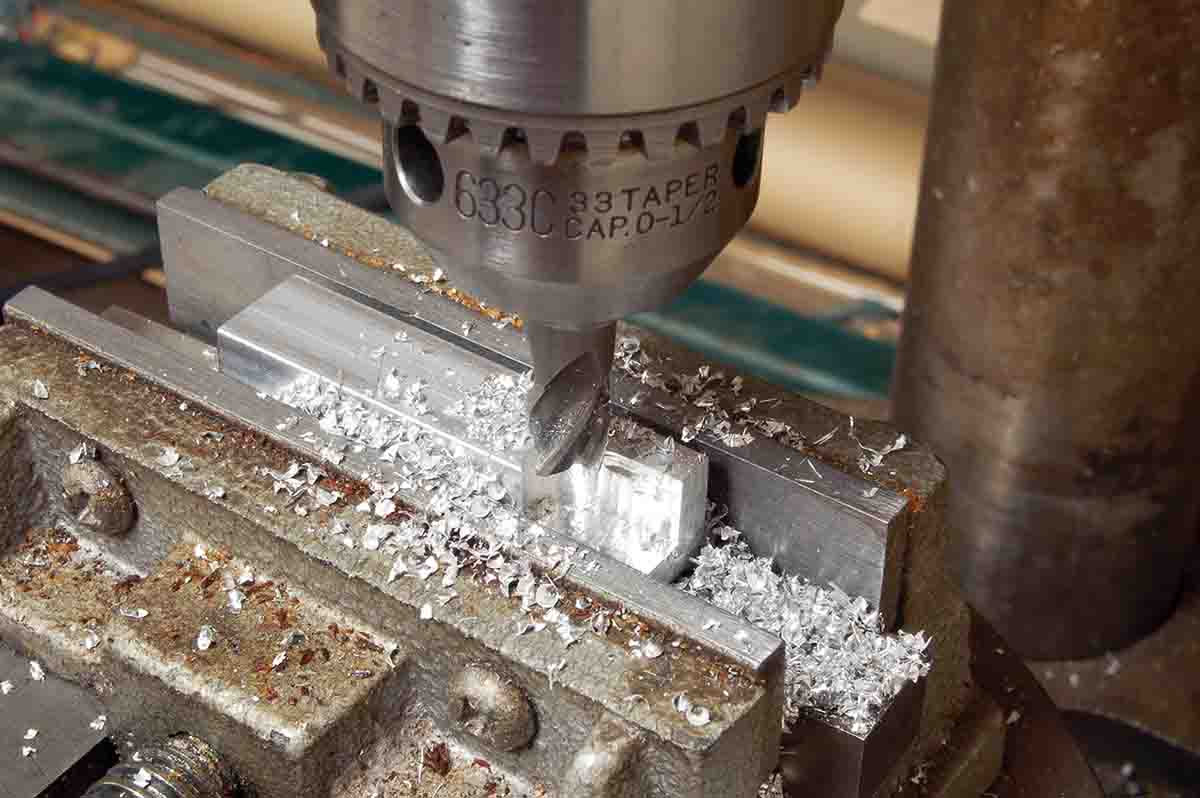
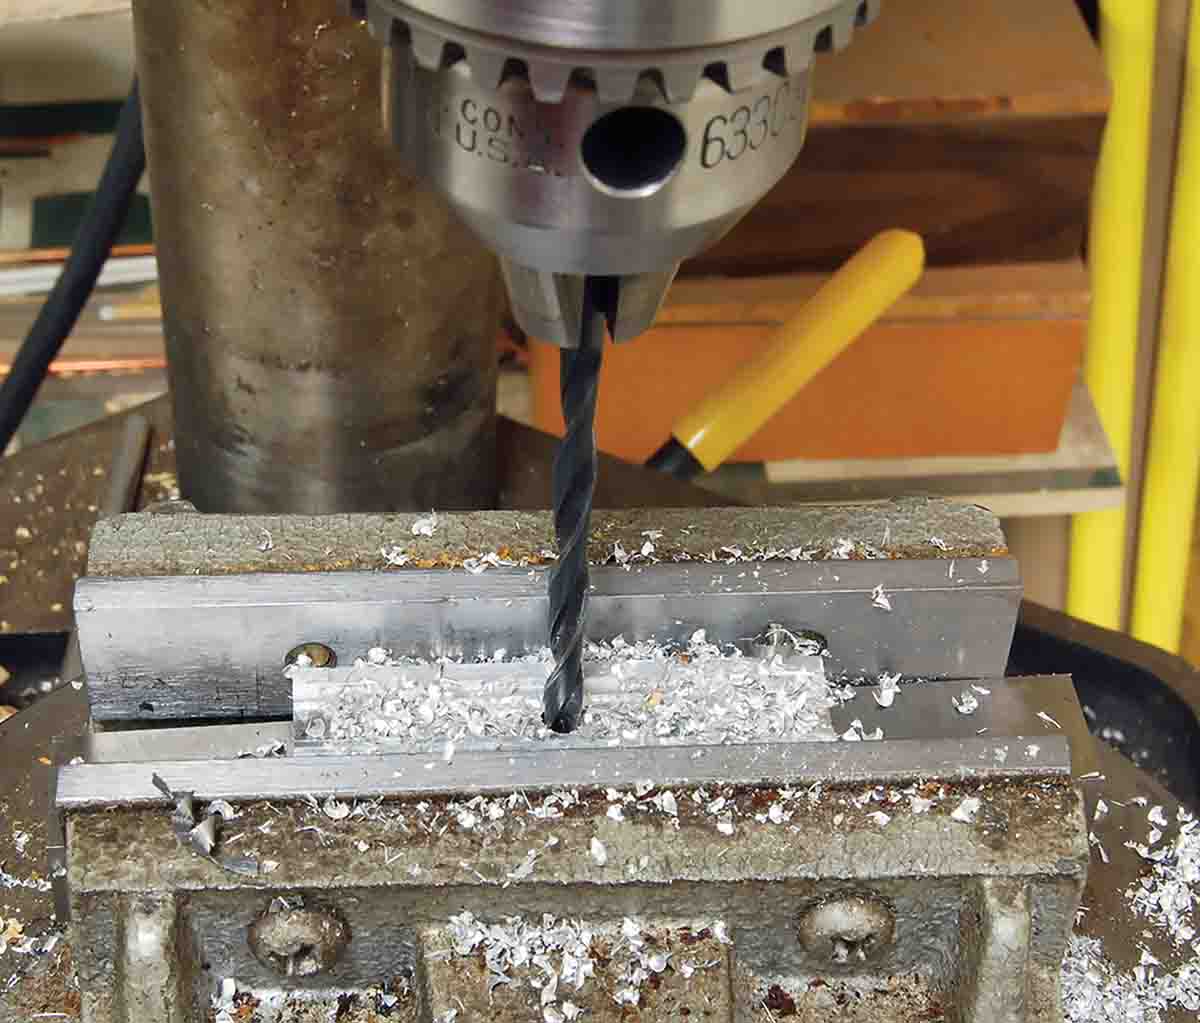
Picatinny base stock is extruded aluminum. It comes in 24-inch lengths from Brownells (Brownells .com). I used 2 inches for this project. Intended for universal application, this stock is too tall and needs to be reduced to about .375 inch. Normally, this would be done on a hobby drill/mill, but any drill press with a compound vise is okay for the light milling of aluminum. A compound vise allows cranking the workpiece left and right, forward and back. A drill press is useless for gun or hobby work without such a vise. A cheap
3⁄8-inch end mill (cutter) is available at some tool stores or in hobby supply catalogs. It looks like a drill bit with a flat cutting end. As used here, the cutter is pushed straight down like a drill bit and is called plunge milling. Run the drill press at the lowest speed. Remove most of the excess stock with a hacksaw before milling.
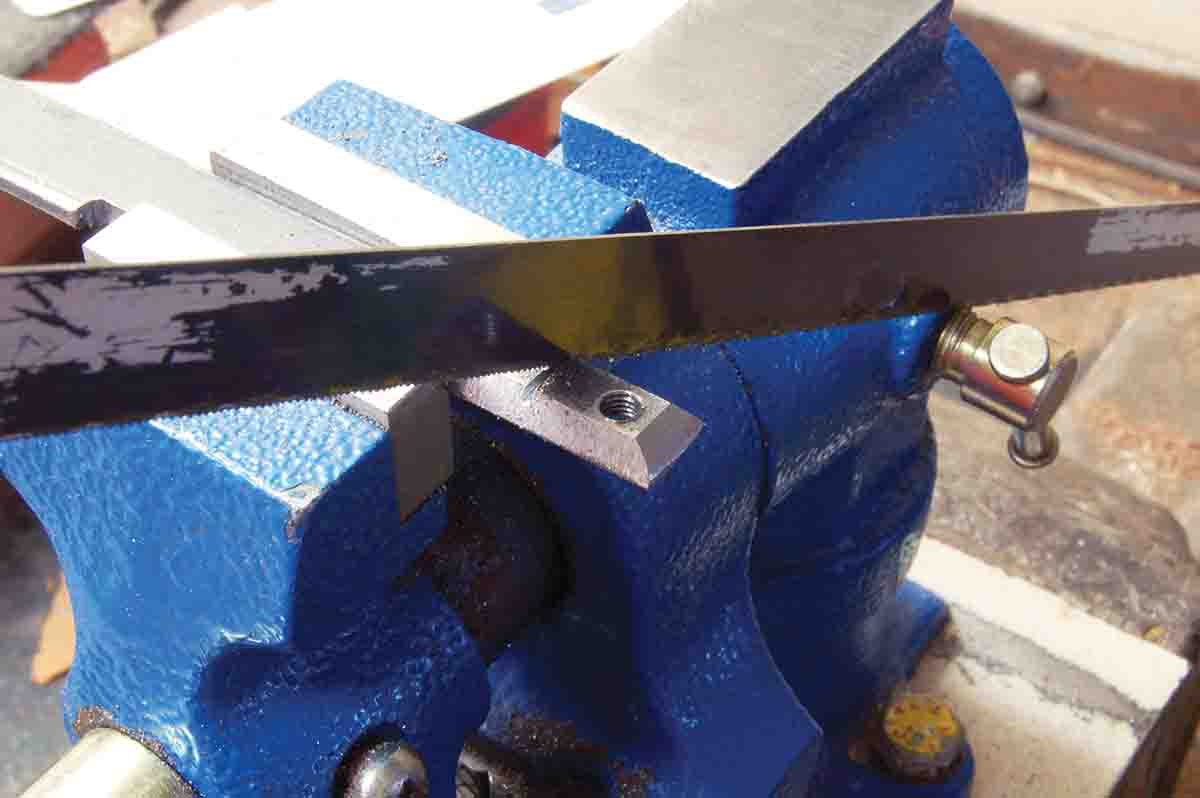
Do not remove the base from the vise just yet. Locate the exact center of the base both widthwise and lengthwise. At that point, drill a .166-inch (#19) relief hole for the anchor screw. Now, replace the drill with the mill cutter. Be careful not to move the vise off the center just found. Lower the cutter to touch the base, then use a .010-inch shim to set the quill stop and turn the cranks on the compound vise to mill a 3⁄8-inch groove down the center of the base from end to end. Repeat until a .50-inch deep groove is formed.
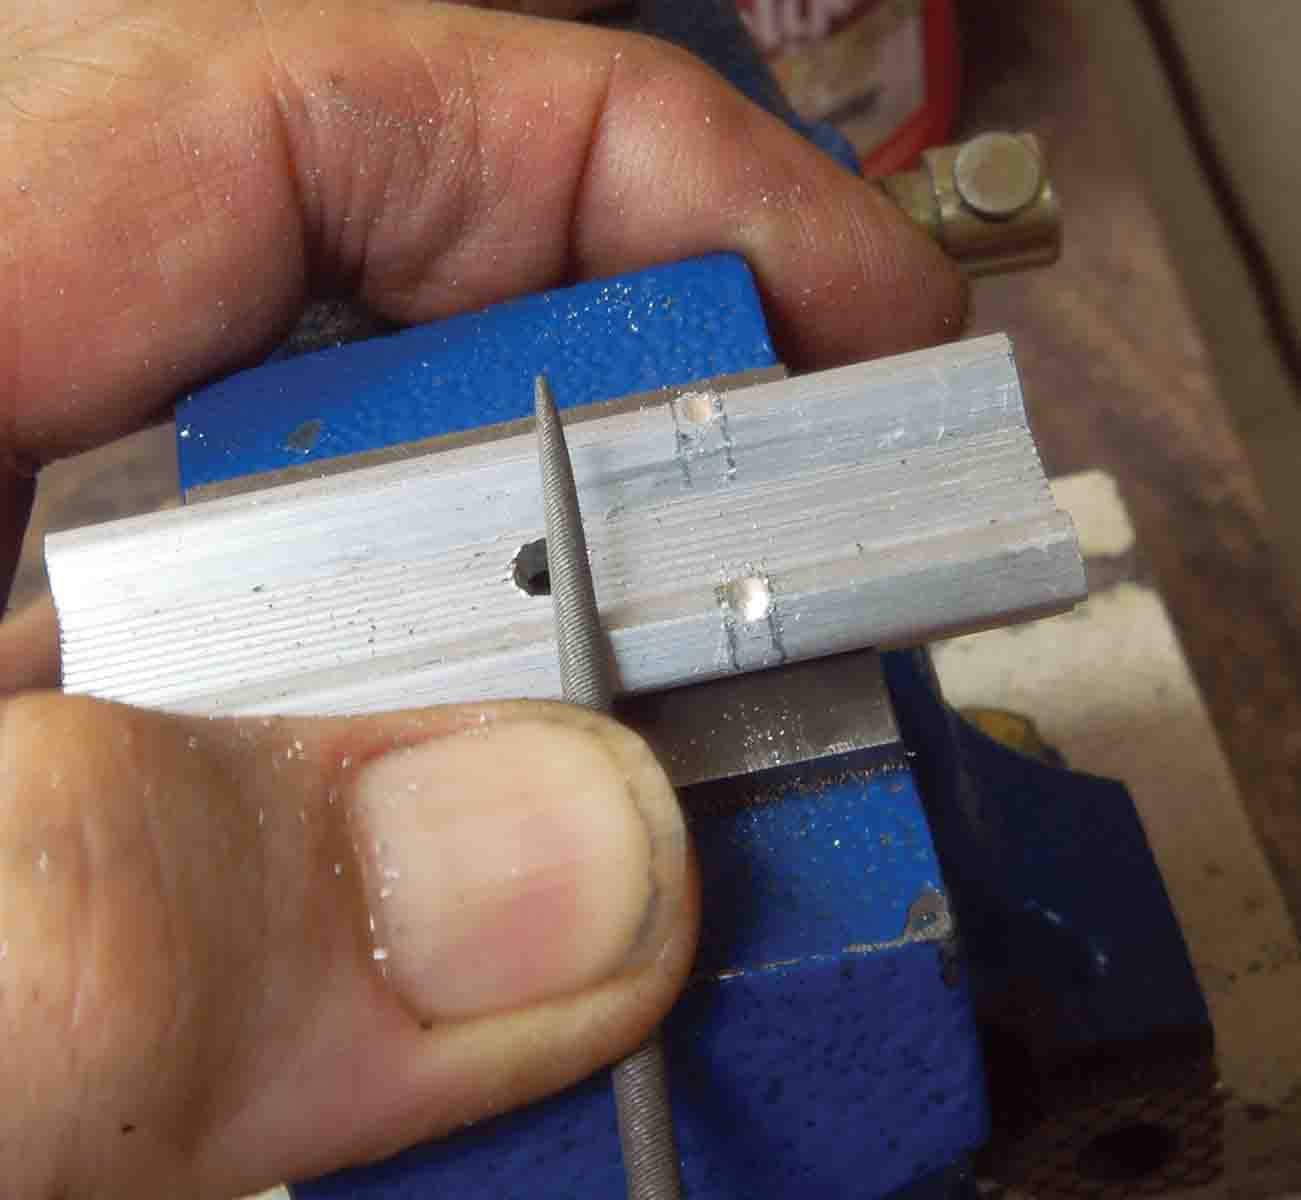
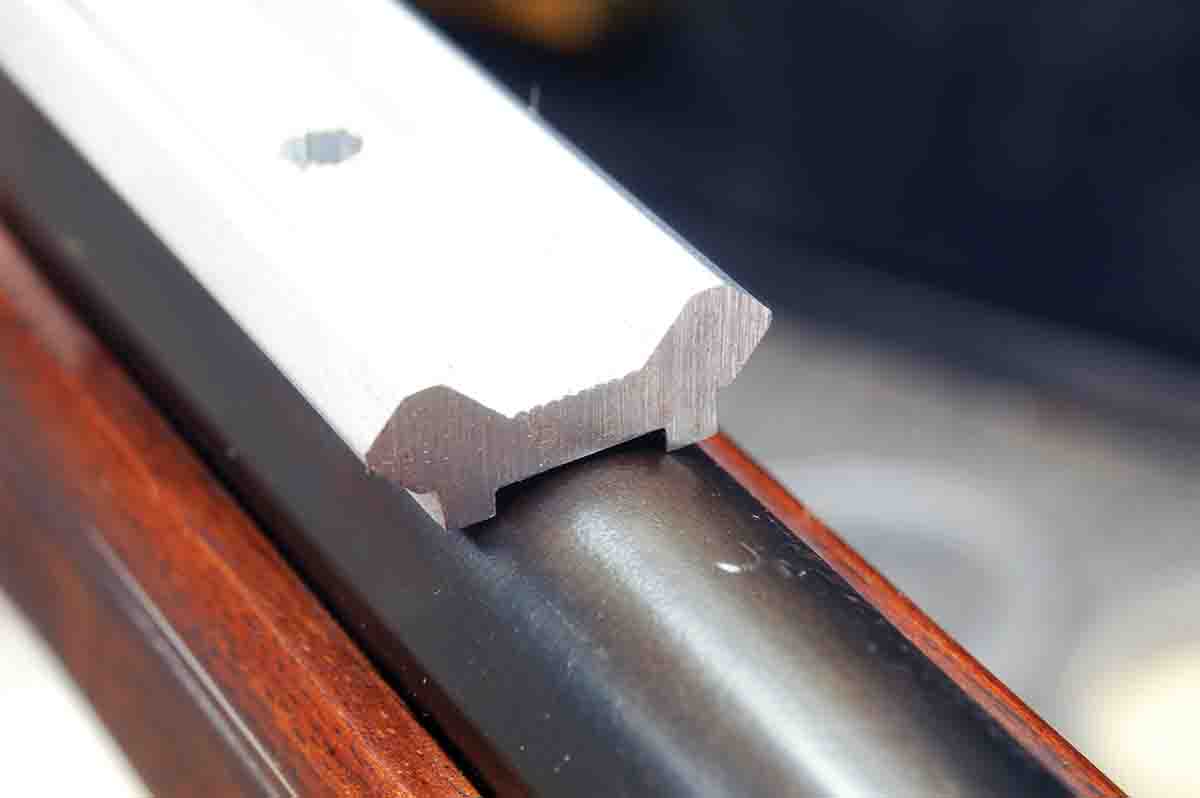
The purpose of the groove is to allow the base to sit down over the curve of the barrel a bit, preventing it from turning when clamped by only one screw. Only the edges of the base should touch the barrel, as the photo shows. Now, slide the anchor into the dovetail and try the base again. If there is movement, determine the point of contact and file it down.
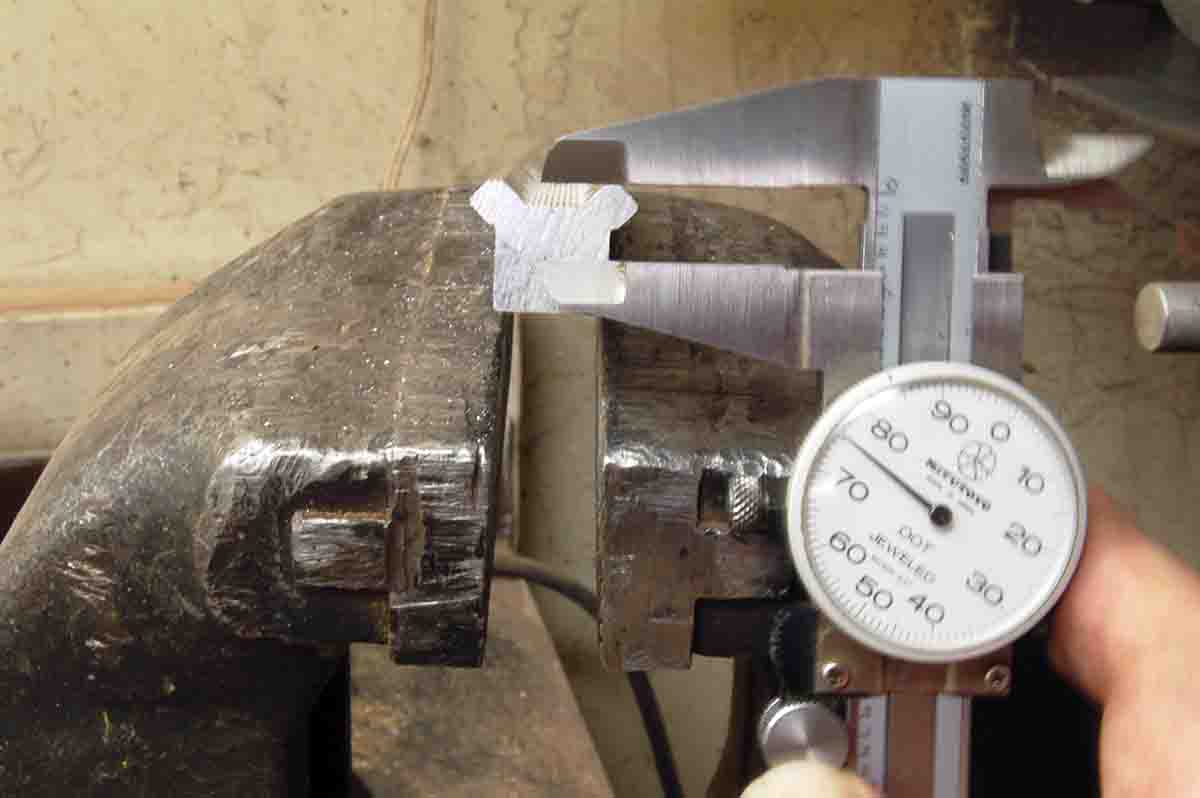
Fitting the anchor screw is next, which means simply shortening it. (The head is so thin it doesn’t require countersinking.) File carefully to allow as many threads as possible to engage the anchor. Tip: I made a little vise to hold scope screws in Rifle No. 271 (November – December 2013). It makes the job quick and easy.
All that remains is to cut the crosscut for the red dot base clamp. Lay this out with a square and cut using a common round needle file. No great precision is needed as .22 rimfire recoil is nonexistent. Just be sure the slot is deep enough to allow the sight to sit flat on the base. If the white aluminum seems offensive, Birchwood Casey sells Aluminum Black liquid in 3-ounce bottles that does a good job of fixing that.
Putting the Bushnell TRS-25 red dot on the old Winchester M67 gave a pleasant surprise. Hitting tin cans at 100 yards was easy. The same sight on a different rifle has accounted for several squirrels. It certainly is a game changer for rifles that have no means of mounting anything but open sights.