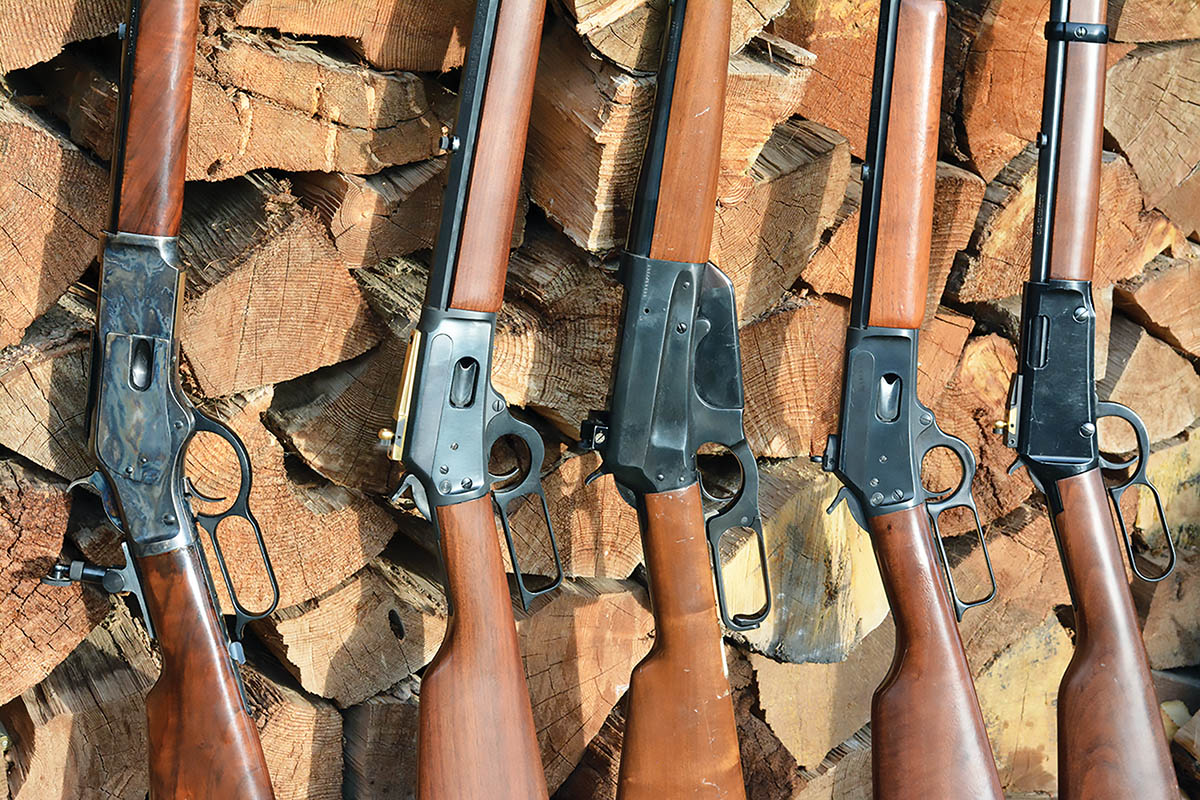
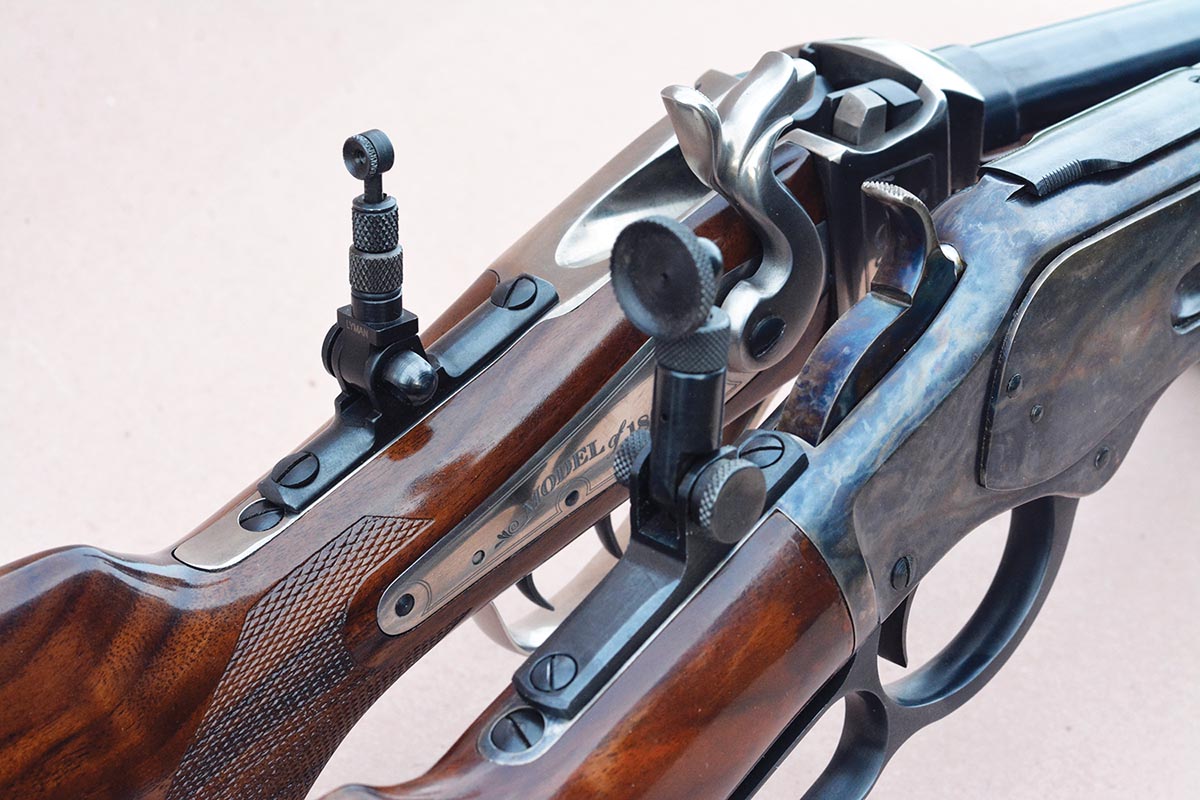
There is a huge variety of aperture sights to fit a variety of field rifles, but they are especially popular on lever actions: (1) Uberti 1873 with Tang mounted sight, (2) 1894 Marlin with Skinner Express, (3) 1895 Browning with Williams Foolproof, (4) 1894 Marlin with X-S aperture and (5) Henry Frontier with Skinner Rimfire.
X-S Sights offers a Test Post that is a temporary plastic sight that easily inserts into dovetails and is used to determine the correct height for the permanent front sight.
Aperture (aka peep) sights have
a proven record of accuracy in the field and on target ranges, but have also proven valuable in combat. In spite of the widespread use of highly advanced telescopic sights, the popularity of modern aperture sights has become huge and continues to grow. They are generally lightweight, rugged, accurate, handsome and comparatively modestly priced. Personally speaking, I am fond of their compact nature, which works so well when riding horses, hunting in brush or timber, and in low-light conditions. 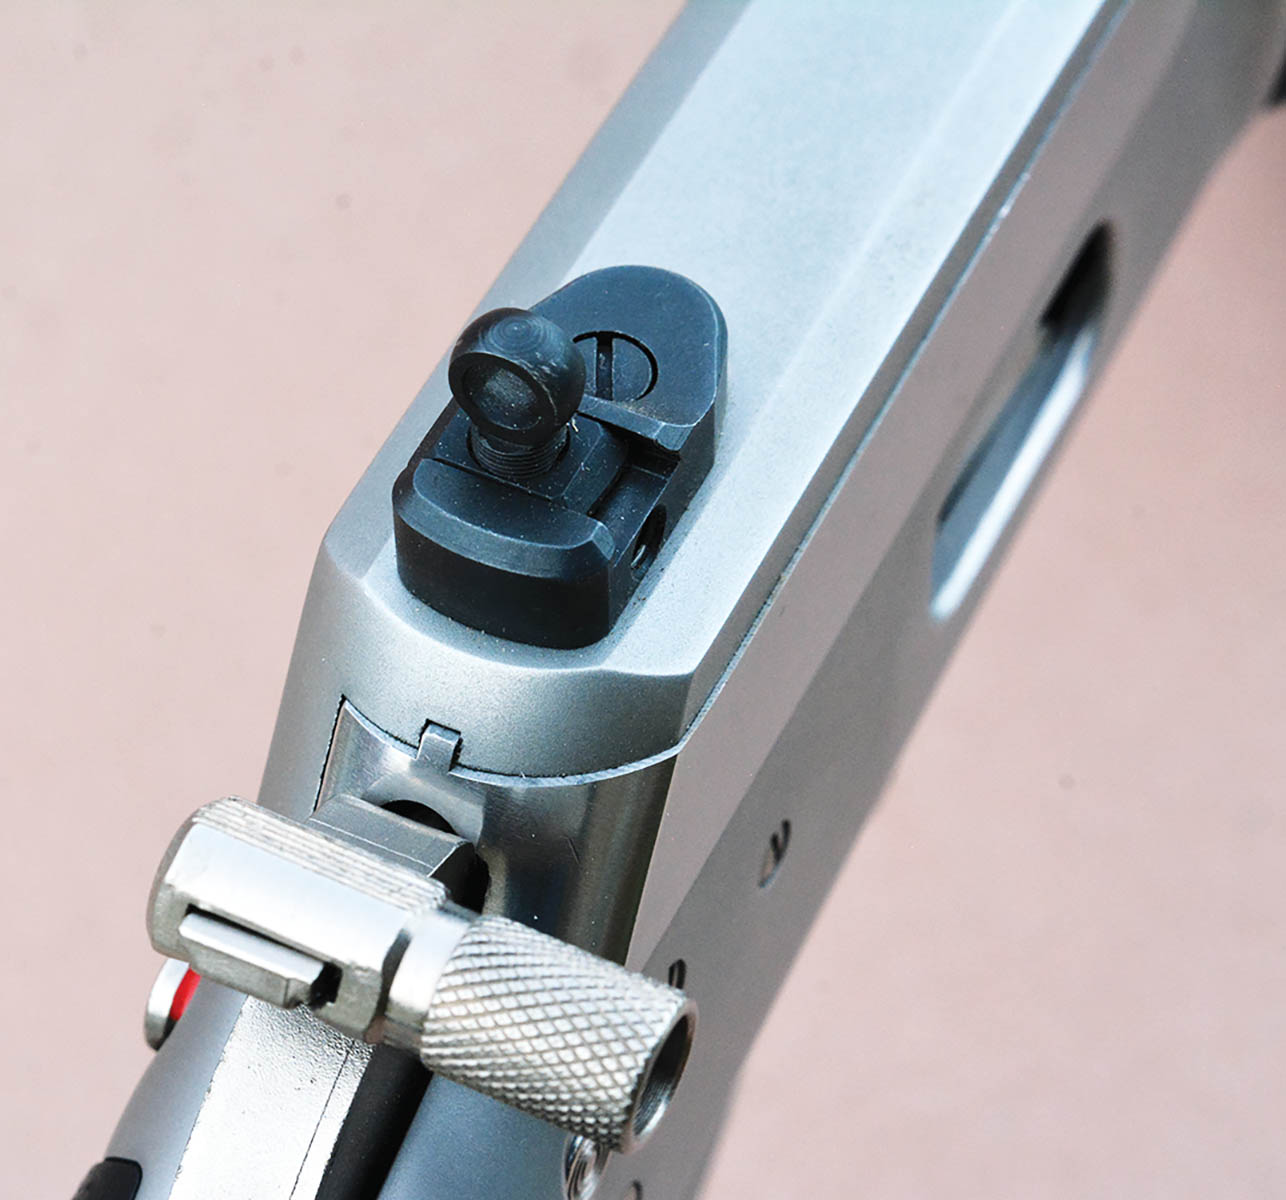
X-S Sights offers a Test Post that is a temporary plastic sight that easily inserts into dovetails and is used to determine the correct height for the permanent front sight.
Today’s comments are primarily
for sporting field rifles and aperture sights that mount directly to the receivers, but can also apply to tang-mounted field sights. Examples include Skinner Sights, X-S Sights, KRA Customs, the classic Lyman 57/66, Williams Foolproof and similar sights. All of the above examples are fully adjustable for windage and elevation; however, their adjustments may not be huge. When used in conjunction with lever-action or straight-wall cartridges at long distances that are beyond their normal effective range, they generally won’t provide enough adjustment to sight in (which is where the tall, tang-mounted target sights shine). If mated to a front sight that is of the wrong height, they may not offer enough adjustment to sight in at normal hunting distances, which we will discuss in a moment. This is not a sight design shortcoming, rather just a poor mating of the two sights by the installer, but especially the front sight height. The following are a few tips that will help when installing aperture sights and ensure that the rifle will always sight in with virtually all standard-for-caliber loads and bullet weights at normal distances. 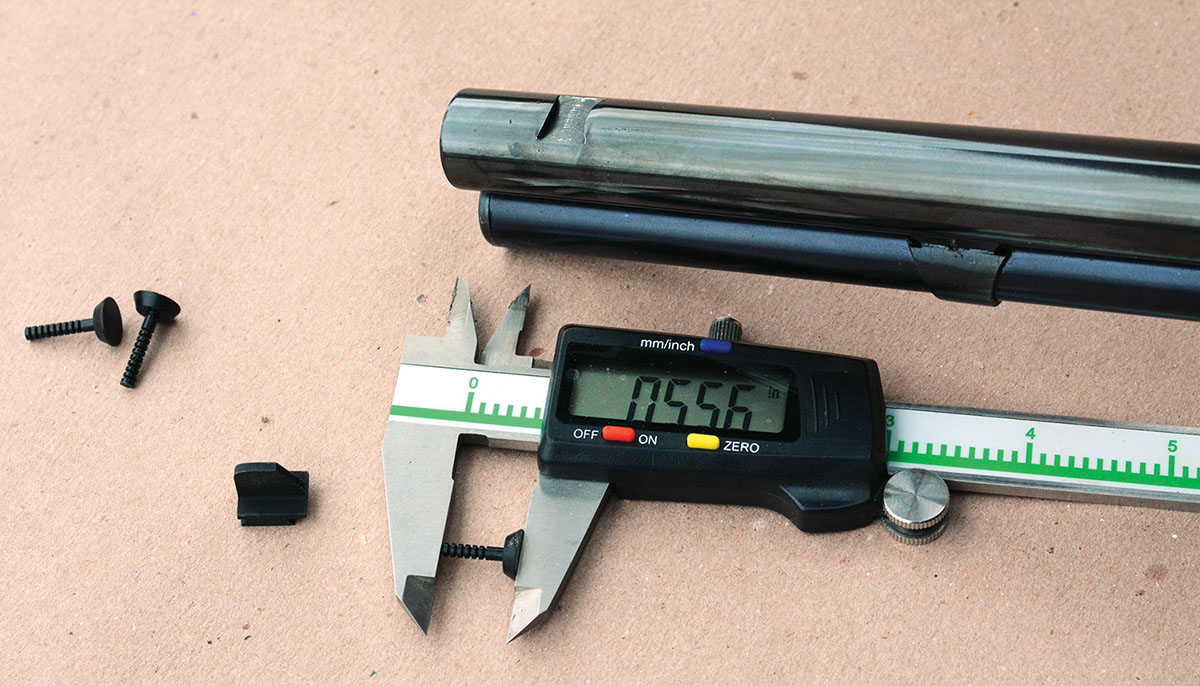
After sighting in the rifle with the X-S Test Post, it should be measured to determine the correct height of the permanent front sight.
Most centerfire leverguns that are factory fitted with semi-Buckhorn rear sights and gold bead front sights will generally have too low a front sight to correspond with a new top-of-receiver-mounted Skinner or X-S aperture sight. In the rare instances that the rifle does sight in with the factory front sight, the rear sight will probably be more or less out of elevation adjustment, which is exactly what we want to avoid. As a result, a taller front sight is strongly suggested. Incidentally, a new front sight is modestly priced, and there are several great versions to choose from that accommodate precision field shooting. I am especially fond of the standard Skinner Guide Series with a black blade and the X-S white stripe for general field use, but that is just a personal preference.
First, let’s mount the rear sight. It is a mistake to use a thread locker and is not recommended by most manufacturers. At this point, follow the manufacturer’s recommendation for installation and tightening of screws. A common problem to avoid is excess tightening of the screws.
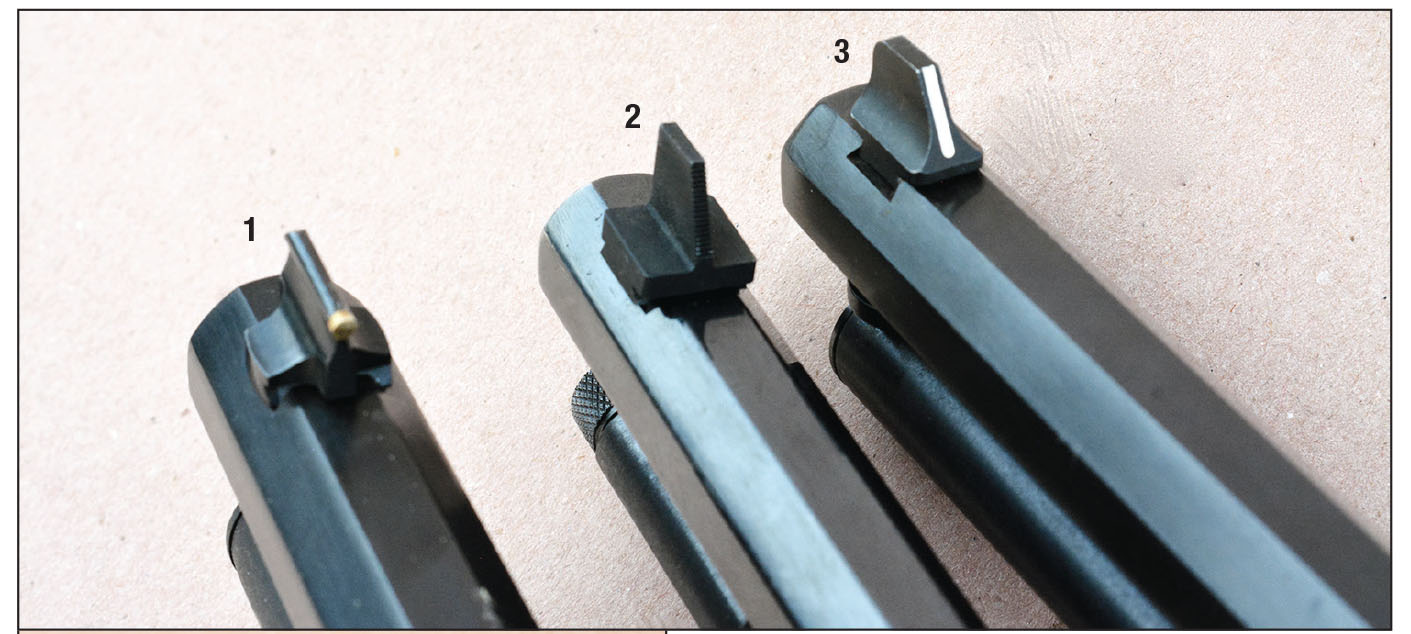
There are many excellent front sight options, including: (1) gold bead, (2) Skinner Guide and (3) X-S white strip.
The mounting screws are hard (harder than rifle receivers) and if they are over-tightened, they can
strip the receiver threads, which can become a costly repair. After installation, it’s suggested to adjust the rear sight to center for both wind-age and elevation prior to installing the front sight (more on that in a moment). 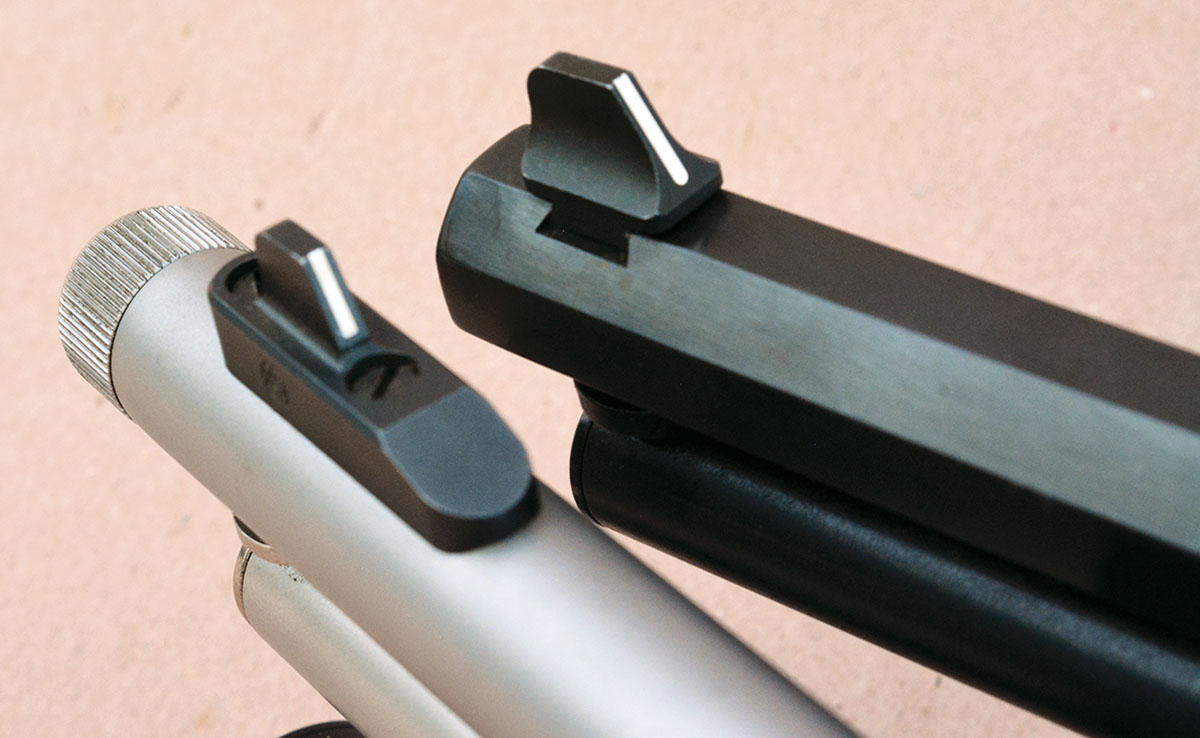
The front sight on the left is mounted via a screw with no adjustment options, while the sight on the right is mounted into a dovetail that allows windage adjustments.
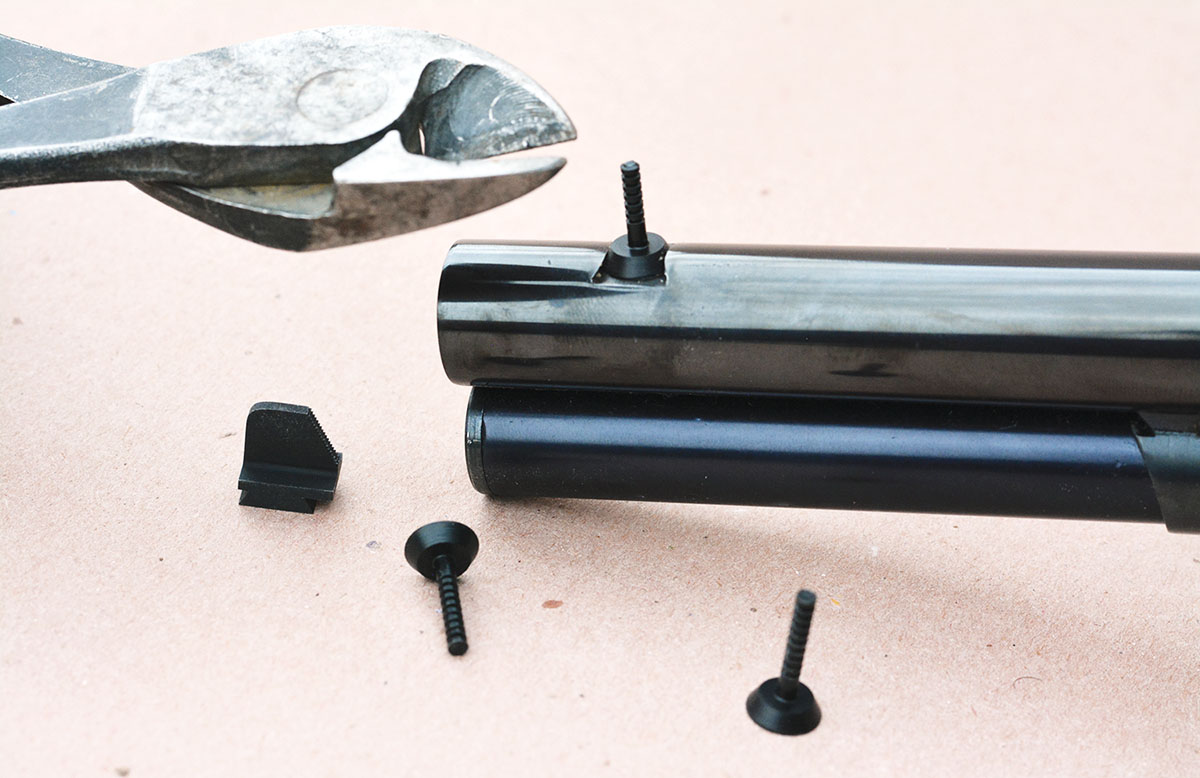
A huge emphasis must be placed on the importance of front sight installation. Using the correct height front sight is critical, but how do we know what the correct height is? Let’s begin with the old front sight that will need to be removed from its dovetail, usually drifted out to the right using a brass punch or a sight pusher tool. (A great product is the Wyoming Sight Drifter.) A brass punch will help minimize marring, or a steel punch can be used that is shaped to correspond with the profile of the side of the sight. A protective barrier between the punch and the sight will offer additional protection. While the new front sight can be installed and the gun test-fired to determine the correct height, this can require removal and reinstallation multiple times, and can result in the dovetail slot becoming loose and the sight marred, plus it is time-consuming. There is a better way. X-S Sights offers a highly useful plastic Test Post that measures .700 inch tall and can be pushed into the dovetail slot using just the fingers.

A brass punch is suggested to remove and reinstall dovetail-mounted sights.
The rifle can now be test fired using this temporary front sight or Test Post. Due to its tall measurement, groups will almost always be hitting low. At this point, cut down the top of the Test Post to shorter lengths (in small increments) until the point of impact is brought to dead center. It is suggested to take special note of the windage position of the temporary sight when the rifle is hitting dead center, which should be duplicated when installing the permanent front sight.
A brass punch is suggested to remove and reinstall dovetail-mounted sights.
At this point, remove the Test Post, or temporary front sight, and measure its total height using calipers or a micrometer. This measurement should be used to select the height of the new permanent front sight or to shorten the front sight that is going to be used. Sight manufacturers, such as Skinner, offer sights in .025-inch height increments for that perfect match. However, blade sights can be shortened with appropriate stones, files, etc., to achieve an exact fit. Once we have the permanent front sight with the correct height, it is now ready to be installed into the dovetail slot. As indicated, if the sight height is correct and is installed with the same windage position as the temporary sight, groups should be hitting dead center, and the rifle is sighted in. However, groups should be fired to confirm that the point of impact is perfect.
For rifles that have a front sight that is mounted to the barrel with screws, there are replacement sights available with different heights. Some will have a sight base with the actual sight that is dovetail mounted and can be easily changed.
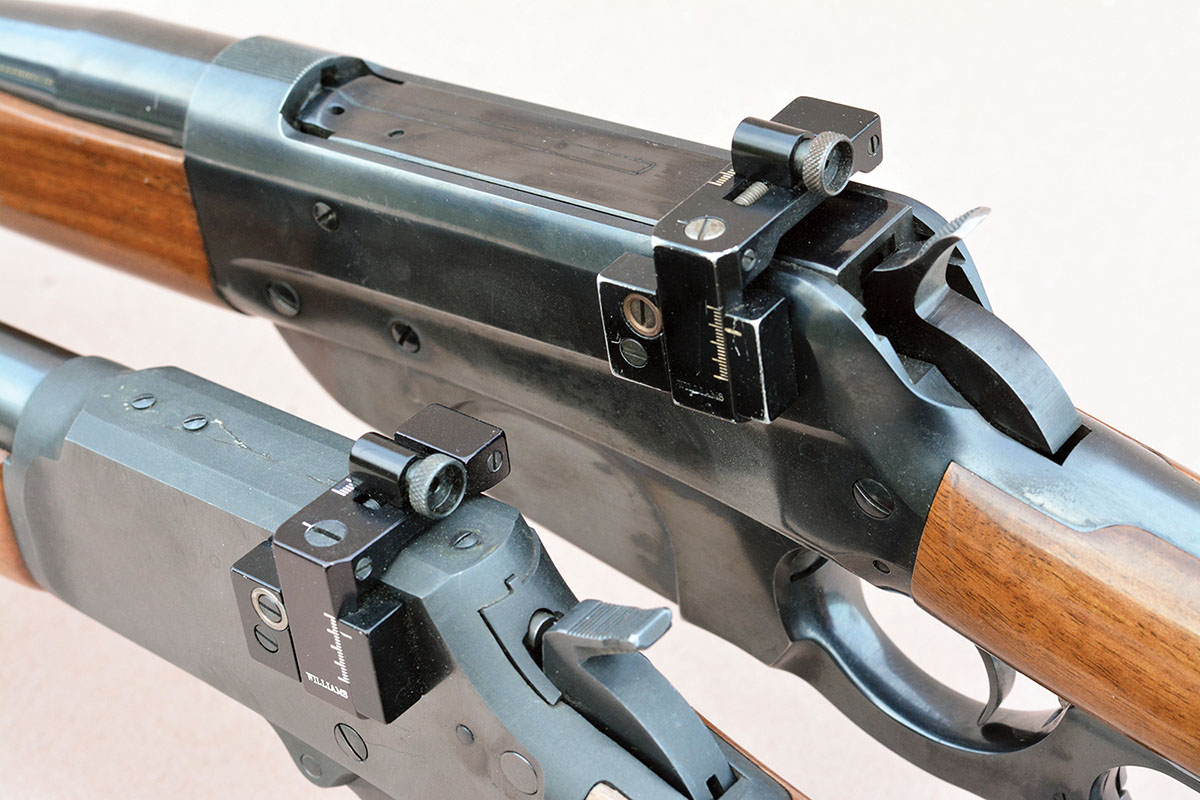
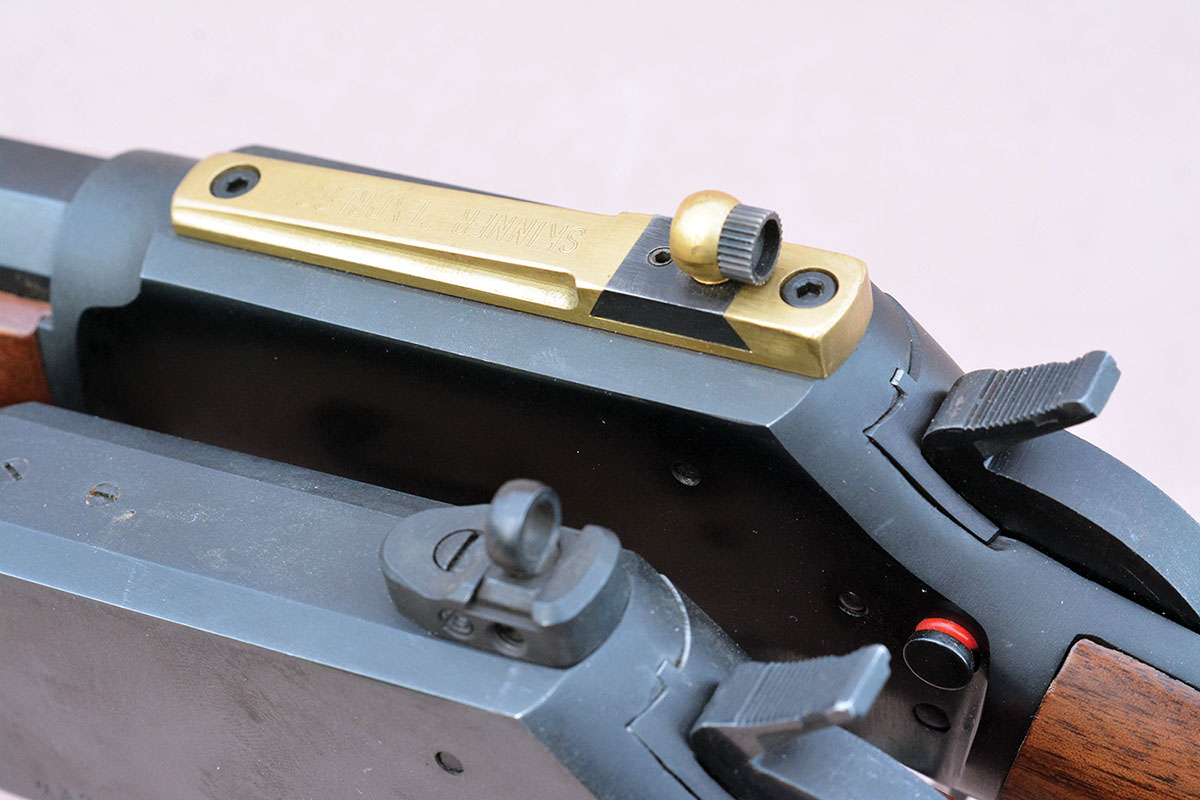
Williams Foolproof is a popular receiver mounted aperture sight that is adjustable for windage and elevation.
One reason the front sight height and windage position are so important is that they allow the rear sight to retain proper windage and elevation adjustments. This allows the rifle to be zeroed with any reasonable load and at all normal distances. In other words, loads can virtually always be brought to the point of aim without having to change the front sight.
Williams Foolproof is a popular receiver mounted aperture sight that is adjustable for windage and elevation.
But there are other reasons to
focus on the front sight to sight in. Some rifles are a little off with the barrel pointing to one side or the other in relation to the receiver, or the front dovetail is cut slightly off, etc. In these situations, the rear sight cannot be centered on top of the receiver, and the front sight centered with the barrel and the gun sighted in. If that is how the sights are installed, generally, the rear sight is adjusted until the gun sights in. The problem with this approach is that virtually all of the rear sight windage adjustment is used up, which brings up another issue. When the rifle is brought to the shoulder, instead of the rear sight naturally aligning with the eye, often the shooter will have to take an extra moment to align the eye with the aligned rear sight. For those two reasons, it is especially preferable to adjust the front sight to compensate for rifles that are a little off. In this way, the rear sight is better centered with the top of the receiver and will naturally align with the shooter’s eye, and so will the front sight. The rear sight still retains full adjustment. Front sights mounted in the dovetail slot (rather than one-piece screw mounted versions) can be bumped hard in the field, causing the rifle to lose zero. While the dovetail slots can be tightened up, it’s not a bad idea to use a heat-sensitive thread locker to further secure the sight. In this way, the sight will stay put, but can still be removed (or adjusted) by applying heat to the thread locker. For what it is worth, I often put a nearly invisible witness mark on the sight and barrel as a quick reference to be certain that the rifle remains zeroed in the field during hard use.
Aperture sights are timeless and practical, as they aid with accurate shooting, are lightweight and modestly priced. Properly installed, they become an integral part of the rifle and the shooter.