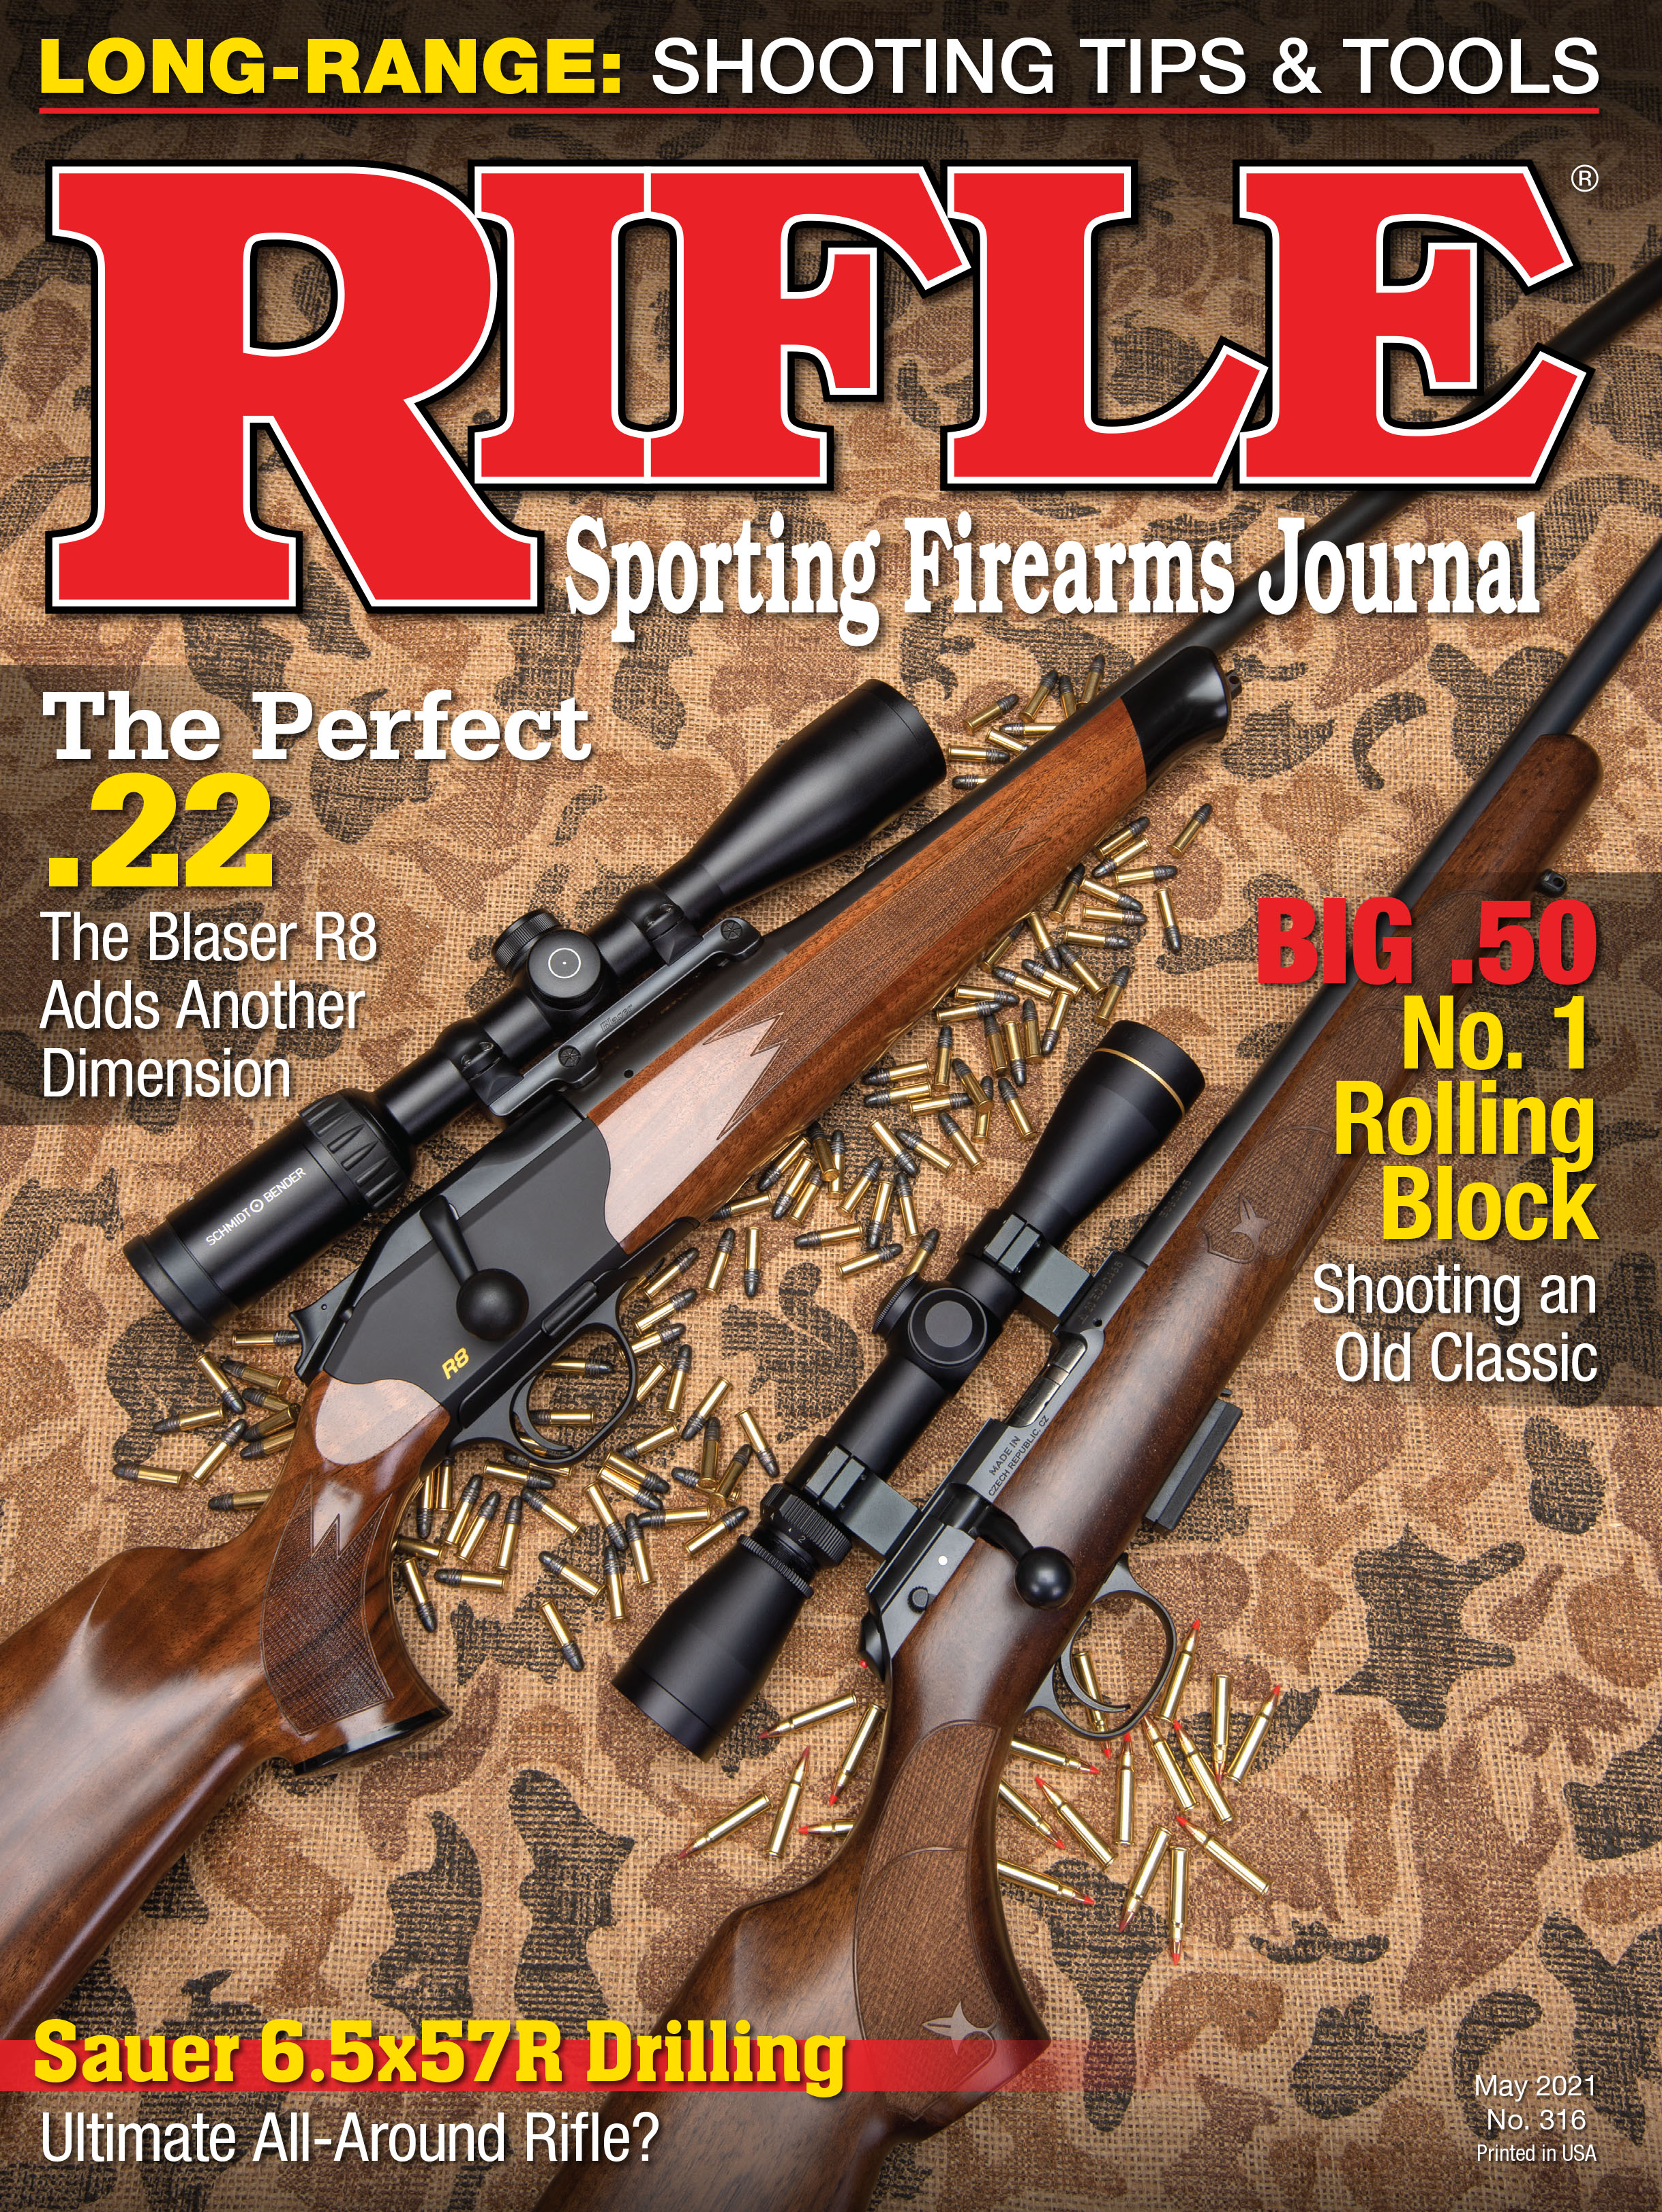
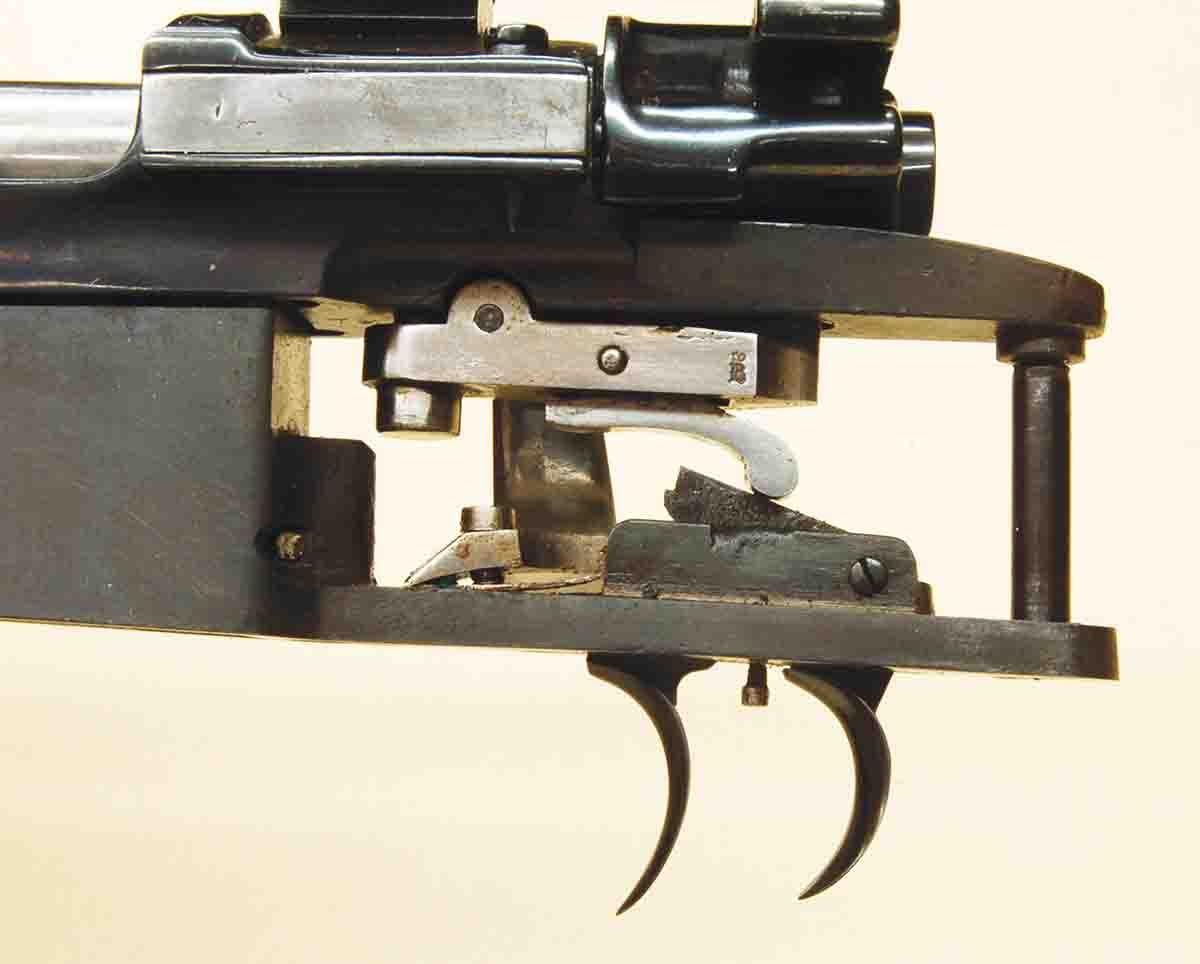
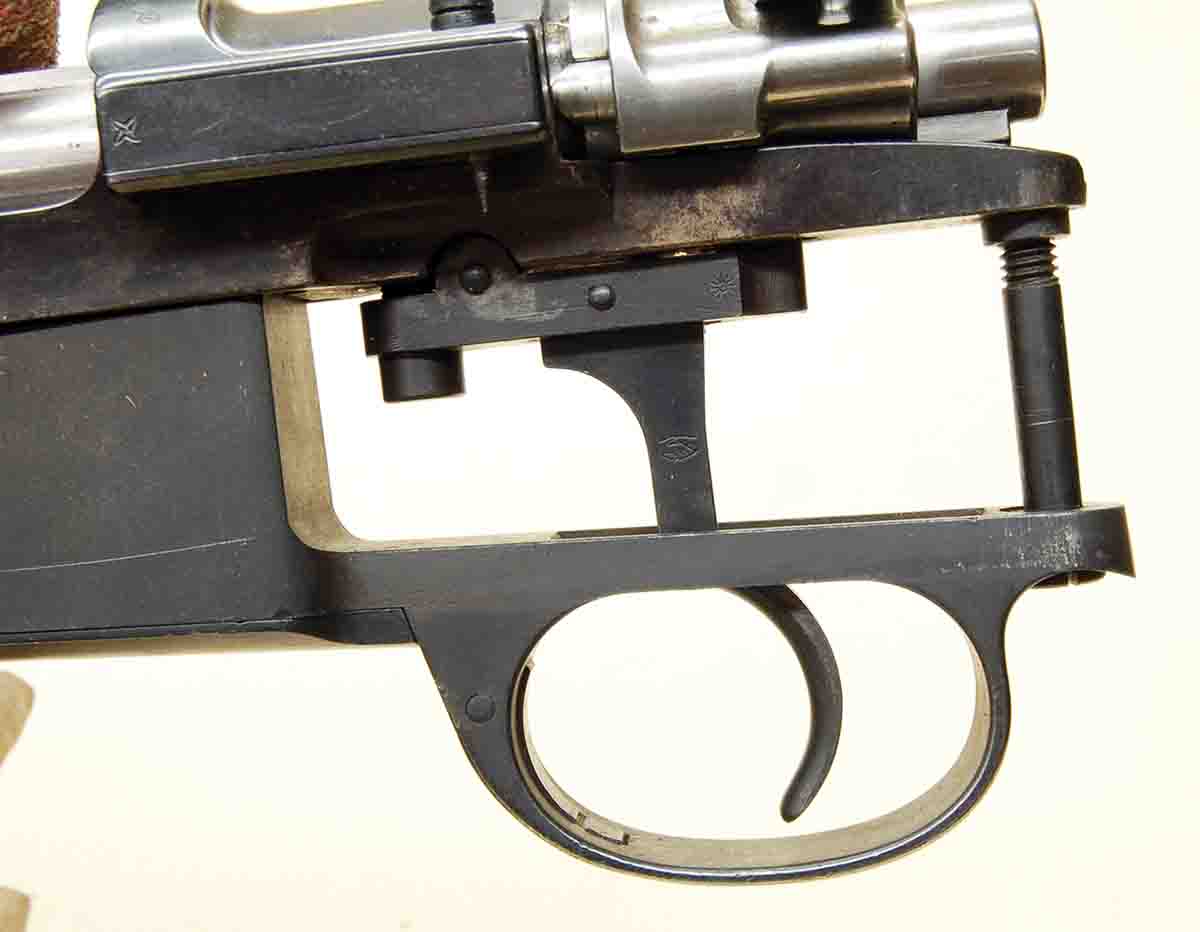
The small screw protruding down between the triggers adjusts the pull of the front (set) trigger.
Most shooters think that the lighter the trigger pull, the smaller the groups their rifles will produce. Old ideas die hard, and this one started with the flintlock! At that time, and through the percussion and early cartridge era, reliable ignition required a hard slap from a heavy hammer driven by a big, horse-killin’ mainspring. To hold the hammer back while the trigger was pulled required a fairly large sear area to prevent the thin case-hardened surface from wearing through too quickly. Heavy trigger pulls were the result, which made firing when the sights were on target difficult to impossible.
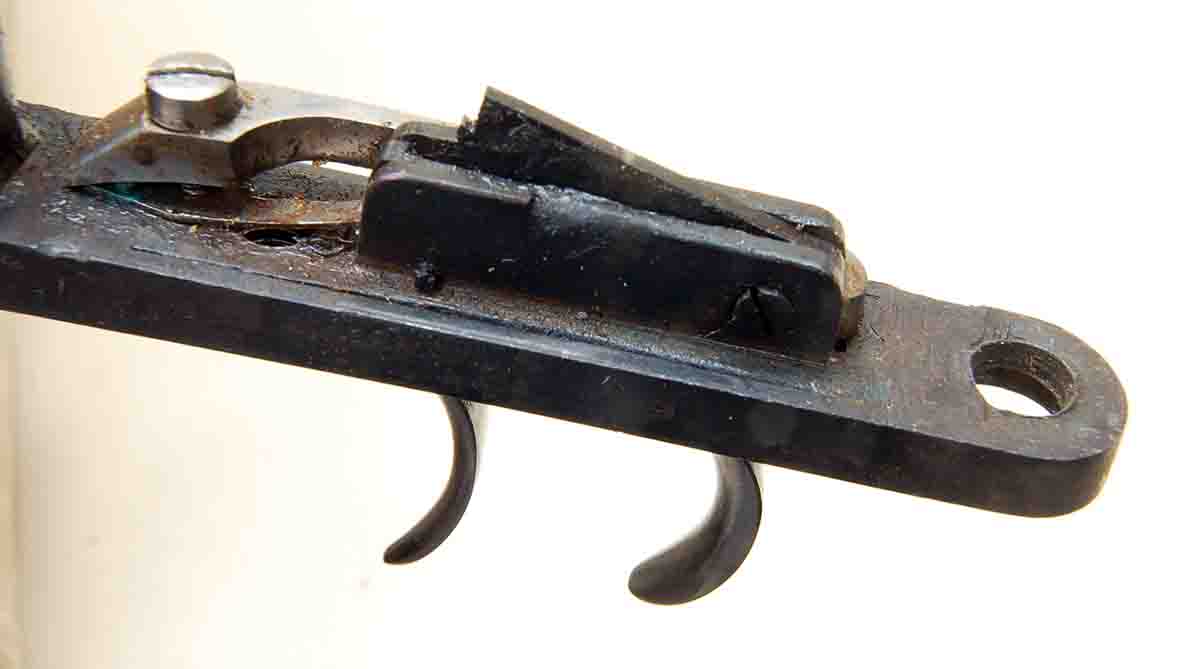
The trigger bow was milled off and the set trigger (rectangular off-color insert) was added, which required the shotgun guard.
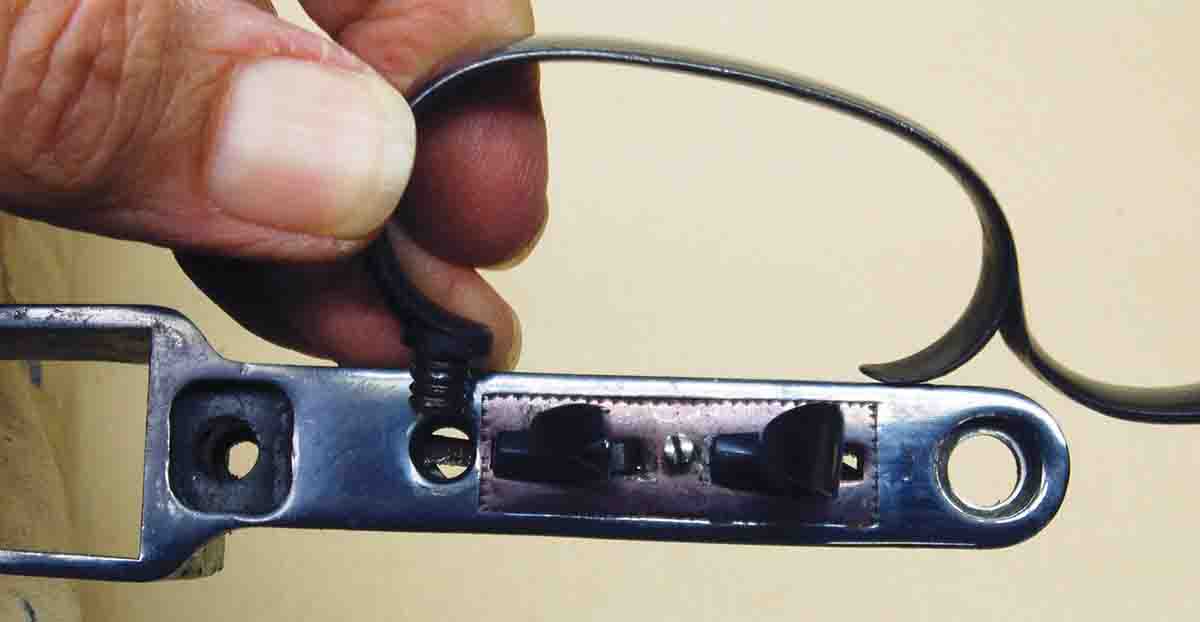
A dirt and rust-coated set trigger mechanism of a recently disassembled rifle.
Riflefolk, being a very ingenious lot, solved this problem as best they could by first adding weight to the rifle barrel – a lot of weight. Ten- to 12-pound muzzleloaders are common. This steadied the heavy trigger pull and dampened the jolt of the heavy hammer. Next came set triggers.
In reality, however, the set trigger is a hoax! It does nothing to deal with the long, heavy hammer release or its impact. Then what does it do? Well, first it eliminates direct contact of the trigger and hammer. A separate sear (with reset spring) was then pinned in place to hold the hammer in the cocked position. A new means now had to be found to push the sear out of its notch in the hammer and fire the gun. To do this a separate lock mechanism was created.
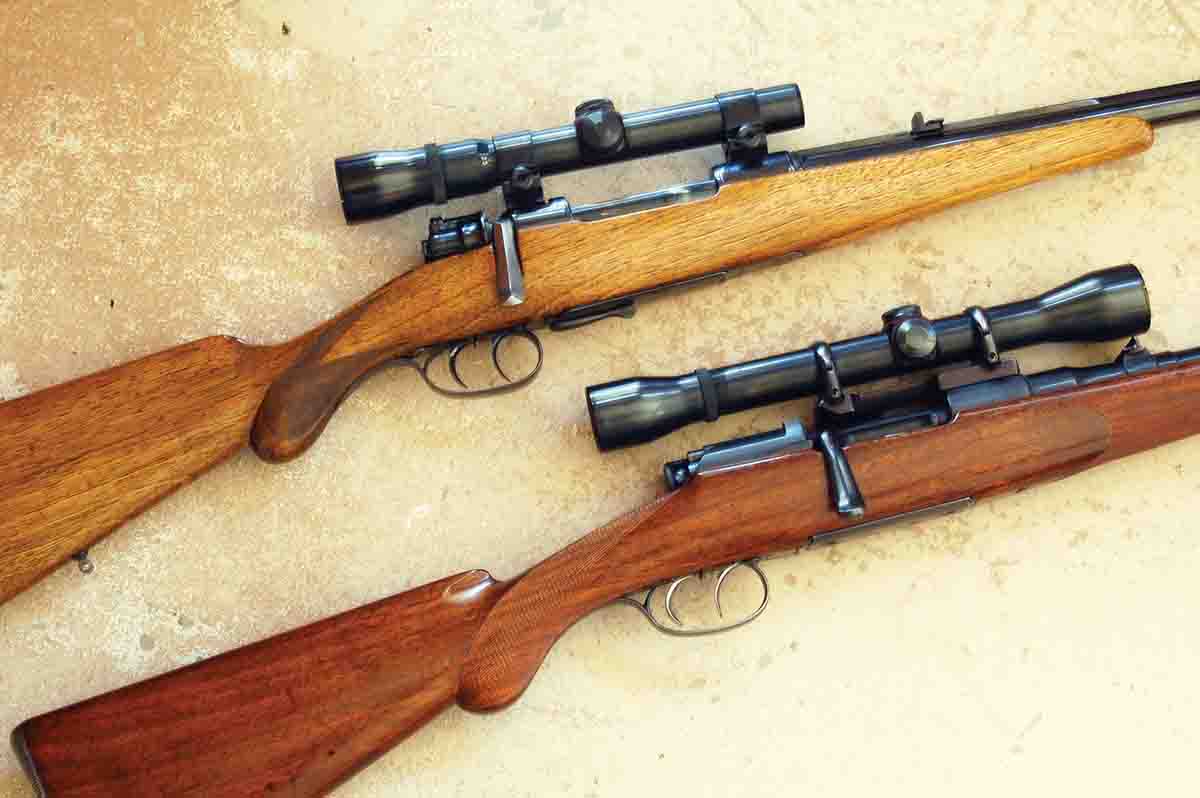
The most common cartridge rifles seen today with double-set triggers are the Mauser M98 (top) and the Mannlicher-Schönauer (bottom).
Design of this secondary lock is quite ingenious. The vast majority of them are what is called a double-set or one-lever set trigger. The opening of the trigger guard is elongated and another “trigger” is added, making it look like a double trigger on a shotgun. Shotgun trigger guards are often used as well. In reality, the rear “trigger” is the hammer of the lock and has an arm that reaches forward to engage a sear surface on the front, or firing trigger. Pulling back on the rear trigger (which is under heavy spring pressure) cocks the set mechanism. For this reason, the rear trigger is deeply curved to prevent the finger from slipping off, which would fire the rifle, just as would the thumb slipping off the hammer before bringing it to full cock.
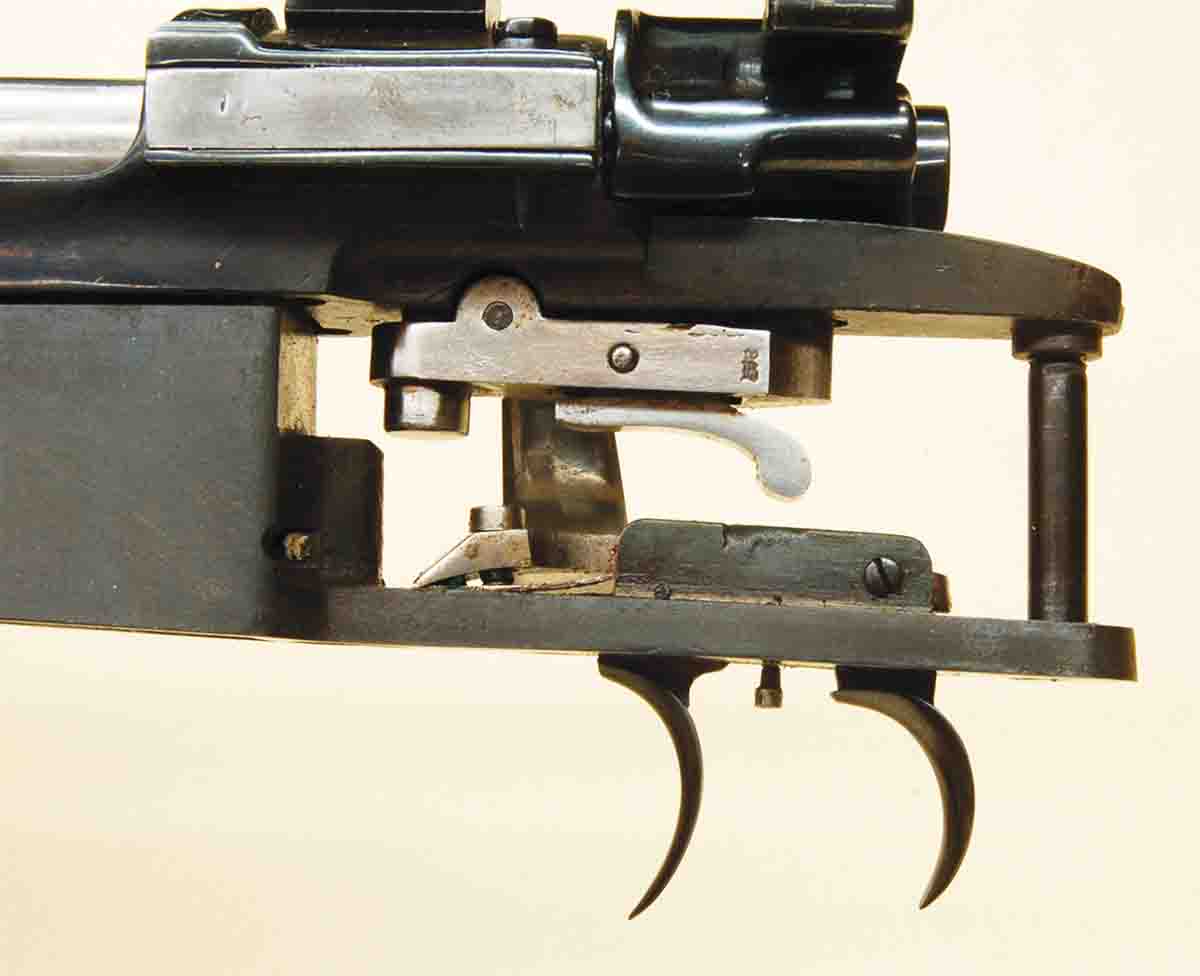
When the mechanism is set, the arm of the rear trigger is down inside the trigger box.
Pulling the front trigger releases the arm of the cocking trigger, which flies up, striking the sear release of the action.
It should also be mentioned that the main lock is always cocked first and the set trigger cocked just before firing only. Reversing the procedure could allow the rifle to fire before the firing hand is in position on the stock, a very undesirable occurrence!
With the trigger mechanism cocked (set), very light pressure on the front trigger releases the arm of the rear trigger, which flies upward striking the sear of the main lock, knocking it out of contact with the main lock’s hammer and firing the rifle. Thus the set trigger has done nothing to alter the main lock’s hammer/sear engagement and nothing to lessen the jolt of the hammer during ignition. In fact, it adds a tremor when the main lock sear is knocked out of engagement. Lock time is also lengthened due to the extra moving parts. The best that can be said is that the beginning of the ignition process is more uniform.
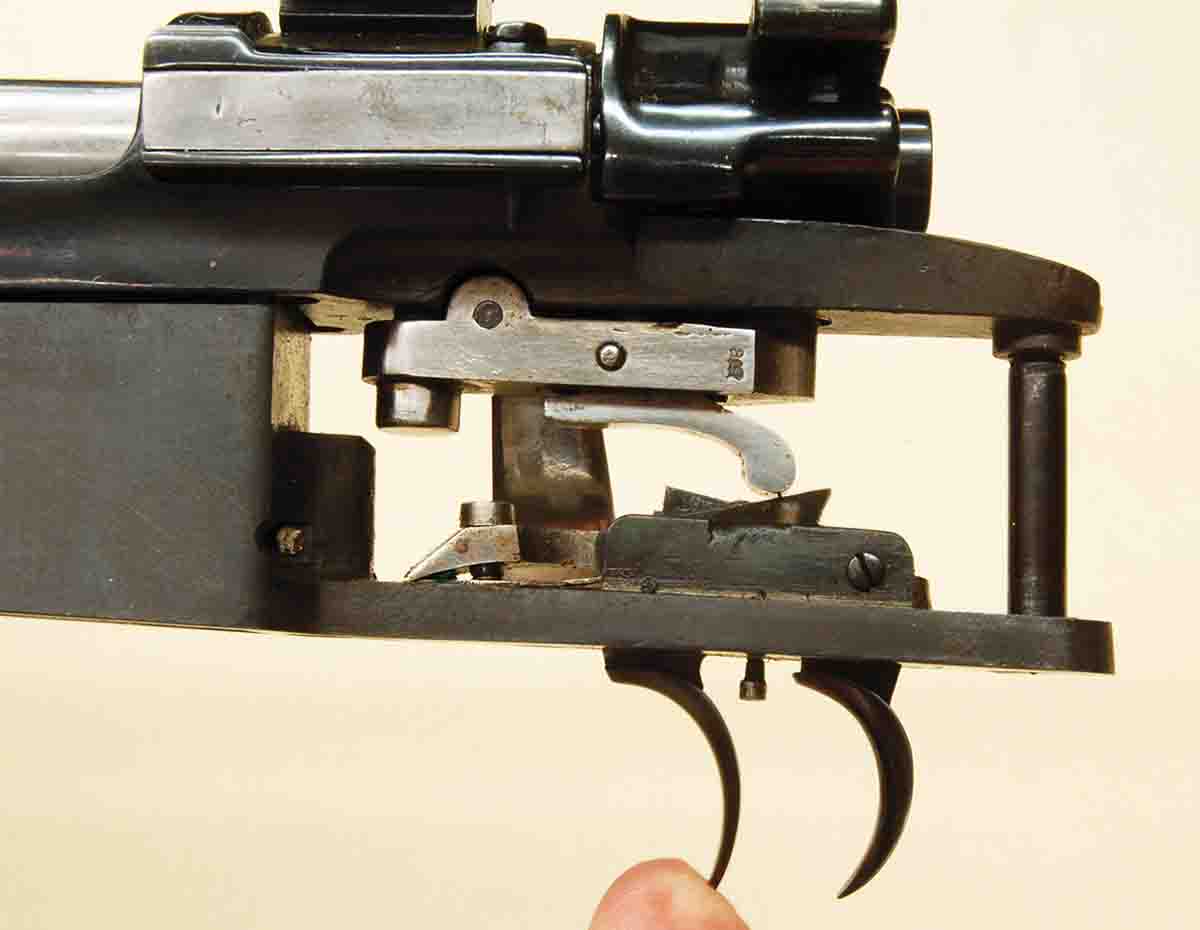
If the mechanism is not set, the front trigger will fire the rifle, but only after a long, two-stage pull.
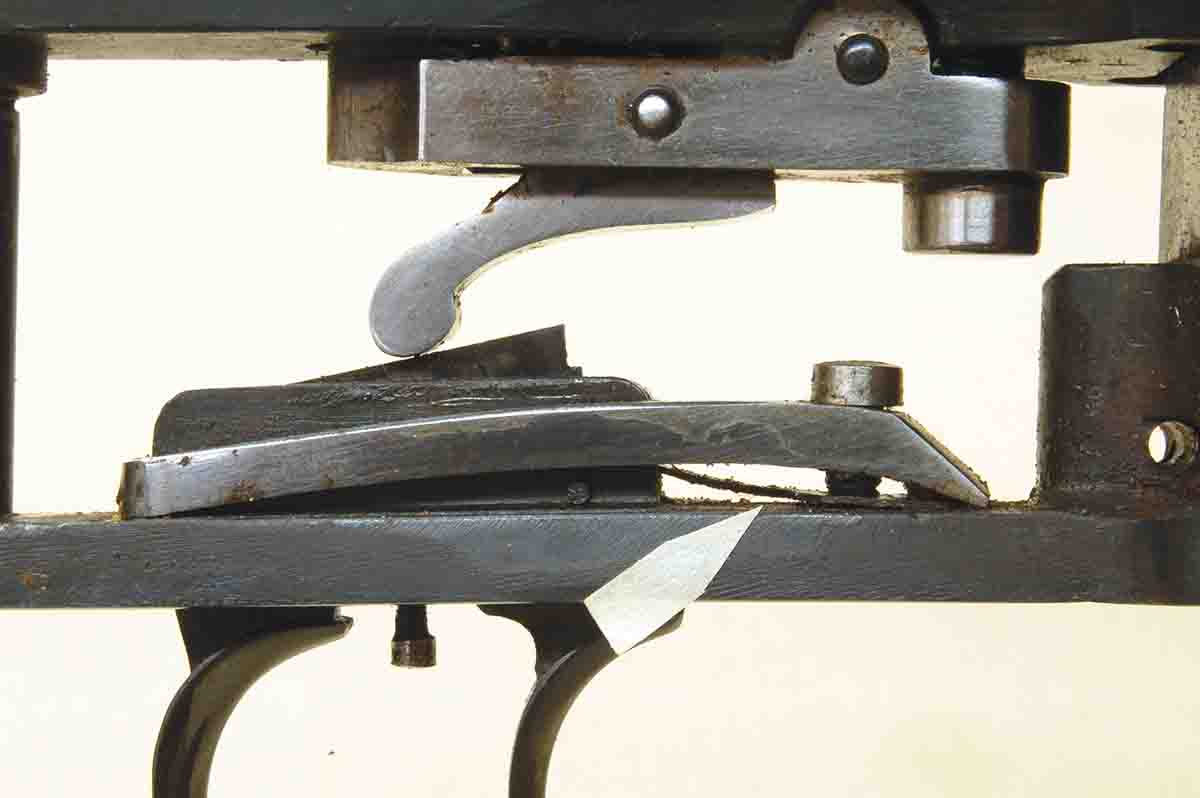
The space under the large flat spring (arrow) allows increasing pressure on the rear trigger.
Now that a set trigger is better understood, we can move on to repairing set triggers – a small percentage of which may actually need repair, despite what their owners say. And, yes, the photos are not of single-shot match rifles, but rather the two most common rifles seen today carrying set triggers, an early Mauser M98 and a Mannlicher-Schönauer. They are used because parts are easily seen and photographed. Do not despair – all one-lever set triggers function exactly alike.
The most common malfunction is failure to set. This usually causes the owner to start adjusting tiny screws or attempting to drive out tiny pins. All set triggers are hand fit to some degree, and pounding the thing apart could guarantee it never works again. Chances are it’s just dirty. The box in which the two triggers are pinned is open at the top. Unburned powder granules can fall in and oil placed on the parts hardens over time.
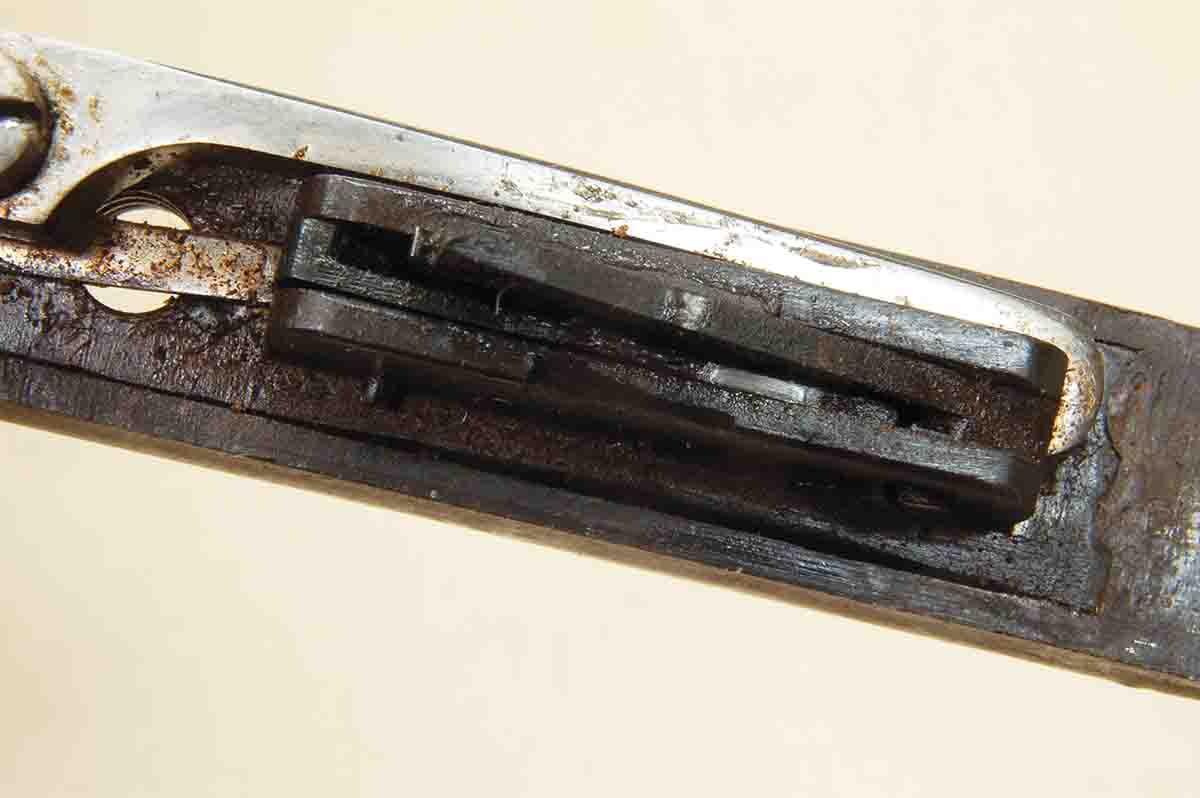
Looking into the top of a set trigger box shows debris that has accumulated, causing failure to set.
Back out the adjustment screw, located in the trigger guard between the triggers, about three turns. Don’t let it fall out! Try to set the mechanism again. As the setting trigger reaches its full rearward position, the front trigger should move back just enough to see, then snap forward about twice as far with an audible “click.” (Note: the action must not be cocked at this time.) If the mechanism still won’t set, release the rear trigger and pull back gently on the front trigger. It should pivot back to nearly touch the rear trigger. This happens because many rifles are intended for hunting, meaning there may be no time or need for setting the trigger. Pulling the front trigger allows its rear surface to reach up and push the main sear out of engagement, but the pull feels like that of a two-stage military trigger.
If the foregoing shows sticky movement of the front or rear triggers or failure to set, the problem is either damaged contact surfaces on the triggers or dried oil and dirt. However, of the hundreds of rifles I have seen over the years having one-lever set triggers, only a couple dozen have been brought in because the triggers failed to work. In all but two instances, I can remember the problem was improper adjustment or dried oil and/or powder fouling in the trigger box.
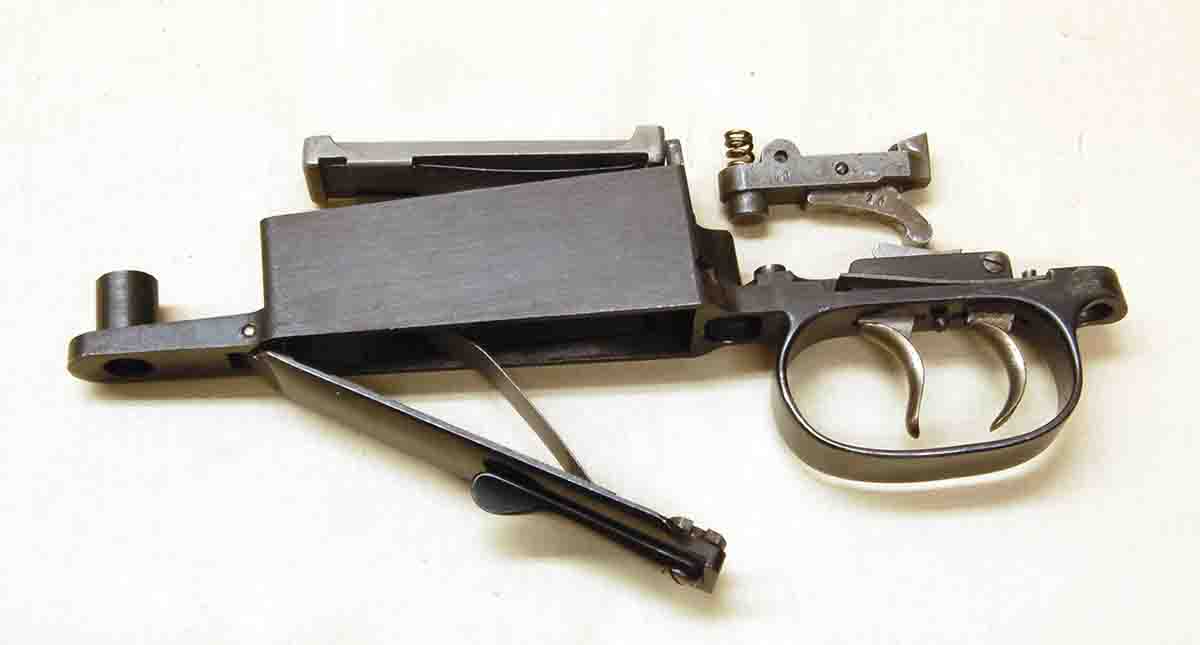
Fifty years ago, the bottom metal containing the set trigger was available as a drop-in accessory.
Cleaning is easy. Remove the bottom metal (bolt gun) or trigger plate/lower tang (single shot) and suspend it on a wire over a metal pan. Spray liberally with a degreaser intended for firearms. Brake and carburetor cleaners are not a good idea because some contain acids that could ruin the thin firing trigger return spring. Cleaning may take a few days, but parts must work freely and produce an audible “click” when the trigger sets. Compressed air may be helpful. For what it is worth, I never lube the triggers after cleaning.
Of the other two cases, one required replacing parts of the action sear assembly because someone had been “working” on them, leaving a pull weight greater than the set trigger could overcome. The other instance was an owner who wanted the firing trigger to release at an ounce or less. This is impossible for a one-lever set trigger. Cleaned and working perfectly (in my experience at least), eight ounces or a bit less is usually obtainable, which is less than 99.9 percent of shooters can control. With the adjusting screw between the triggers backed out, set the trigger mechanism and measure pull. Turn the screw in a half turn at a time and watch release weight decrease. One pound is a good place to stop turning. It’s as easy as that.
The Mauser M98 with a military trigger is simple compared to the set mechanism.
All this shows that the stories of triggers being “adjusted” to release at “nothing” and requiring fingertips to be sanded until they “bleed a little” are just that – stories; sort of like stories about killing big-game animals at 600 yards before the era of digital range finders. There could, however, be a grain of truth here because prior to World War II, most people worked with their hands to make a living. Hands could be calloused, fingers desensitized from cuts and heavy pressure. Sanding a fingertip may then have allowed it to feel contact with a trigger that released at 8 to 10 ounces.
Next time, we will look at multi- lever set triggers and a more modern idea that uses only one trigger.