Light Gunsmithing
Smoothing Bolt-Action Operation
column By: Gil Sengel | September, 18
Krags get their easy functioning from the case hardening applied to both receiver and breech bolt. This heat treatment yields a glass-hard surface that is nearly free of friction. Model 70s are not case hardened but are made from alloy steel that through-hardens to 45-50 on the Rockwell C hardness scale. The surface is not as hard as case hardening, but the strength of this steel is far greater than that of the Krag. Pre-WWII handwork gives the early M70s their smooth operation.
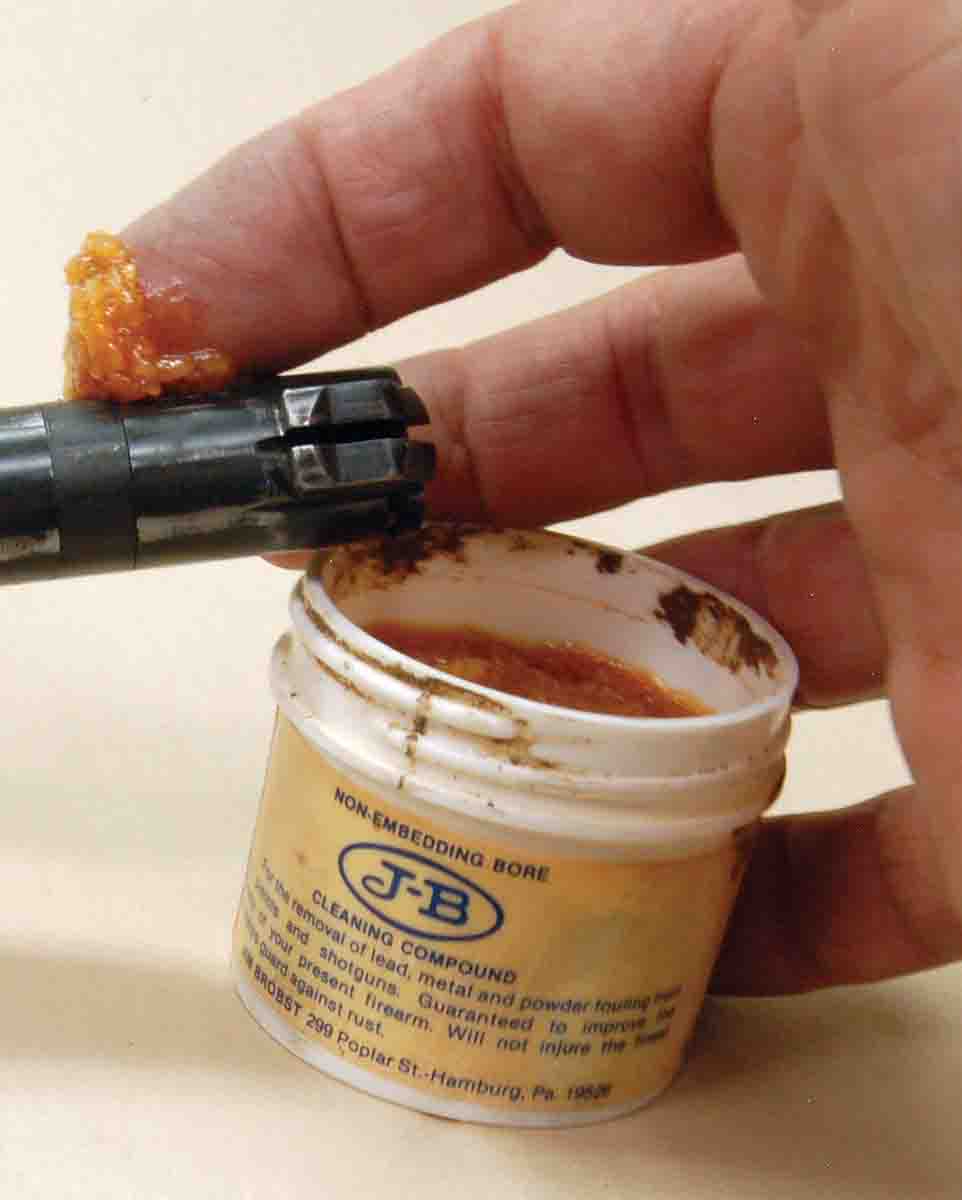
Such attention is not given to today’s factory actions, yet any interested gun tinkerer can achieve very near pre-WWII results by the use of J-B Bore Cleaning Compound. First, it’s necessary to remove the rifle’s stock, then the striker assembly from the bolt, and finally all parts from the receiver. This prevents getting abrasive into places it does not belong.
Now coat the bolt body lightly with J-B, a very fine abrasive. Insert the bolt in the receiver and work it through about 200 cycles. Remove the bolt, wipe off all the J-B possible on both the bolt and inside the action, lightly recoat with J-B and repeat. Doing this 15 to 20 times will noticeably smooth-out the back-and-forth movement of the bolt with no danger of altering headspace as could happen if a coarser abrasive was used. Wash all parts with mineral spirits to remove every trace of the J-B paste.
Making the bolt slide smoothly in the receiver does not, however, make the action function easier. It does nothing to make the bolt cock easier or properly eject fired cases. Both are vitally important when attempting to make follow-up shots with the rifle shouldered as it should be.
To chamber a second round more easily after firing the initial shot, it is first necessary to raise the bolt handle. As the handle comes up, the nose of the cocking piece rides up the angled cocking surface at the rear of the bolt body under full mainspring pressure. These two surfaces must be hard and should be lubricated. Obviously, if the bolt is of a design that lifts less than the normal 90 degrees to reset the firing pin assembly, it will require more force to do so. The same is true if the handle is a bit shorter than normal, as on some ultralightweight actions.
There is little that can be done to modern actions as all are made of modern steels that allow “spot hardening” at this wear point. Not quite as hard as case hardening, the best that can be done is to lightly oil these surfaces, hold the trigger back, then raise and lower the bolt handle a few hundred times to wear-in the surface. Or a small dab of J-B can be used – make certain to get it all off when finished.
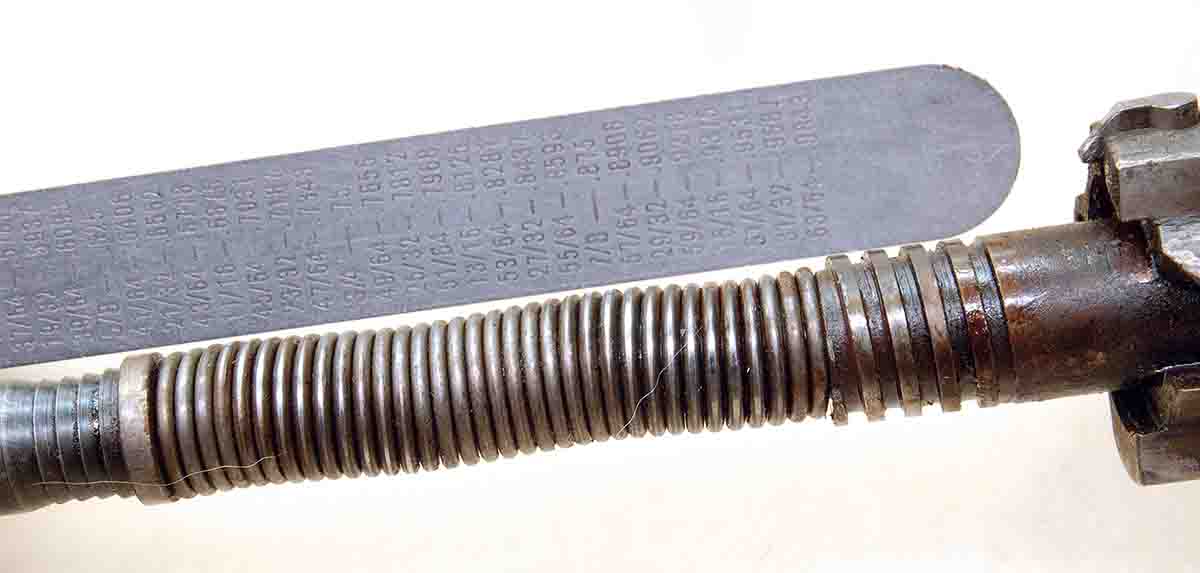
There is yet another possible problem before the bolt handle is fully raised, and it seems to occur more often in newly made sporting actions than military actions. This is dragging of the mainspring on the inside of the bolt body because a coil spring will not compress in a straight line without support. Such support usually comes from a spring “strut,” a solid piece of steel very near the inside diameter of the spring. When pressure is put on the spring, the strut moves through a hole somewhere, allowing the spring to continue to compress. In a bolt-action rifle the firing pin acts as a mainspring strut.
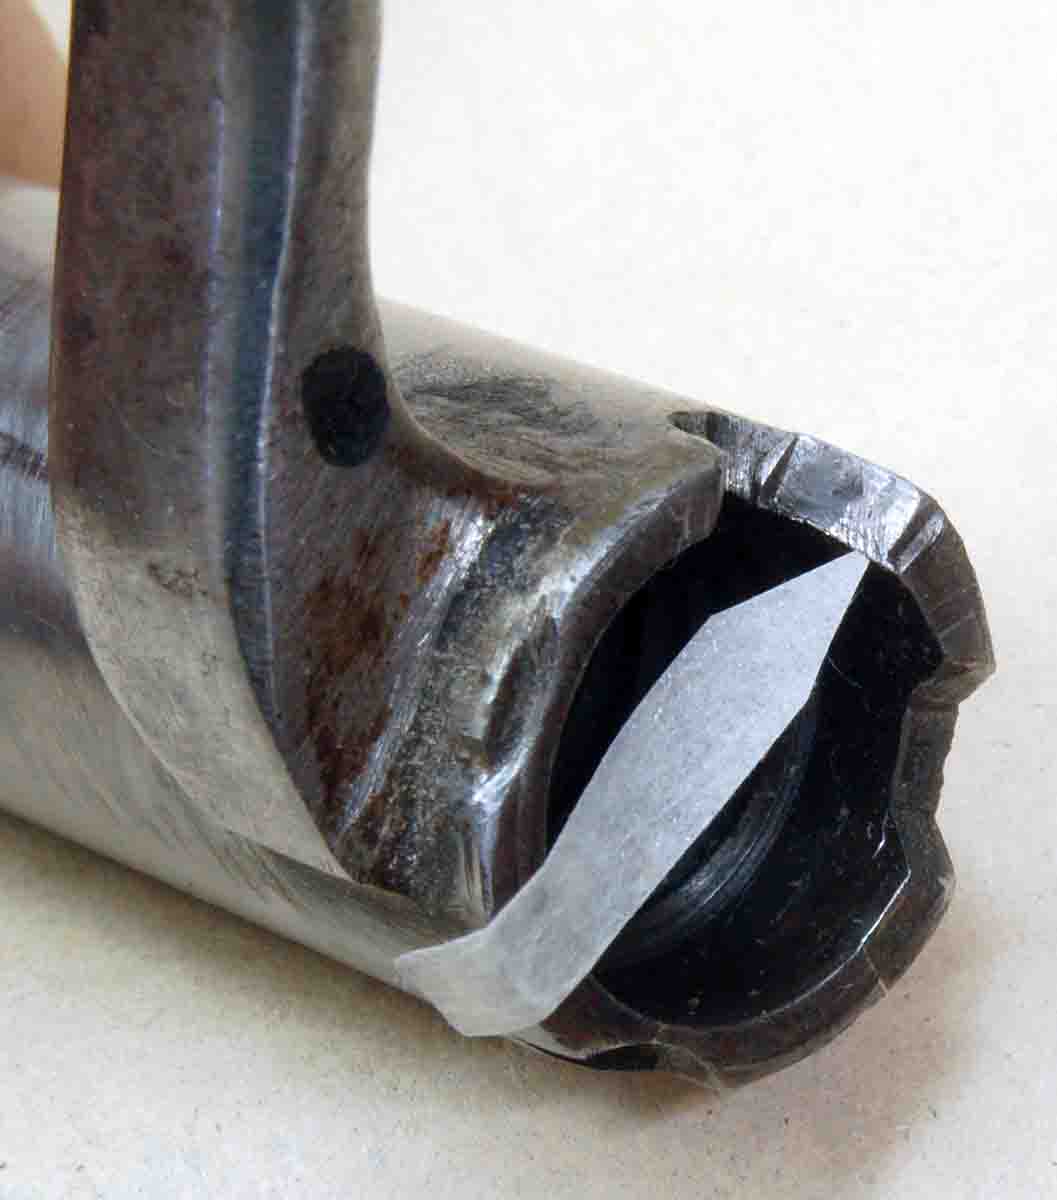
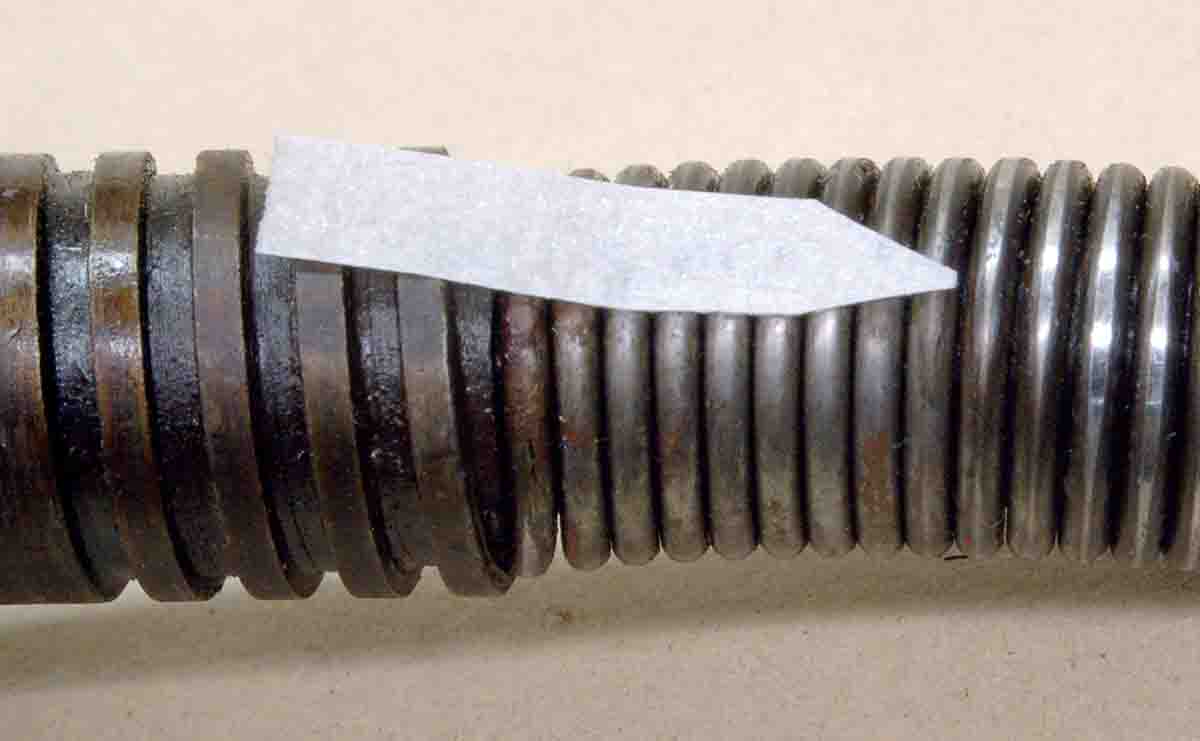
Of course, the firing pin will not be exactly the diameter of the inside of the coil spring, and mainsprings are rather heavily compressed, even in the “fired” position. A bulging of the spring away from the firing pin will occur at uniform points along its length. If the hole in the bolt body is not large enough to accommodate these bulges, they will rub against the bolt. If the hole is not mirror smooth, harder than necessary bolt lift will occur and the firing pin will be restricted when released.
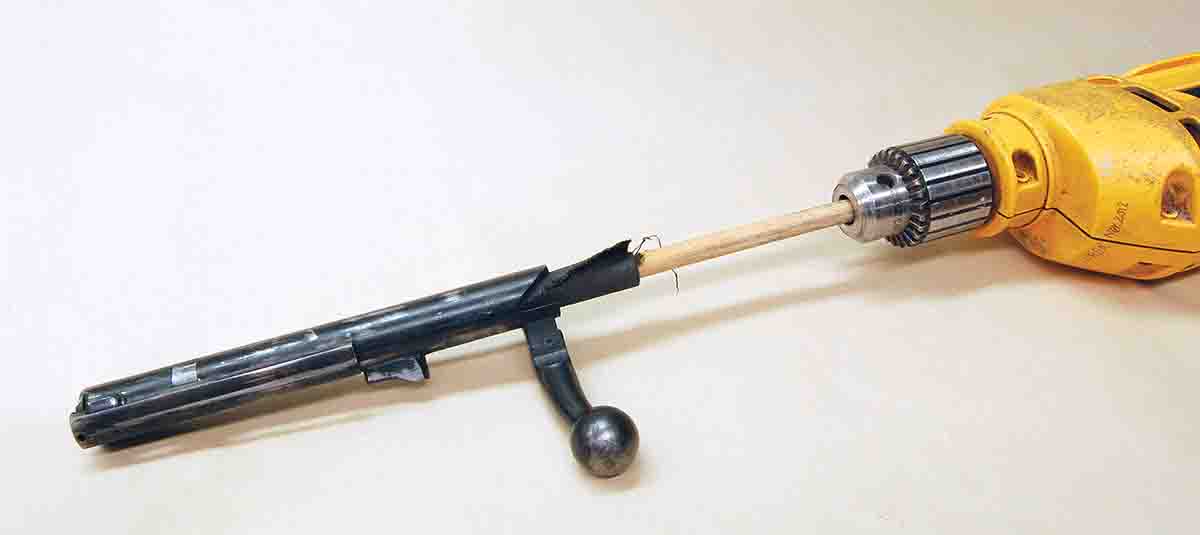
Why wasn’t the hole simply made a few thousandths of an inch wider and the whole thing prevented? Good question. There is nothing we can do here, but if the sides of the hole are rough we can fix that. It’s not possible to see the roughness without a borescope, but it can be felt by pushing in the firing pin assembly and feeling the resistance. A length of 600-grit abrasive cloth wrapped around a wood dowel until it is tight in the bolt hole (be sure to begin polishing forward of the threads for the bolt sleeve) and turned by a variable speed electric drill will quickly smooth things up. Remove polishing residue, then lube lightly.
With the bolt handle fully raised it would appear that all possible work has been done, but there is still one major fault to deal with. It involves bolt actions with plunger ejectors. Yes, I know they sometimes stick in their little holes and fail to come out. This is not good, yet the concern here is when they are working perfectly – or at least as they are designed to work.
Powered by an extremely strong spring, the plunger ejector drives a loaded round (and then the fired case) against the right-hand side of the chamber. As the extractor pulls the case out of the chamber, it is driven against the right receiver wall and into the right bolt lug raceway because the case is being ejected low to avoid striking the scope. Any burrs or sharp edges left from machining the bolt lug recess or end of the lug raceway will now scrape against the case as it moves rearward. It seems that if the case is similar in length and forward diameter to the .270 Winchester, it can experience great resistance to rearward movement and even wedge in the lug raceway, stopping bolt travel completely.
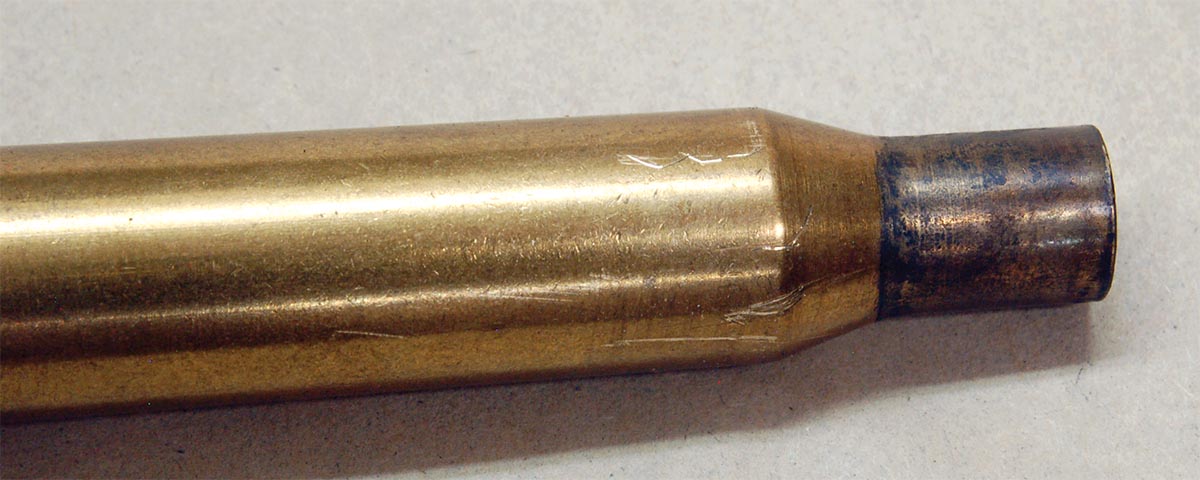
While it is tempting to say this condition is rare, a little time spent on a public rifle range watching shooters ejecting fired rounds from rifles with a plunger ejector will show that is hardly the case! How can anyone expect to get more than one shot at a game animal if it’s necessary to remove the rifle from the shoulder and fight to get the fired case out? It is necessary to use small files to get into the lug raceway, slowly removing the sharp edges then chambering and ejecting fired cases to check progress.